tips for nailing a flatlay
It takes a lot of work to arrange objects in an eye-pleasing manner. Thankfully, we have some top tips for snapping the perfect flatlay.
Ah, the flatlay. Easy on the eyes, much less breezy to create. As anyone who has ever shot one will know, the flatlay is the ‘no-makeup makeup look’ of photography: it takes a hell of a lot of work to make something look effortless. The good news is that nailing the flatlay is totally possible, whether you’re equipped with a smartphone or DSLR. To help you out, we gathered some simple tips for creating an artfully arranged snap.
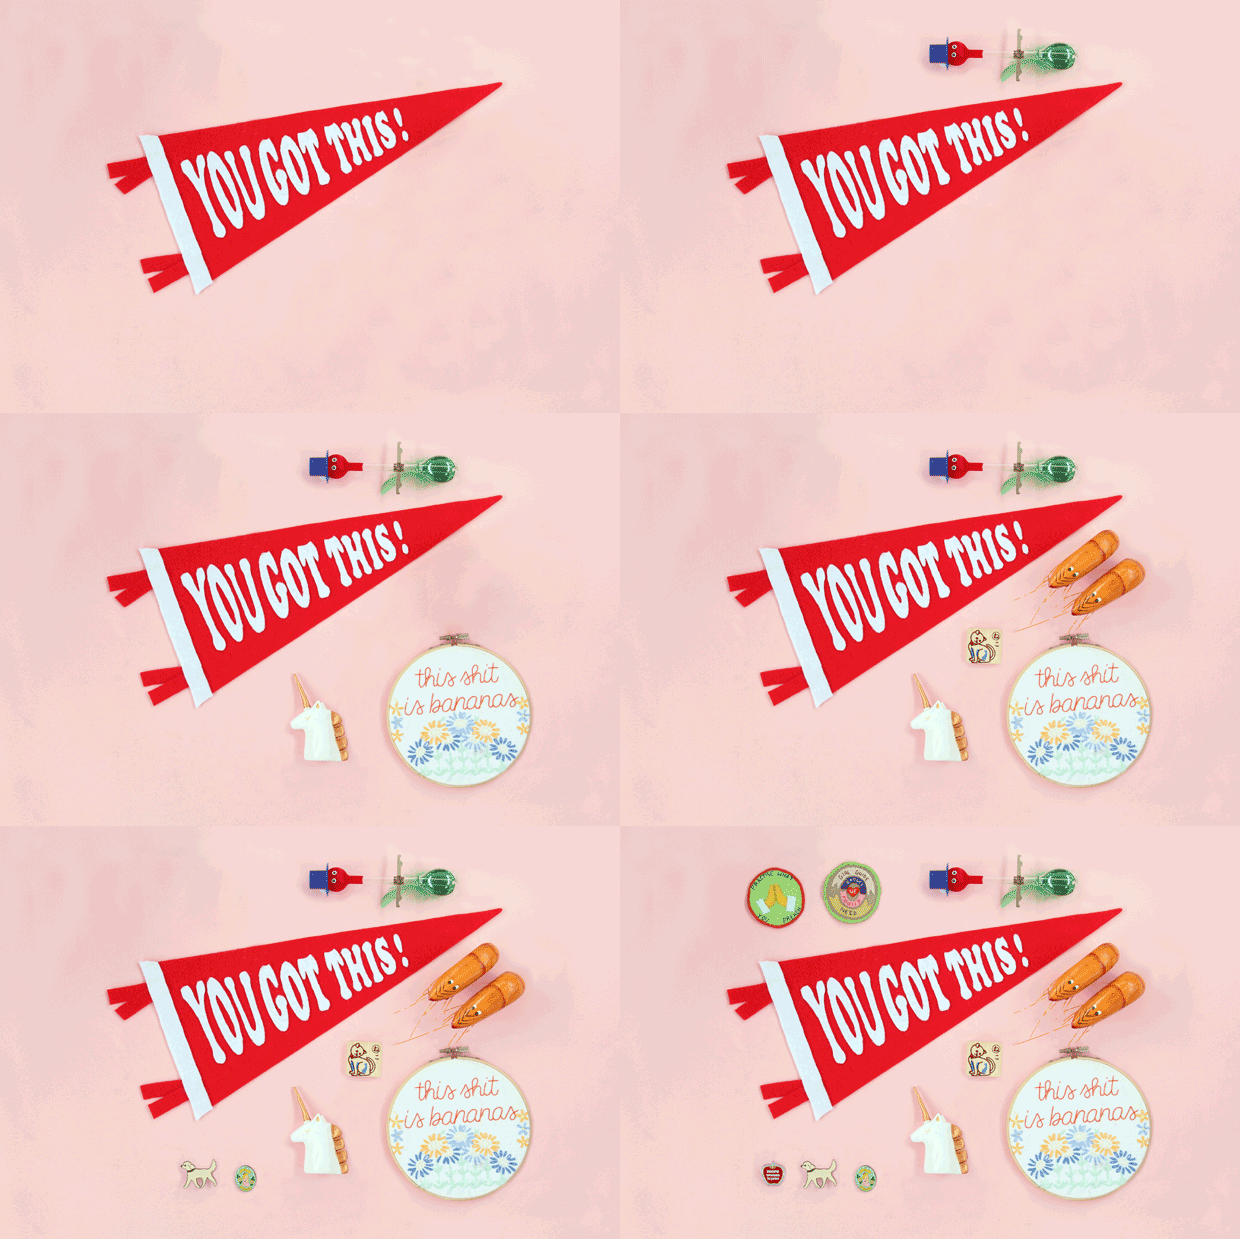
BACKGROUND Keep it super-simple here. Pick one colour or texture to let your products shine.
THEME Select your objects around a theme of some sort. This could be based on colour, season, location, brand – the choice is yours! It’s also more visually exciting to see objects in a variety of shapes and sizes, so keep this in mind when choosing what to photograph.
SHOOTING ON YOUR PHONE A good way to make sure you are shooting from directly above is to turn on the grid function on your camera, then place a straight object in the frame – if it lines up with your grid, you're good to go.
SHADOWS Your lighting should ideally be bright enough so that there aren’t many shadows visible. If there are, make sure you look at which way the shadow is pointing. Shadows look odd if they are above the objects – it’s generally more pleasing if they come from the bottom left or right corners.
BOUNDARIES When laying out your items, make sure the final objects form a nice shape, whether that’s a square, rectangle, circle or even triangle, if you’re getting creating. This makes the flat lay feel clean and created with intention. It also helps the eye stay focused on your objects. Don’t forget to leave space in your frame if you plan on overlaying text on the image later.
DETAILS Try to keep the space between each object uniform. This helps keep the visuals clean. Objects might also need to be moved just a millimetre to look better in the frame – don’t be afraid to be a perfectionist with this. If you aren’t sure, just keep trying different set-ups until it feels right. Nailing the placement is sometimes just a matter of trial and error.





.jpg&q=80&w=316&c=1&s=1)


.jpg&q=80&w=316&c=1&s=1)


