
get fancy: frankie pattern nail art
Painting pretty things on your fingers is a fun way to spend your time, not to mention add a bit of pizzazz to your get-up.
Painting pretty things on your fingers is a fun way to spend your time, not to mention add a bit of pizzazz to your get-up. With the help of nail art aficionado Chelsea Bagan, we've come up with something special for your digits, inspired by the oh-so lovely frankie gift wrap book patterns. All you need is a teeny brush, a steady hand and a wee bit of patience, and you're on your merry painting way. Enjoy!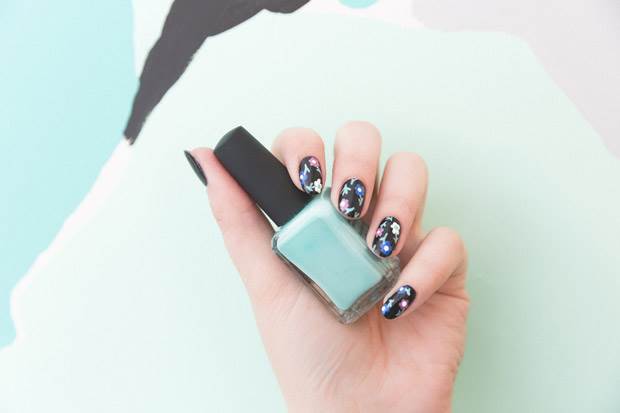
DESIGN 1
TOOLS:
red nail polish
white nail polish
top coat
striper brush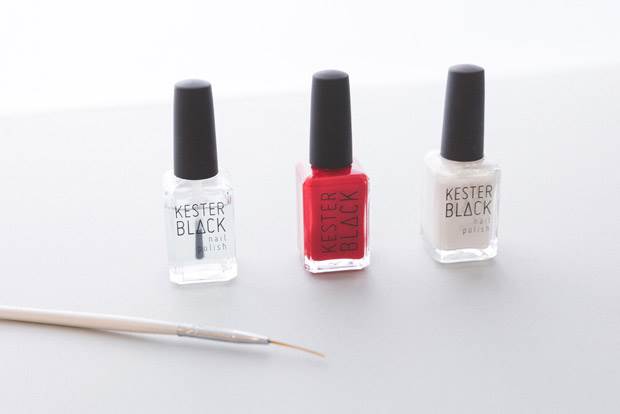
INSTRUCTIONS:
1. Paint on a clear base coat on first - this helps prevent colour staining and also prolongs the life of your manicure.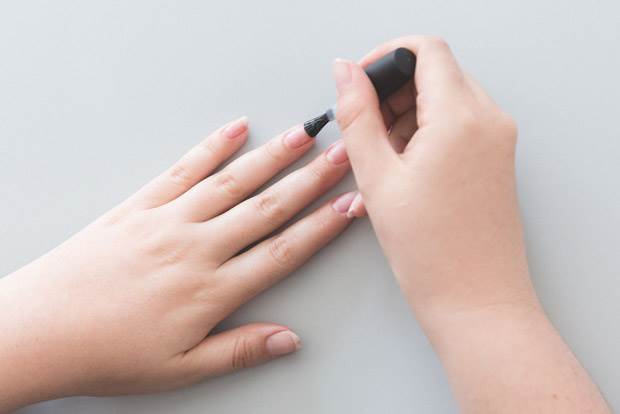
2. Paint on two coats of your base colour (we used red).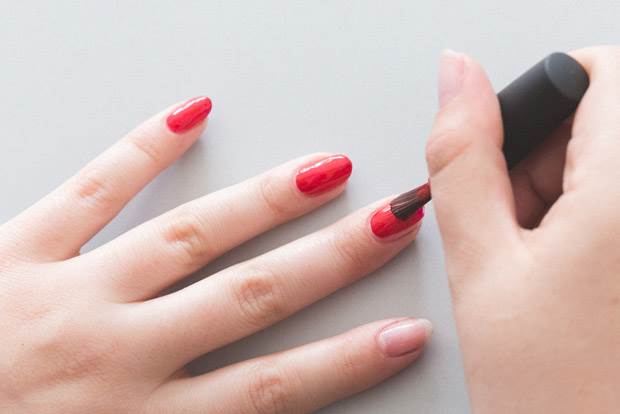
3. Using a striper paintbrush and a white polish, paint two small strokes to create a ‘V’ in the middle of the nail. Once you have this you can fill out the centre to make it look like more of a full heart.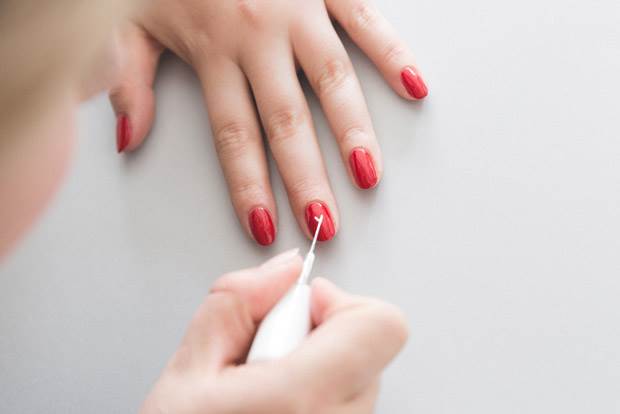
4. Repeat step 3 and paint two hearts, one above and one below.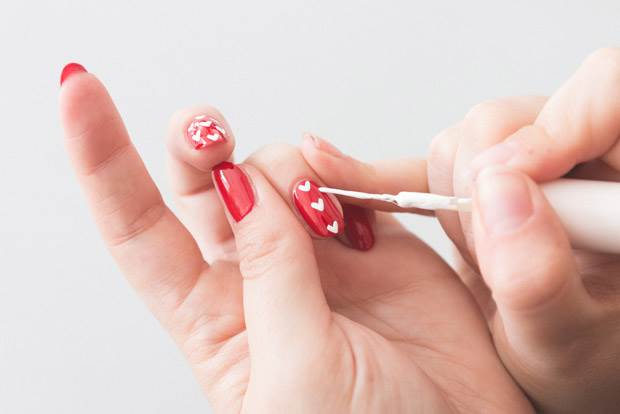
5. Repeat step 4, but on either side of the first row of hearts and in the gap between them.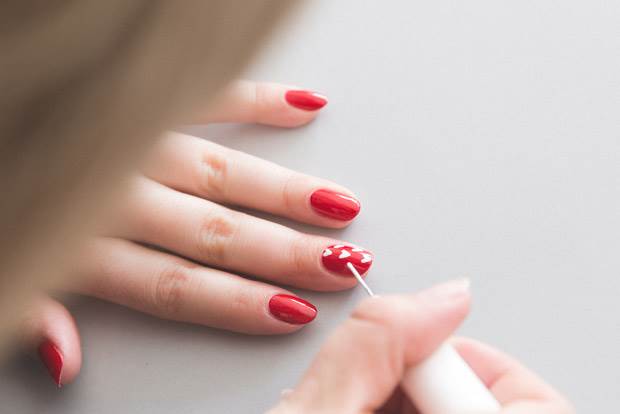
6. Continue across the rest of your hand, then add a clear top coat to seal the pattern.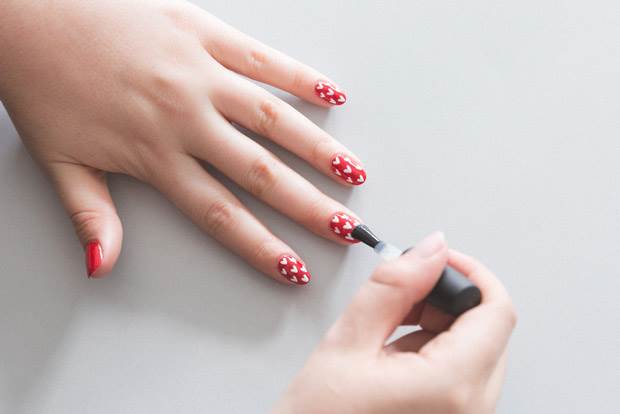
DESIGN 2
TOOLS:
white nail polish
pink nail polish
blue nail polish
green nail polish
black nail polish
clear top coat
striper brush
dotting tool (or bobby pin)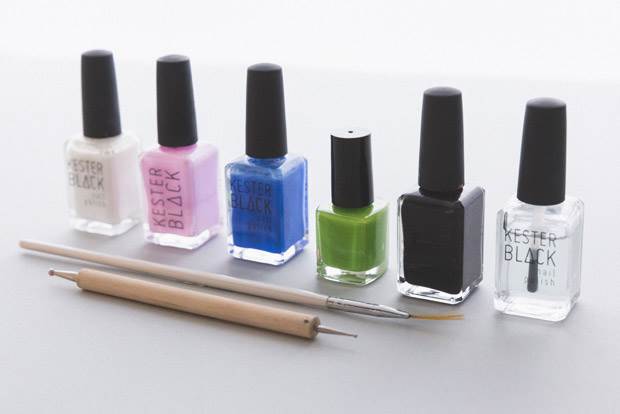
INSTRUCTIONS:
1. Once again, paint on a clear base coat to prevent staining.
2. Paint on two coats of white polish, then, using a nail art striper brush and a pink polish, paint on five tiny ‘V’ shapes in a circle to create your first flower.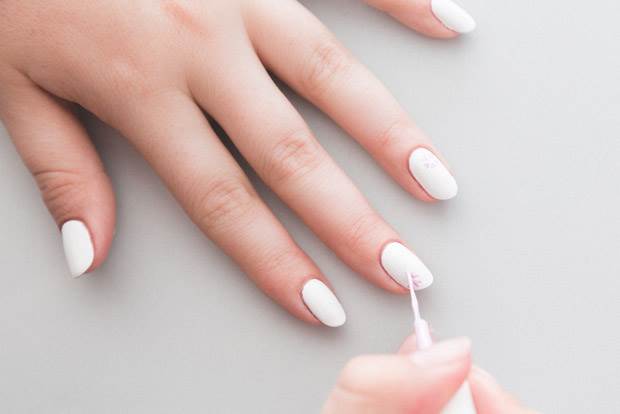
3. Repeat step 3 and paint one flower on each finger, then go around again using the blue colour.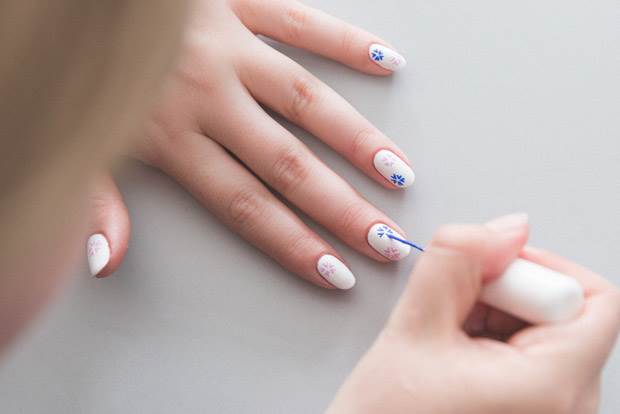
4. Using a dotting tool or bobby pin, place a spot of green in the centre of the flowers.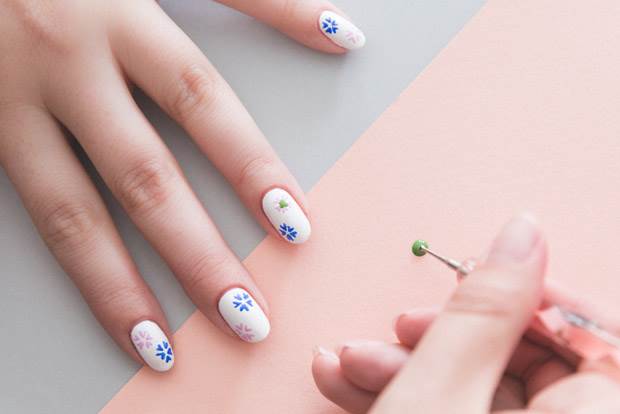
5. Follow that by putting a white dot in the centre of the green, then another tiny green dot in the centre of that.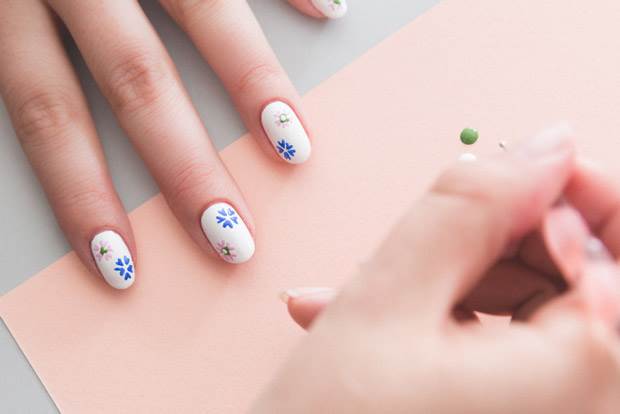
6. Randomly place small black dots around the outside of the flowers and the centre of the blue flowers, then finish with a clear top coat to seal it in.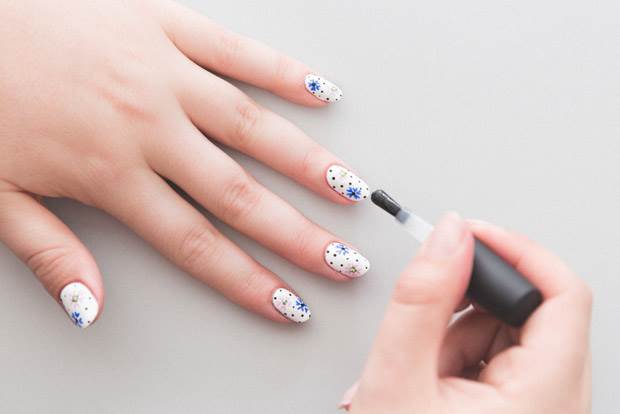
DESIGN 3
TOOLS:
black nail polish
white nail polish
pink nail polish
blue nail polish
green nail polish
clear top coat
striper brush
dotting tool (or bobby pin)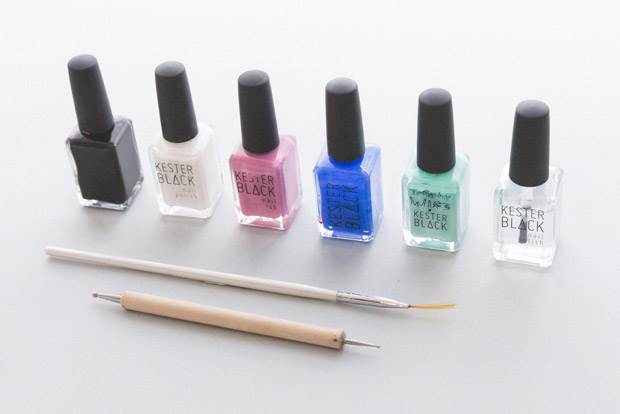
INSTRUCTIONS:
1. Apply a clear base coat, then paint on two coats of black polish.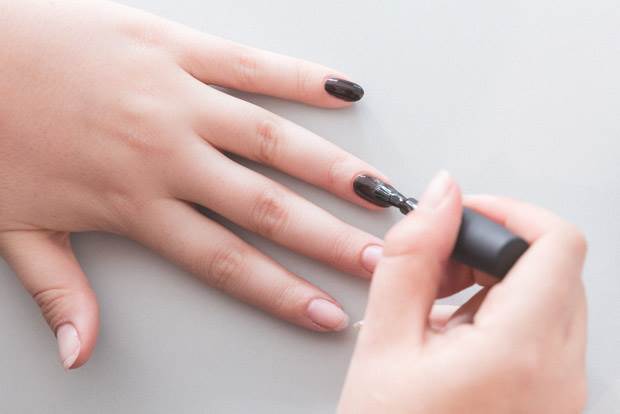
2. Using a dotting tool or bobby pin, paint on five dots in a circle to make your flower base. Repeat the process with your pink polish, then again with blue.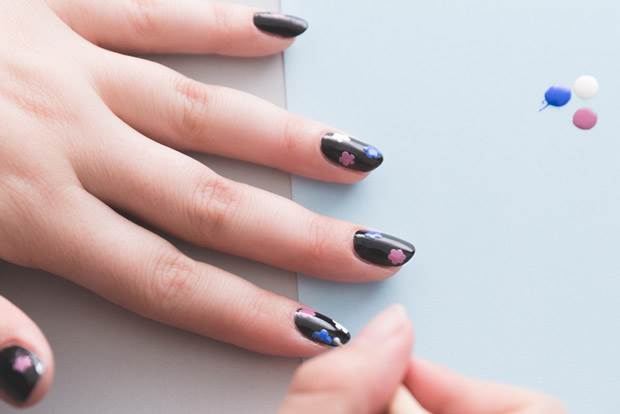
3. Spot the centre of each flower with a contrasting colour, then using a striping brush and a green polish, paint on small stems and dashes for leaves.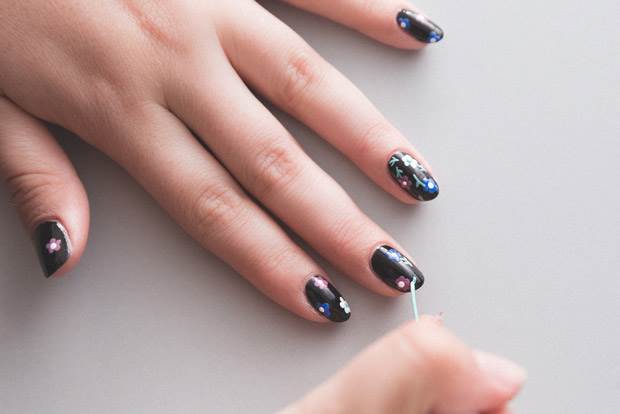
4. Pop on a top coat to finish, then spend some time flashing your fancy nails around!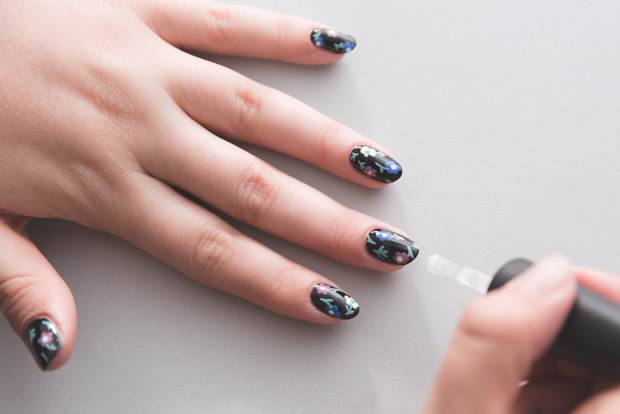
Tutorial by Dana Leviston, with nail art and designs by Chelsea Bagan of Trophy Wife. Pretty snaps by Bri Hammond.


.jpg&q=80&w=316&c=1&s=1)


