
get fancy: a winged eyeliner how-to
Introducing Get Fancy, our no-bullshit beauty blog series that's a lot more fun than a trip to a scary department store make-up counter.
Having spent our formative years in op shops and mosh pits instead of poring through the kind of lady magazines that make you feel bad about your looks before suggesting exxy products to cover up your entire head, we realised we'd entered adulthood with no notion of how to apply eye make-up without looking like a crazed lemur. Or what to do with blush that won't end up on a 'sad clown' Tumblr. Or how to get bouffy, Dolly Parton-esque hair whenever we please. These are important life skills that we don't possess, but oh how we want to. So here we present the first of many Get Fancy blog posts from our favourite, no-bullshit beauty lady: Dana Leviston. She is ace and much more fun than a trip to a scary department store make-up counter. You don't have to use her tips every day. Just when you want to Get Fancy.
MATERIALS:
mascara
small flat wedge brush
black gel liner in pot or
all-in-one liquid liner pen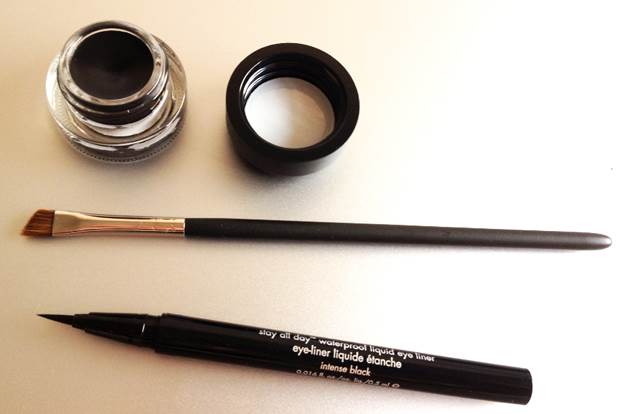
INSTRUCTIONS:
1. Though eyeliner is the main focus of this look, mascara works hand-in-hand to help you look all lovely and doe-eyed. It can be applied before or after your eyeliner, but before is recommended as you can fill in any gaps left by the mascara.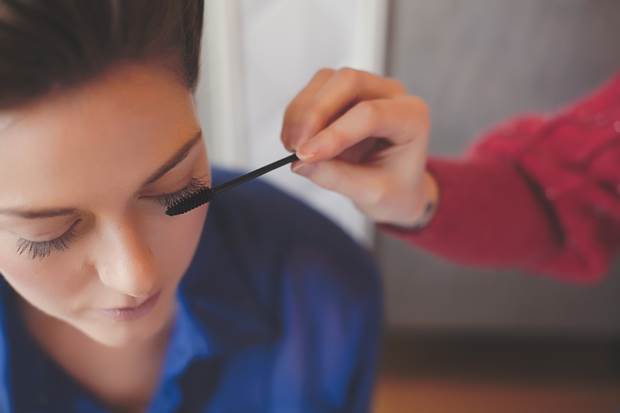
2. Using a small flat wedge brush with a gel liner in a pot (or an all-in-one liquid liner pen, if that's easier for you), start on the inside corner of the lash bed and face the longest pointed end of the brush toward the inner corner of the eye.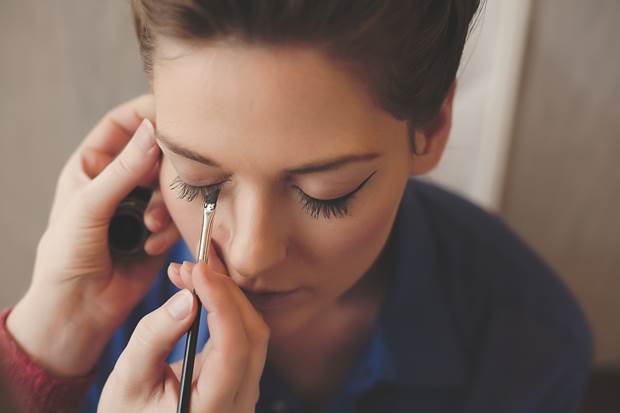
3. Paint a thin line to the middle of the eyelid, staying close to the lash bed (if you get a case of the wobbles, don't be afraid to take a quick break!). A wee tip: you may want to pull the skin of your eyelid gently toward the temple to achieve a smoother line. 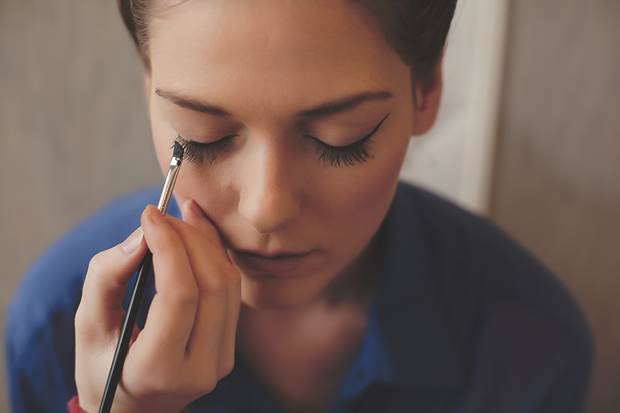
4. Once that's done, turn the brush around so that the longest pointed end is facing the outer corner of the eye. Start painting a line from the outer corner, dragging the brush back towards the middle of the eyelid to connect the dots (or first line you painted, to be more precise).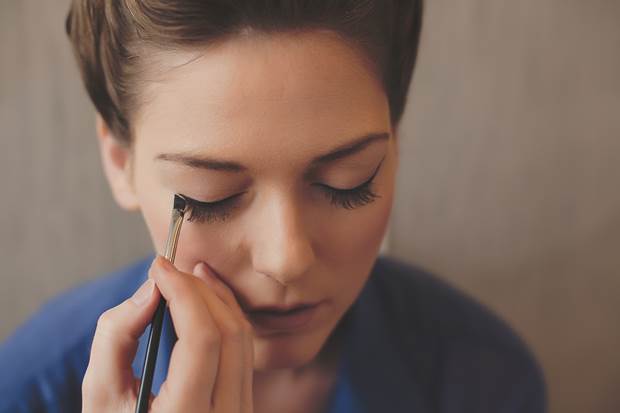
5. Now for the important stuff. To begin your 'wing', keep the longest pointed end of the brush facing toward the outer eye. Decide on the finish point of the wing and paint a tiny dot to mark the spot, then start painting a line from the dot back down, meeting the rest of the eyeliner at the outer corner of the eye. Basically, it's one big game of tic-tac-toe.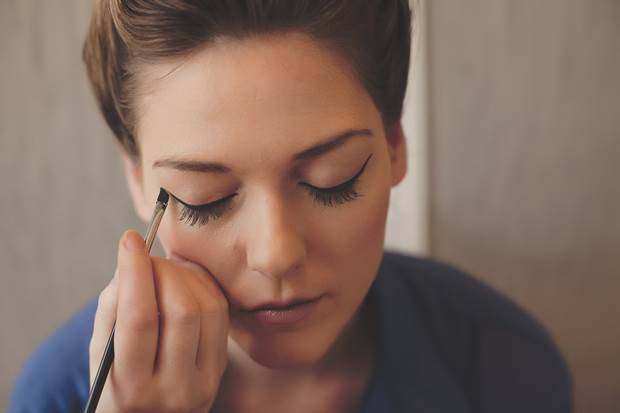
A line of coloured liquid liner could also be added to highlight the black. Plus, you can make the line thicker to create more of a 'cat-eye' style wing - also perfect if you happen to be headed to an Ancient Egypt themed party. Happy eyelash-fluttering!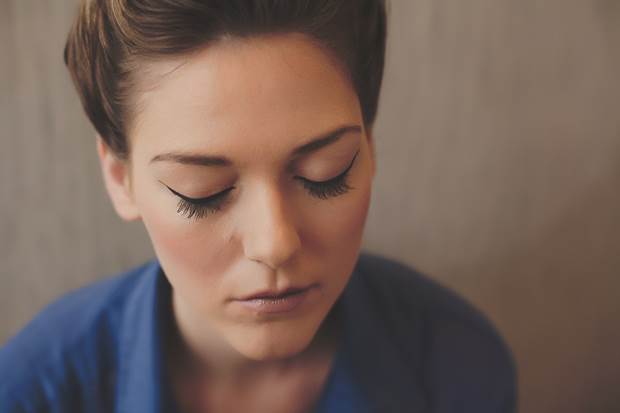
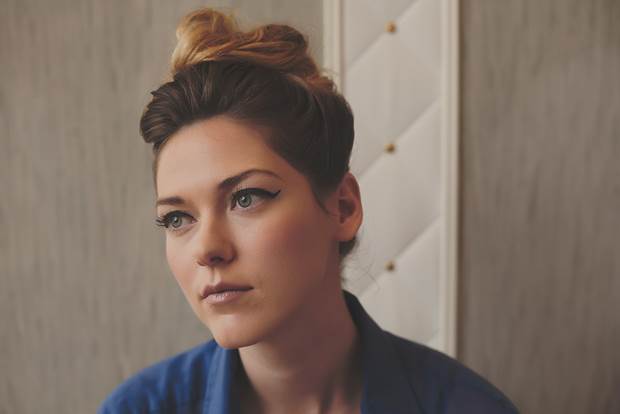
The pretty piccies of model Stephanie Colgan were snapped by Kate Berry.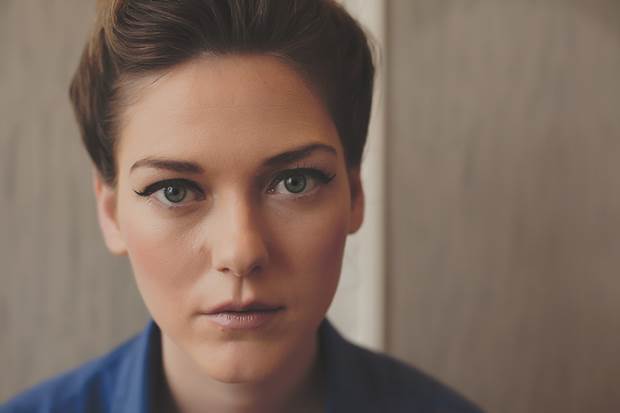


.jpg&q=80&w=316&c=1&s=1)


