
frankie exclusive diy: reusable sponges
These homemade sponges are pretty simple to whip up, and can be washed and reused.
Have you ever wondered why supermarket dish sponges fall apart so fast? Something about their flimsy design makes us think they were destined for landfill from the moment they were created. The good news is that you can avoid the crummy things all together if you have a little fabric stash and a sewing machine. Keep scrolling to see how it's done.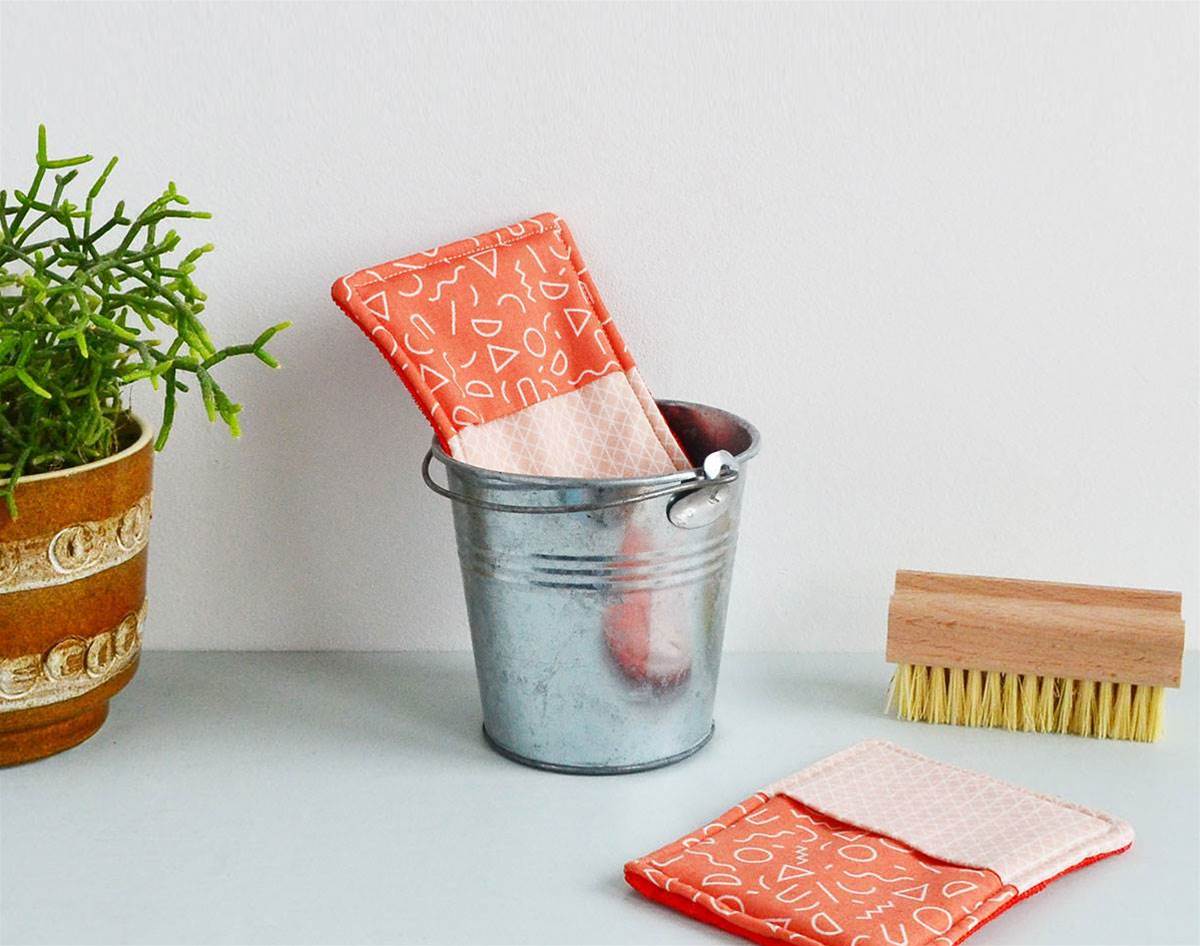 MATERIALS:
Makes two sponges
patterned fabric A 24cm (w) x 15cm (h)
patterned fabric B 24cm (w) x 15cm (h)
plain fabric 24cm x 15cm
cotton or bamboo wadding (or you could use an old fluffy towel) 24cm x 30cm
plastic netting from fruit or vegetable packing (enough to cover at least 24cm x 15cm) Note: it helps to leave this under a heavy book for a while to flatten it out)
iron
sewing machine
METHOD
1. Begin by cutting out all your pieces. From each of your patterned fabrics and plain fabric, cut out two 11.5cm (w) x 14.5cm (h) rectangles. From your wadding, cut four 11.5cm x 14.5cm rectangles. Cut your netting into two rectangles, ideally a little larger than 11.5cm x 14.5cm.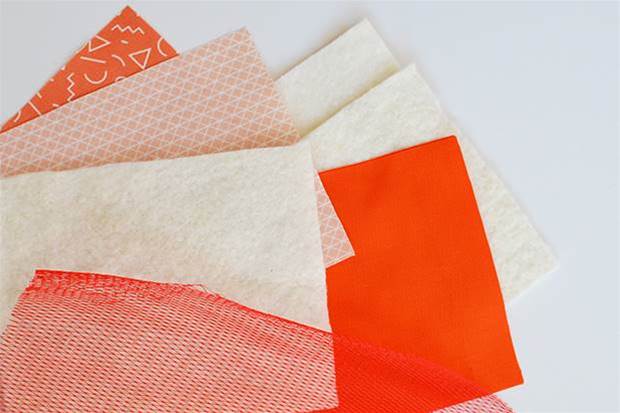 2. Take one rectangle of each of your patterned fabrics and fold each in half so the narrower edges meet, right sides out. Press with your iron to crease.
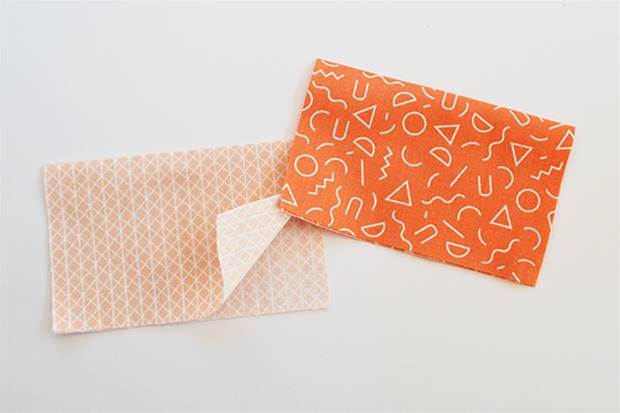 3. Lay out two wadding rectangles on top of each other, followed by one of the patterned rectangles (not the folded ones). Now add a folded rectangle in the other patterned fabric on top, so that the bottom narrower edges line up and the folded edge is at the centre. This folded section will form a little grip pocket for your fingers when using the sponge.
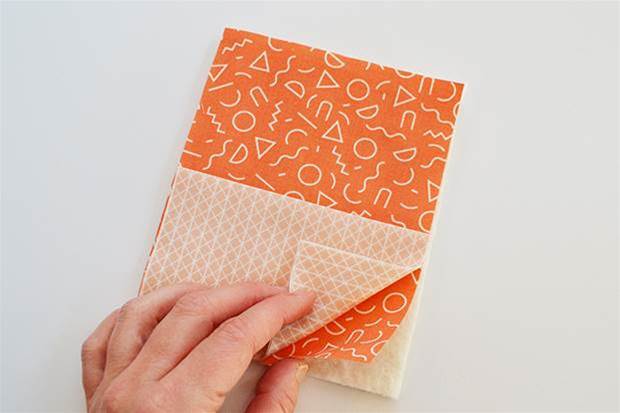 4. Next, lay one of your netting rectangles on top, followed by one of your plain fabric rectangles. Pin around the edges through all the layers. Repeat steps 3 and 4 with the remaining pieces to make your second sponge.
 5. Sew along the side and bottom edges with a 1cm seam allowance, leaving the top narrower edge open. Trim across the corners of each edge and trim any excess netting.
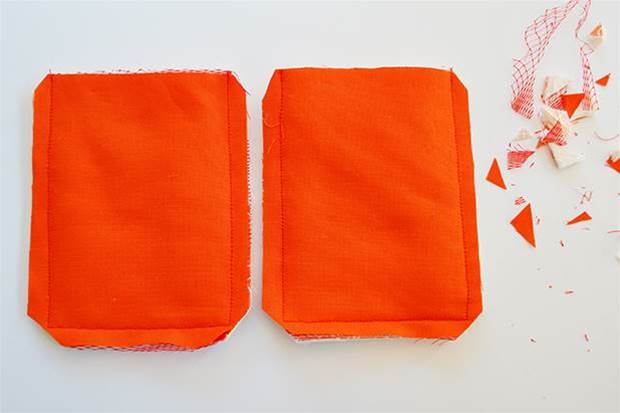 6. Turn your sponges right way out so that you end up with the netting over the plain fabric on one side and the two patterned fabrics on the other side. Iron your sponges on the fabric side only, being really careful not to melt the netting!
 7. Fold in the open edge by 1cm and pin. If you have a walking foot, use it for this next step (don’t worry if you don’t, it just helps keep the layers together as you sew). Sew along the pinned edge and around all the other edges about 3-4mm in from the edge. Your sponges are ready to use!
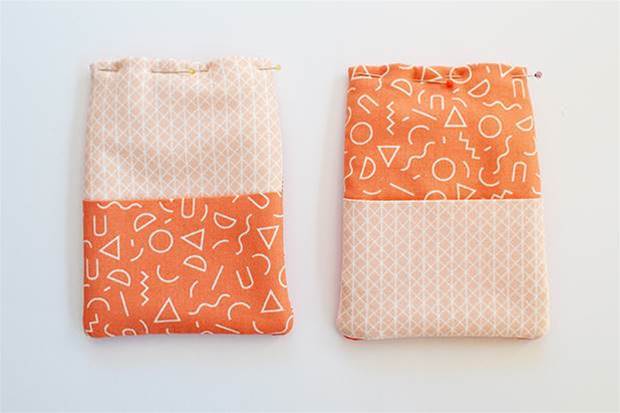 Anna Alicia is a freelance craft writer, designer-maker and mother based in East London. Anna’s latest craft book (out now through Quadrille Publishing) is all about one of her favourite things to sew –‘Bags’!


.jpg&q=80&w=316&c=1&s=1)


