
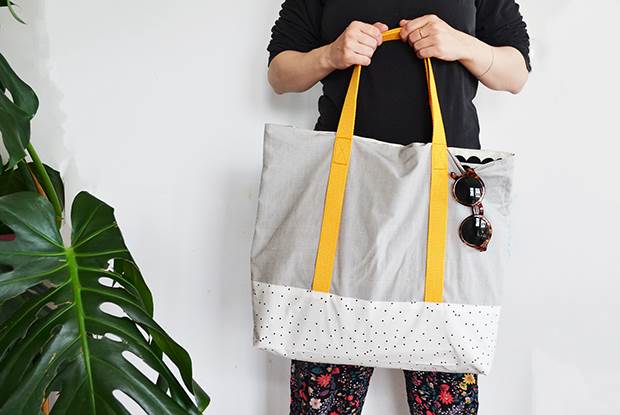
frankie exclusive diy: overnight bag
The straps can even hold your picnic blanket or blooms.
I can’t say for sure, but you probably need this bag. It’s the perfect bag for an impromptu overnight stay, but it’s also a great gym bag, market bag, beach bag… The straps can even hold your yoga mat, picnic blanket or blooms. Or if, like me, your life revolves more around trying to keep a little one occupied (and you haven’t seen a gym, beach or yoga mat in months), it’s great for carrying around toddler gear (ball, beloved soft toy, two spare changes of clothes, infinite snacks…). Whatever your situation, you probably need this bag.
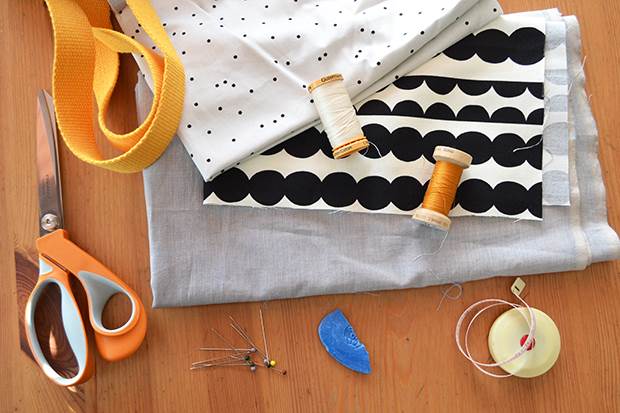
MATERIALS:
1/2m patterned cotton fabric (for the base)
3/4m plain cotton fabric (for the main outer)
3/4m canvas (or similar sturdy fabric, for the lining)
2m of 3cm wide webbing
cotton thread to compliment fabrics
cotton thread to match webbing colour
pins
tape measure
ruler
scissors
tailor’s chalk
sewing machine
iron
INSTRUCTIONS:
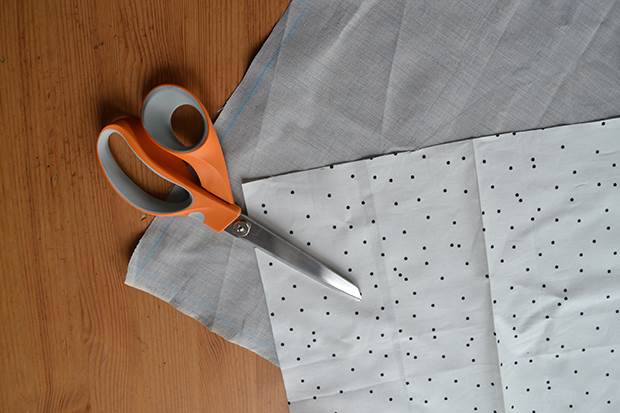
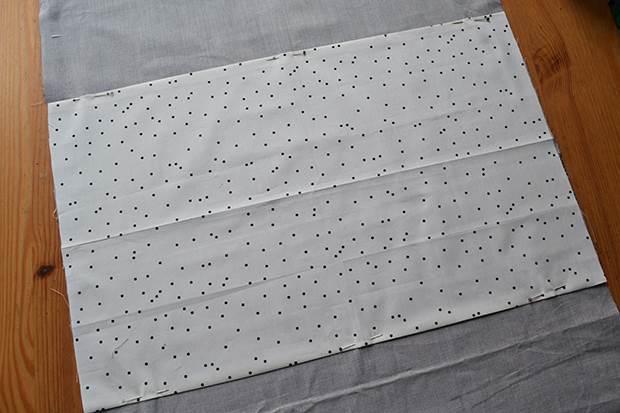
1. Start by cutting out your fabric. From your base fabric (the dotty fabric in the bag I made) draw out a rectangle 51cm x 33cm and cut out with a 1cm seam allowance. On both your lining and main outer fabrics draw a rectangle 51cm x 91cm and cut out with a 1cm seam allowance.
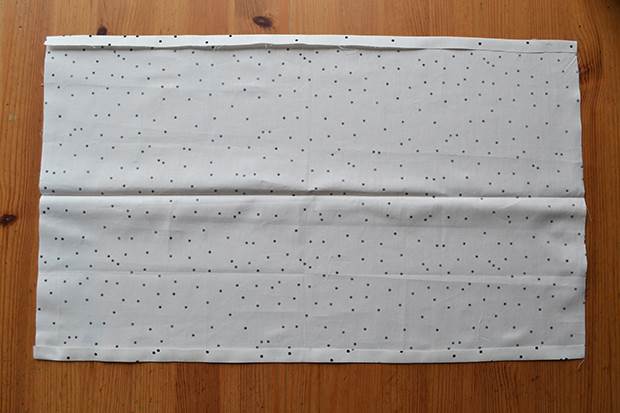
2. Take your main outer piece and fold in half (right side out) so the narrower edges meet. Press the fold to form a crease. Now take your base piece and fold so that the longer edges meet, press in the same way. Unfold your base piece and lay out wrong-side up. Along both of the longer edges, fold over by 1cm and press.
3. Lay out your main outer piece (right side out) and lay your base piece on top so that the crease you pressed along the center of each matches up. Pin your base piece in place along its folded edges.
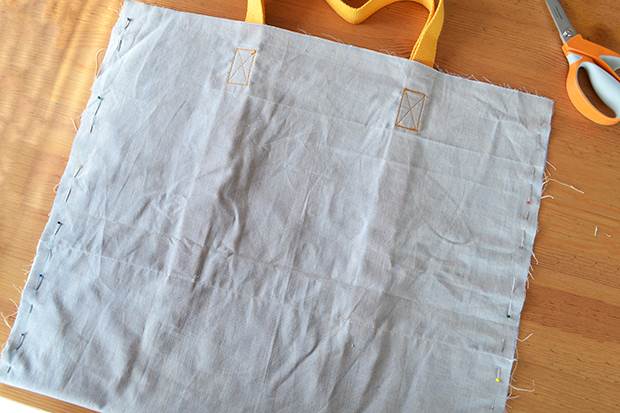
4. Cut two 1m lengths from your webbing. Measure 15cm in from one of the pinned edges of your base piece. At this point, insert one end of one of your webbing pieces by 1cm, between the base and outer fabrics (you may need to remove some pins). Pin the webbing in place in a straight line running towards the top of your outer fabric. Repeat on the right hand side with the other end of your piece of webbing, making sure the handle you create is not twisted. Turn your fabric around and repeat the whole step on the other pinned edge of your base piece, so you have two handles.
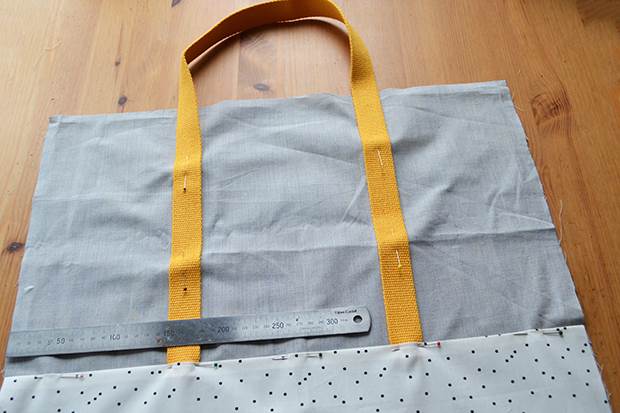
5. Sew along both pinned edges of your base piece, about 2mm from the edge.
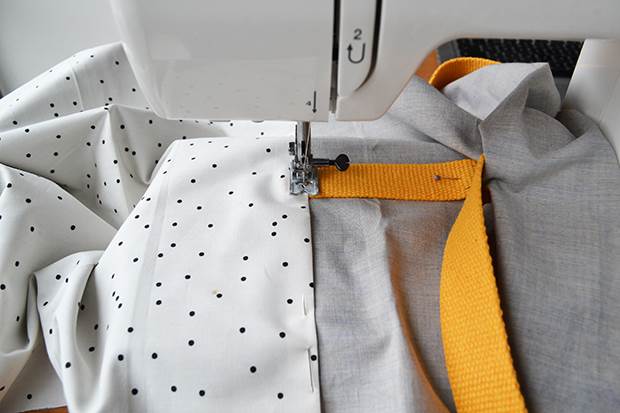
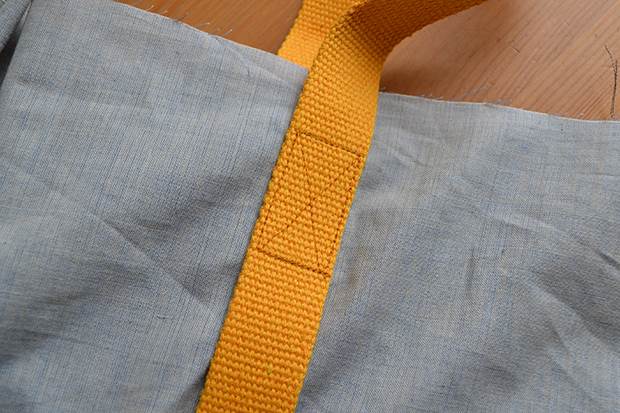
6. To secure your handles in place, sew a rectangle with a cross in the center (in the cotton thread that matches your webbing) at the top of each strap, 3cm from the top edge of your outer fabric. Your rectangles should be about 2.5cm wide by 4.5cm long. Sew around their edges twice or three times to make sure they’re secure.
7. Fold your panel in half (right side in), so the handles meet at the top, and pin along the sides. Fold your lining fabric too, so its shorter edges meet, and also pin along the sides. Sew where you have pinned, 1cm in.
8. To give your bag a base, take the lining piece and flatten out the bottom corners to 90 degree triangular points (as in the picture). Your side seam should be running in a straight line away from you. For both corners, measure 4cm from the tip of the corner and draw a line across the corner at a 90 degree angle. Pin along these lines. Repeat this for your outer bag piece.
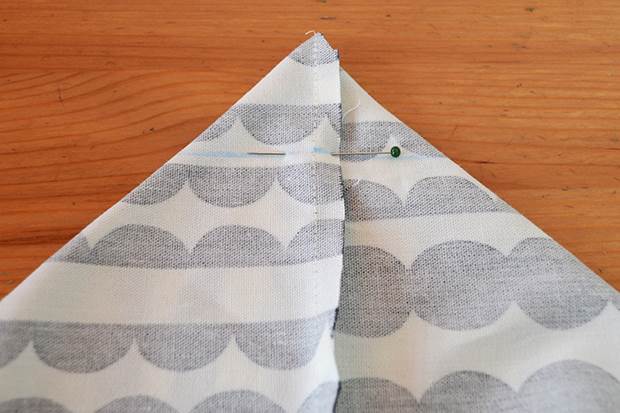
9. Sew along the lines you’ve pinned, then trim the corners away about 1cm from your stitching.

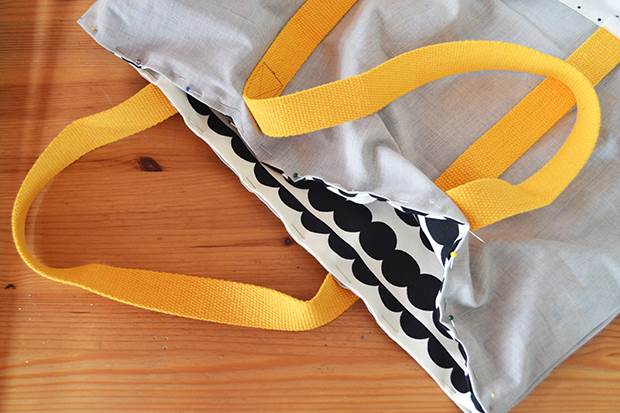
10. Turn the outer bag piece right way out and tuck the lining piece inside so the top edges match up. Fold the top edge of the outer piece in by 1cm, and the edge of the inner piece out by 1cm, pinning together all the way around.
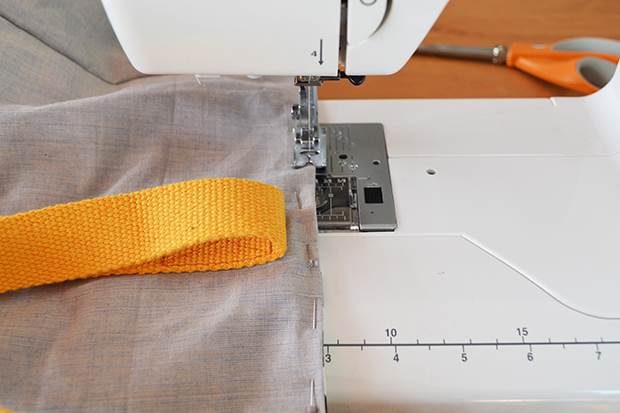
11. Sew all the way around the top edge, about 2mm in.
To see more cool stuff from Anna Alicia, head over this way.


.jpg&q=80&w=316&c=1&s=1)


