
frankie exclusive diy: frozen in time resin jewellery
Great to give as a special gift or to keep as your own personal statement piece, this DIY will help you whip up some jewellery that also acts as a teeny wearable time capsule.
Great to give as a special gift to a loved one or to keep as your own personal statement piece, this DIY will help you whip up some jewellery that also acts as a teeny wearable time capsule.
Once you've mastered using resin you can experiment with casting all sorts of bits and bobs – glitter, flowers, itty-bitty objects. You're only limited by the types of things that you're happy to dangle from your lobes or around your neck!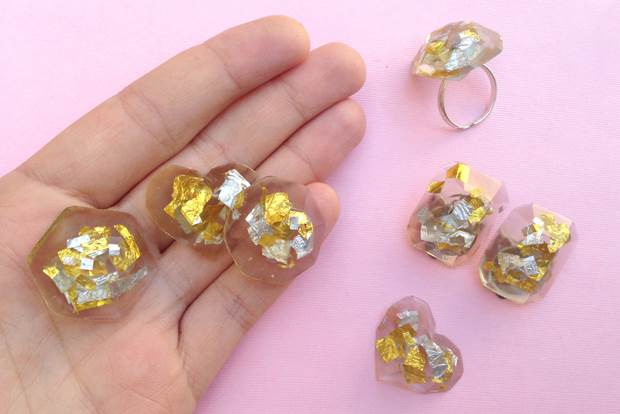
MATERIALS
casting resin & catalyst (available from a hardware store)
mould (a silicon ice cube tray or chocolate mould works perfectly!)
gold foil
scissors
measuring jug
superglue
earring backs & ring band
toothpicks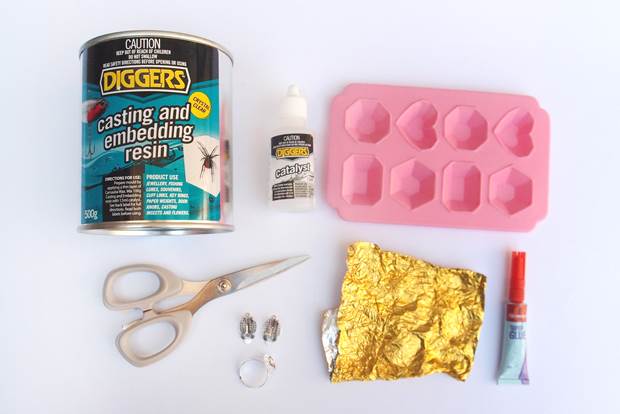
INSTRUCTIONS
1. Prepare your foil confetti by chopping it into small pieces with scissors.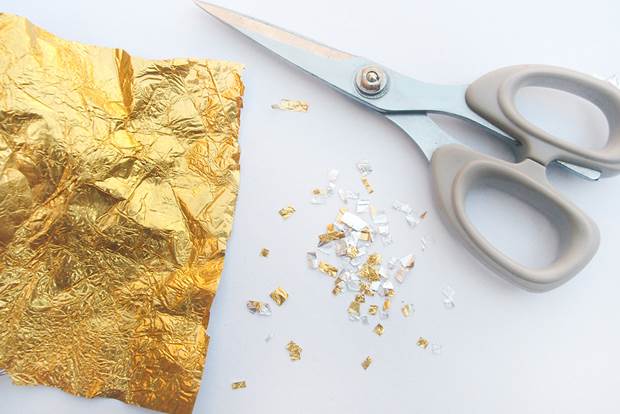
2. Follow the instructions on the casting resin and mix up 100ml of resin. Although it's super easy to work with, this stuff is toxic so make sure you're wearing gloves and working in a well-ventilated area! You will need to move relatively quickly as the resin will begin setting in a few minutes' time.
3. Begin by filling the mould up half-way with resin. If you happen to be using a hard plastic chocolate mould, you may want to give it a quick spray with cooking oil to allow the resin to be easily released when it has set. A silicon ice cube tray won't need any release agent.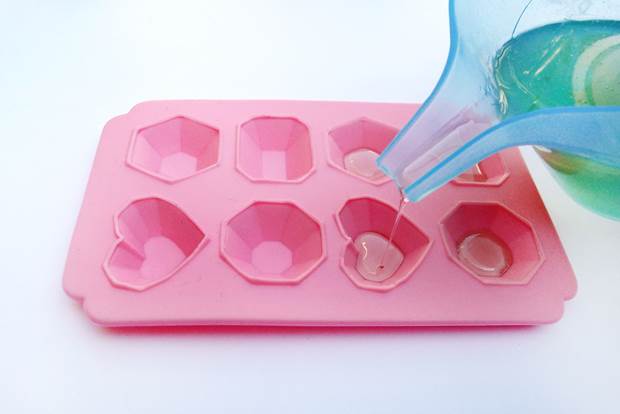
4. Start adding your foil confetti and fill up the moulds to the top with resin. Add more confetti to the surface and use a toothpick to gently mix it in so that it's under the surface. You can also use your toothpick to carefully position the pieces so that once set it is distributed evenly in your object.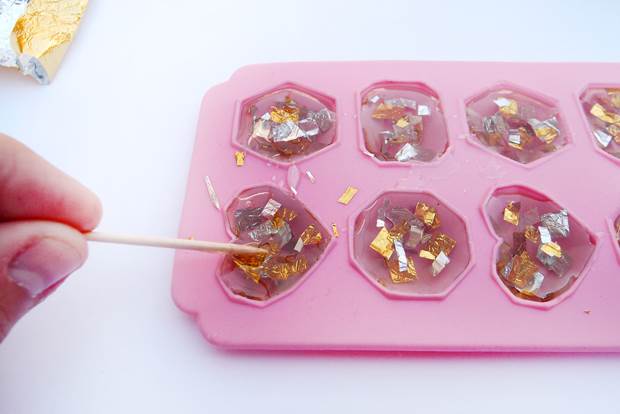
5. After following the instructions on the resin and allowing it to set, you can begin making your own unique statement jewellery pieces! Use the superglue to attach earring backs or a ring band as desired, then pop on your homemade bling for its very first outing.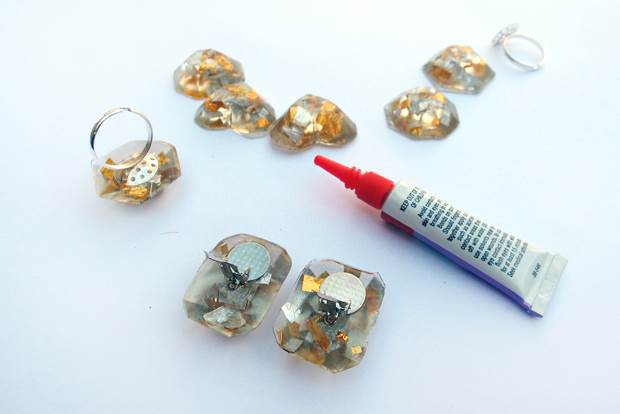
Photos and words by Esther Sandler, the clever lady behind Togetherness Design.


.jpg&q=80&w=316&c=1&s=1)


