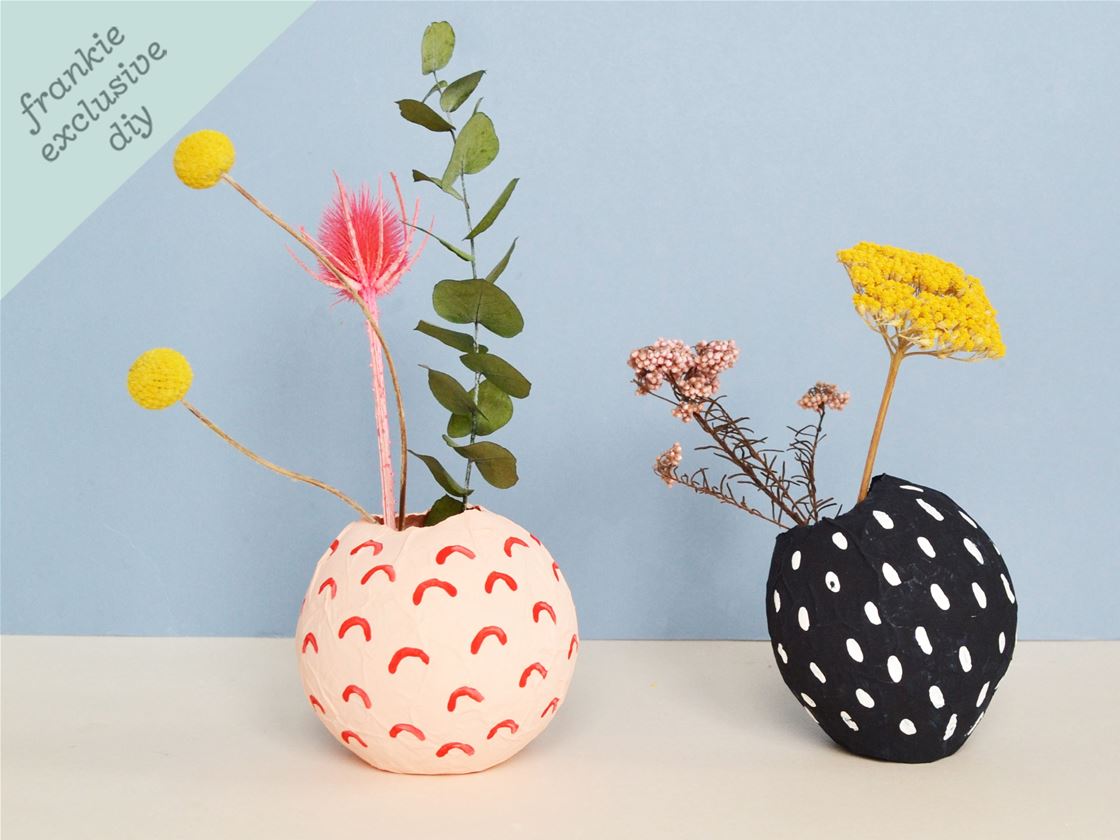
frankie exclusive diy: papier-mâché vases
Make an easy-peasy (but super-cute) vessel for showing off dried and paper blooms.
 MATERIALS
a balloon
a jam jar or similar (to sit your balloon on while it dries)
a few sheets of tissue paper or newspaper
PVA glue and a bowl to mix it in
acrylic or poster paints
medium and fine paintbrushes
optional – pebbles or similar (to weigh your vases down)
METHOD
1. Start by blowing up your balloon/s. I made small vases, so I only blew the balloons up a little bit. It can be fun to use different shaped balloons to create different vase shapes! 2. Tear up several sheets of tissue paper (a great way to re-use packaging), or newspaper, into small strips.
 3. In a bowl, mix roughly three tablespoons of PVA glue with about 150ml of water until the glue and water are completely combined. Dip one of your strips of paper into the glue mixture, let any excess glue drip away, then lay your paper strip on your balloon. Keep adding strips of paper to build up layers, smoothing them down as you go. Leave an opening around the balloon’s knot (this will form the mouth of your vase). Once you’ve built up a few layers, set your balloon down to dry on the jam jar.
 4. Leave your vase to dry thoroughly – this may take overnight! Once dry, pop the balloon inside the vase and remove the deflated balloon. So that your vase can stand up, push it carefully but firmly down against a flat surface to form an indent in the bottom of the vase.
 5. Paint your vase with your base colour, allowing it to dry between coats.
 6. In a contrasting colour, and using a fine brush, add some simple patterns across the surface of your vase – dots, dashes, stripes and checks work well! You may want to pour some small pebbles or similar into the bottom of your vase to give it a bit more stability.
 Fill your vase with dried or paper flowers, and admire!
 See more cool stuff from Anna Alicia over here.





.jpg&q=80&w=316&c=1&s=1)


.jpg&q=80&w=316&c=1&s=1)


