
frankie exclusive diy: toasty oven mitts
Are you planning on spending some quality time with your oven this season?
Winter's here, and with it comes all sorts of warm, cosy indoor pursuits like book reading, tea drinking and one of our personal favourites, baking! If you're planning on spending some quality time with your oven this season, why not whip yourself up a pair of these sweet floral oven mitts and make kitchen life a bit more exciting?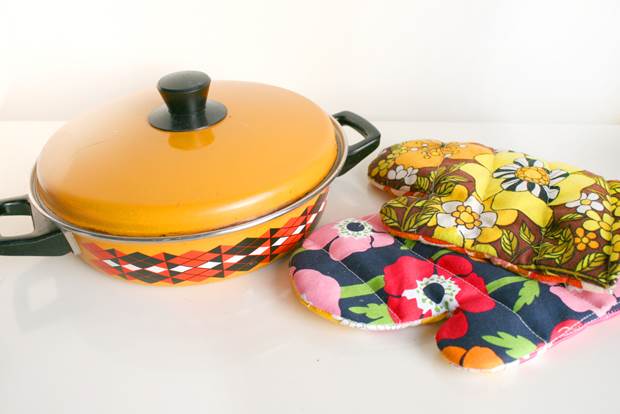
MATERIALS (for one oven mitt):
4 x 30cm squares of floral fabric (we used different fabrics for each side of the oven mitt for a cute clashing look)
2 x 30cm squares of wadding
1 thin strip of fabric, approximately 15cm x 5cm in dimension.
plain card
fabric and paper scissors
pencil
needle and thread
sewing machine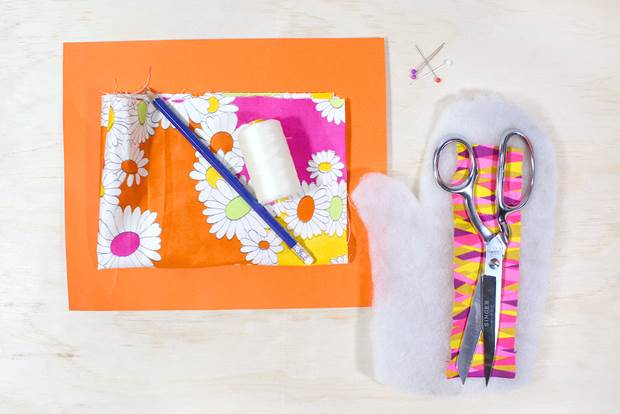
INSTRUCTIONS:
1. Trace around your hand onto the card to create a template for your oven mitt. Cut this out.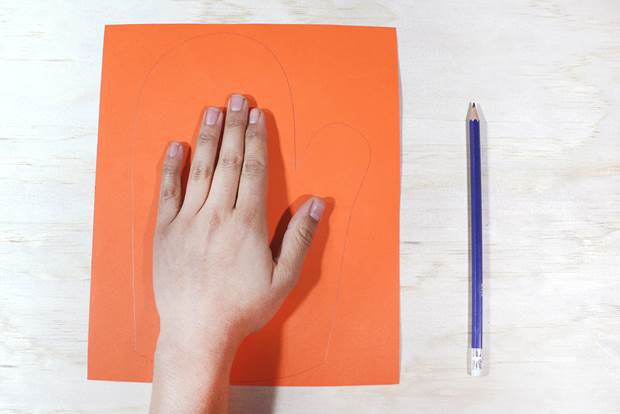
2. Use the template to cut two mitt shapes from one type of the floral fabric. This will form one side of your oven mitt. Repeat this step with contrasting fabric for the other side.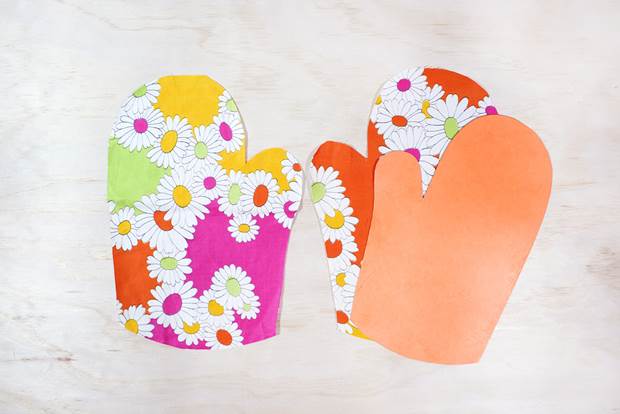
3. Use the template again to cut two mitt shapes from the wadding.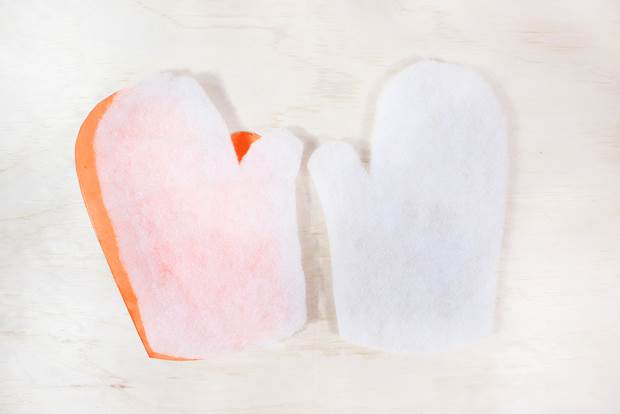
4. To assemble each side of the oven mitt, sandwich one of the wadding pieces in between the two fabric shapes, with right sides facing outwards.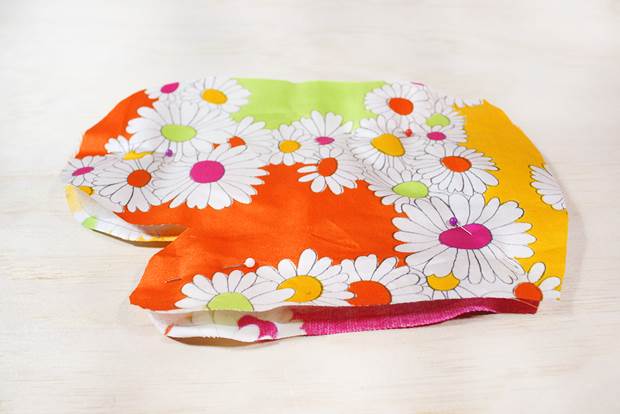
5. With 0.5cm seam allowance, sew all the way around each mitt, leaving the bottom open.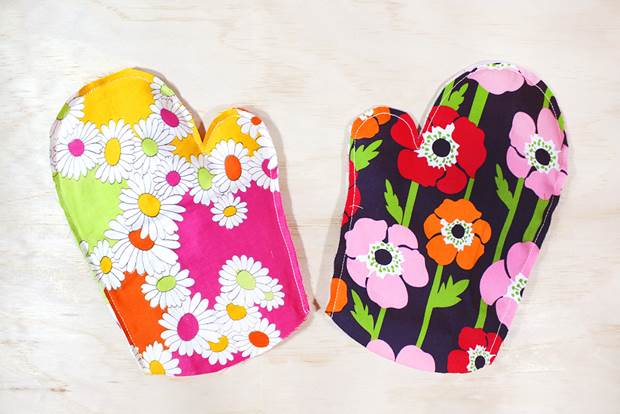
6. Sew some evenly spaced diagonal lines across each side of the mitt. This secures the wadding inside the mitt and also creates a cute quilted look.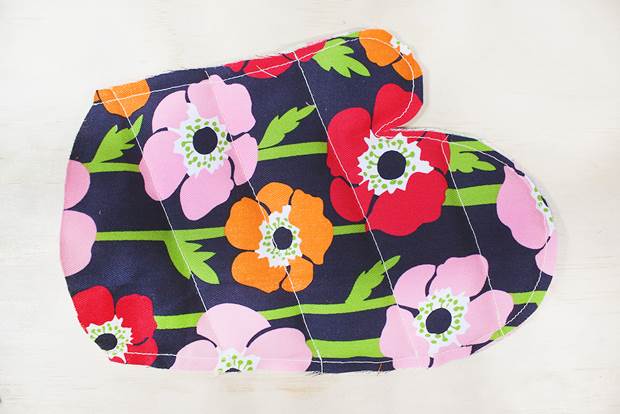
7. Fold the thin strip of fabric in half along the long edge, with right sides facing in. With a 0.5cm seam allowance, sew this into a tube. Turn the tube right side out. This will form a loop for hanging your oven mitts.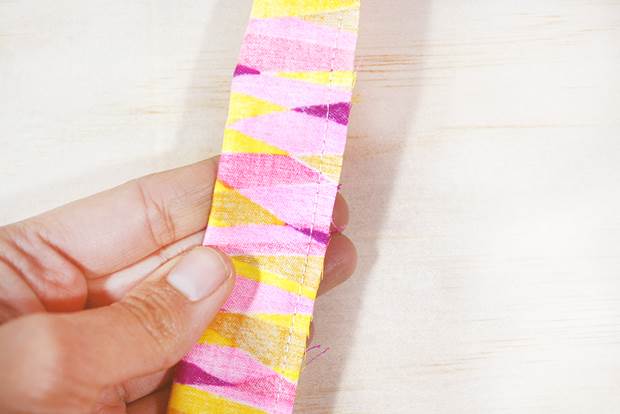
8. With right sides facing in, pin both sides of the mitt together, with the hanging loop sandwiched in between. Sew the two sides of the mitt together, following the 0.5cm stitch line you have already created. Make little snips up to the stitch line all the way around the curving seam. This will make a nice round seam when you turn the mitt inside out.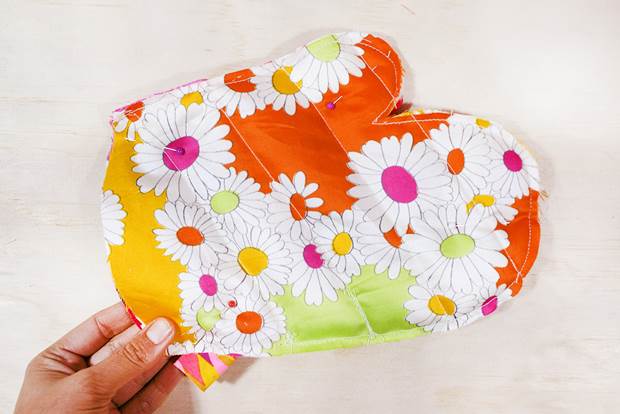
9. Turn the oven mitt inside out. If you would like to make another so you have a matching pair, repeat steps 1-8.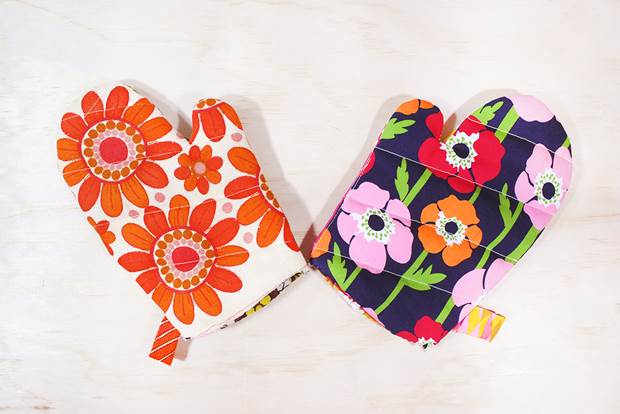
10. Hand-sew the open bottom ends of the oven mitts closed. Then pop on your oven, because you’re ready to cradle some piping hot trays!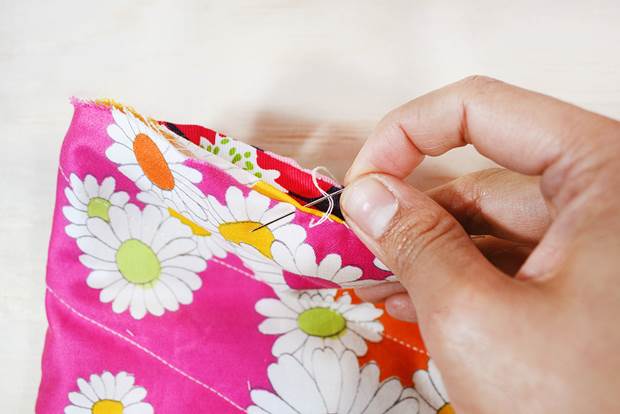
To see more of Kitiya's projects and bits and bobs, head here.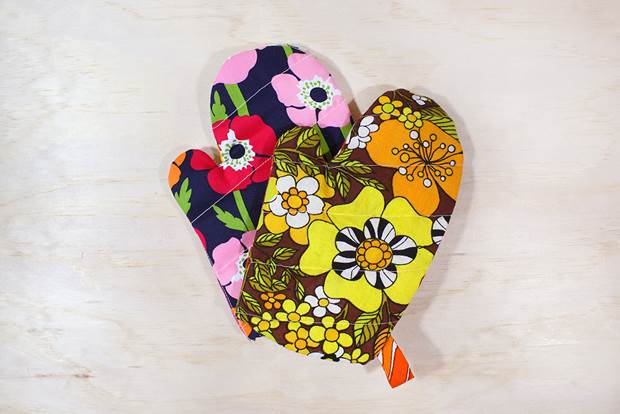


.jpg&q=80&w=316&c=1&s=1)


