
frankie exclusive diy: sleeping kitten wheat pack
In lieu of a real life furry friend to curl up on your lap, this warming companion will keep you company on those cold days and nights.
In lieu of a real life furry friend to curl up on your lap, this warming companion will keep you company on those cold days and nights that are becoming all too familiar. So quick and easy to make, you can whip one up for yourself in no time at all! Try making this DIY using whatever scraps of cotton or linen fabric you have lying around – you can even try a different animal shape if you are feeling particularly crafty.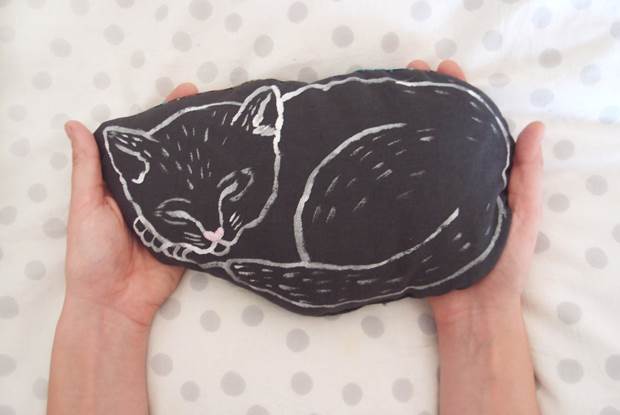
MATERIALS
2 pieces of scrap cotton or linen fabric, just a bit bigger than A4 (it’s very important to use cotton or linen, as a synthetic fabric could melt or catch fire in the microwave!)
around 1kg of whole wheat from a wholefoods store or supermarket
pencil
sticky tape
fabric paint
scissors
paintbrush
sewing machine or needle and thread
iron
kitten illustrated template
embroidery thread and needle (optional)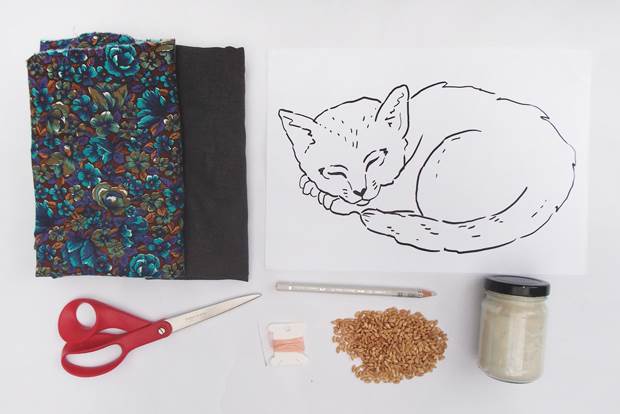
INSTRUCTIONS
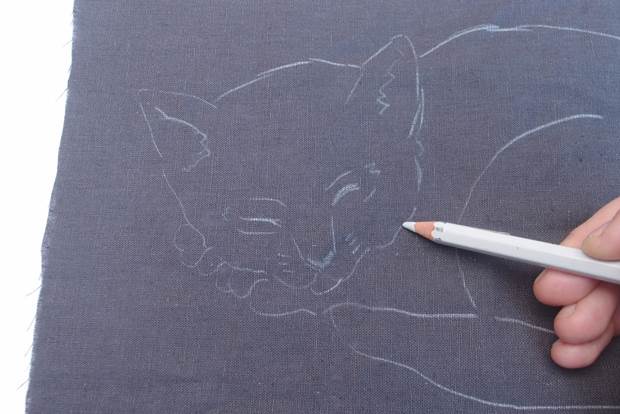
1. Print out the kitten illustrated template onto A4 paper. Using a window as a makeshift lightbox, sticky tape the illustration up with one of the pieces of fabric over the top. Trace around the illustration using your pencil – I’ve used a white pencil as I am working with a dark coloured fabric. After you’ve finished tracing, take the fabric down from the window and touch up any areas so you have a clear template to paint over.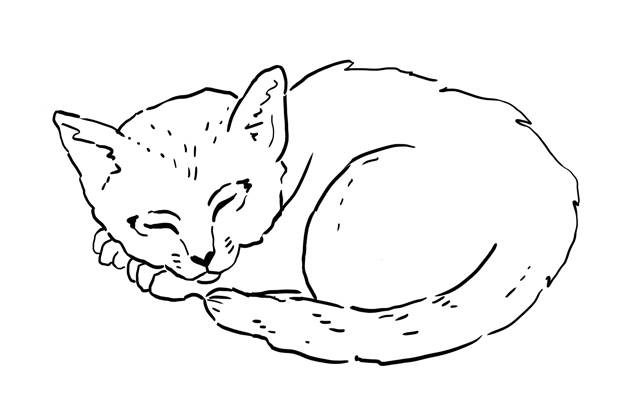
2. Choose a fabric paint colour that will complement your fabric. I found it best to use a small container to mix the fabric paint with a bit of water, which makes it easier to apply and creates a sort of watercolour effect. Paint over the kitten template and leave to dry. Once the paint is dry, you will need to use an iron to heat set the fabric. Use a piece of scrap fabric to protect the painted kitten and follow the instructions on your fabric paint – usually a hot iron for a few minutes is all you need!
3. If you want to add a highlight to your sleeping kitten, use some pink embroidery thread to embroider the nose. Stitch a running stitch around the outside of the nose and then use large vertical stitches to fill in.
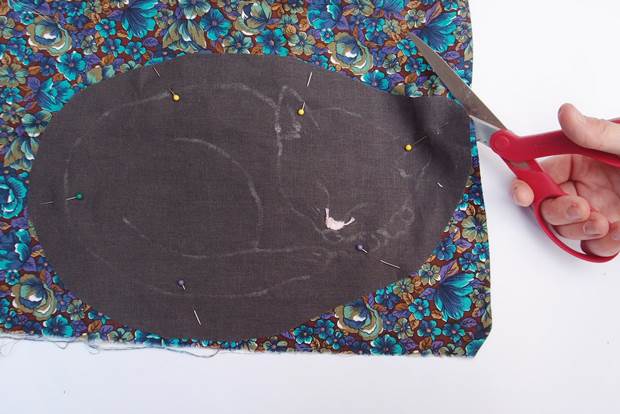
4. Cut around the painted kitten leaving around 3cm of plain fabric. Use this piece as a template for cutting out the reverse fabric. Simply pin together with right sides facing inwards and cut out the reverse.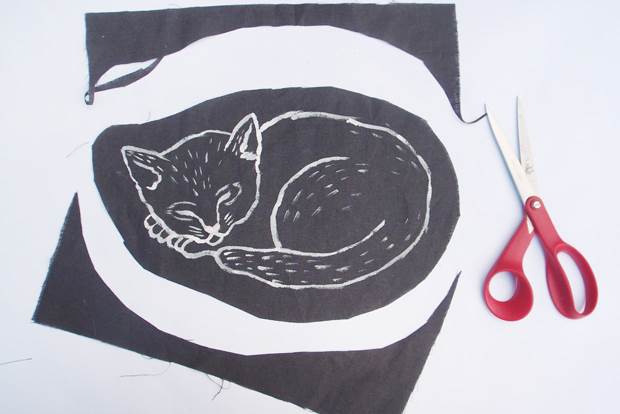
5. Starting at the bottom of the kitten, machine or hand-stitch 1cm in from the edge leaving a 5cm opening. Use this opening to turn the fabric inside out. Now it’s time to fill up your kitten with wheat! Use a jug or funnel to fill the bag. Don’t fill it to the brim – you want to make sure there is still a bit of room for it to move around. I managed to fit just under a kilo of wheat inside. Once full, you can machine or hand-stitch the opening up and then you are done!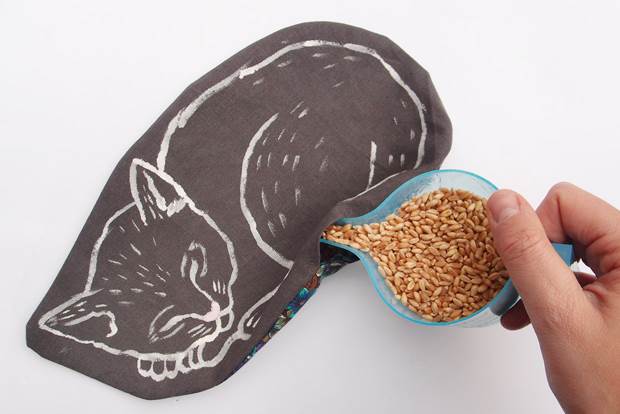
6. To heat up your kitten, just pop it into the microwave for 2-3 minutes depending on your machine’s wattage.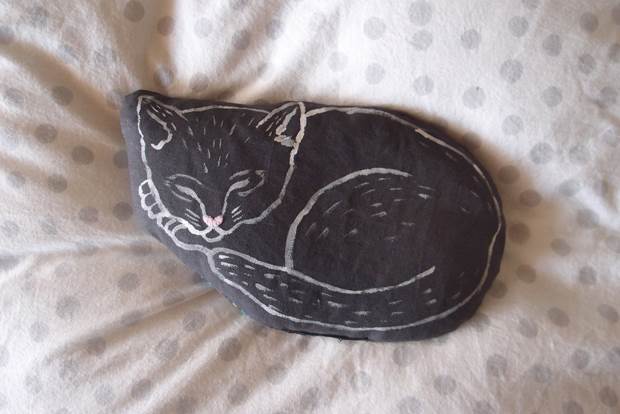
Photos and words by Esther Sandler, the clever lady behind Togetherness Design.


.jpg&q=80&w=316&c=1&s=1)


