
frankie exclusive diy: mini cake pin cushions
If we could surround ourselves with cakes of all kinds at all times, we'd be the happiest folk about, so we're making a start with this cake slice pin cushion.

If we could surround ourselves with cakes of all kinds at all times, we'd be the happiest folk about. Naysayers might say that we're living in an unrealistic sponge-filled dreamland, but we're going to give it a red hot go, starting with this little cake slice pin cushion. No only will it look delicious sitting pretty on your desk, it's the perfect place to keep your pins so they're on hand for your next sewing project. Make them in a variety of colours and give them to friends as presents, or if you're feeling greedy, keep them all for yourself!
Felt is a versatile material to work with and requires no hemming, which is even better. All you'll need to complete this project is a basic running stitch and buttonhole stitch, which are super easy to learn.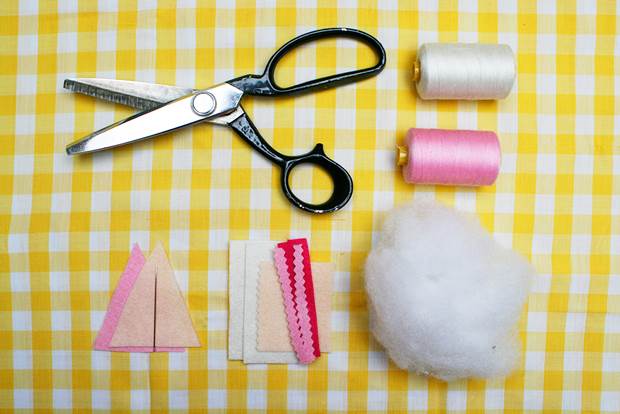
MATERIALS:
Needle
Sewing thread
Crimping shears
2 rectangular strips of cake coloured felt (4x7.5cm)
2 triangular pieces of felt, one in a cake base colour and one in an icing colour (6cm base and 7cm from base to longest point)
1 rectangular piece of felt in a cake base colour (6x5cm), one long edge cut with crimping shears
2 thin strips of felt in a jam colour (1x7.5cm)
2 thin strips of felt in a cake filling colour (1x7.5cm), edges cut with crimping shears
Poly fill stuffing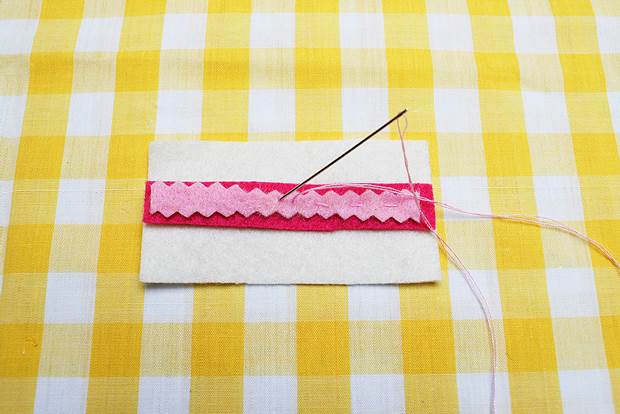
INSTRUCTIONS:
1. Using a basic running stitch, sew the "filling" along the centre of each 4x7.5cm strip of felt, stacking the crimped strip on top of the jam strip. These will form the side panels of your cake slice.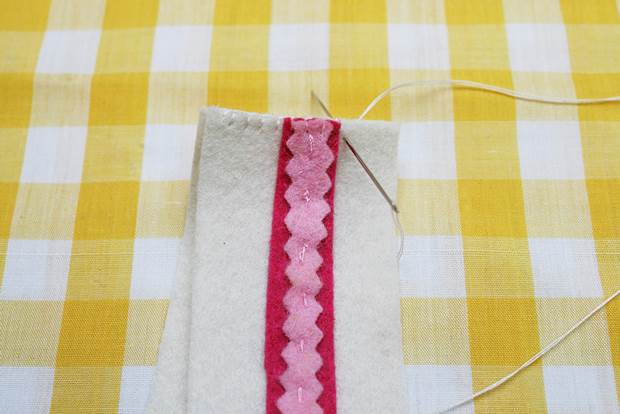
2. Use a simple stitch like buttonhole stitch (see example) to sew the two side panels together on a short edge.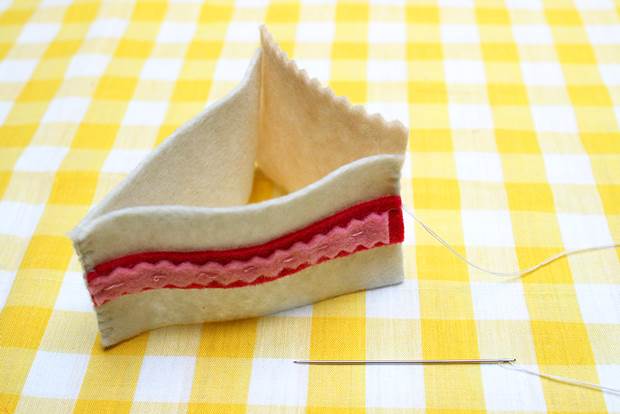
3. Use buttonhole stitch again to sew the other short edges of the side panels to the 6x5cm felt piece (this forms the back panel of your cake slice). Leave the crimped edge sticking up from above the other pieces as this will form the crust of your cake slice.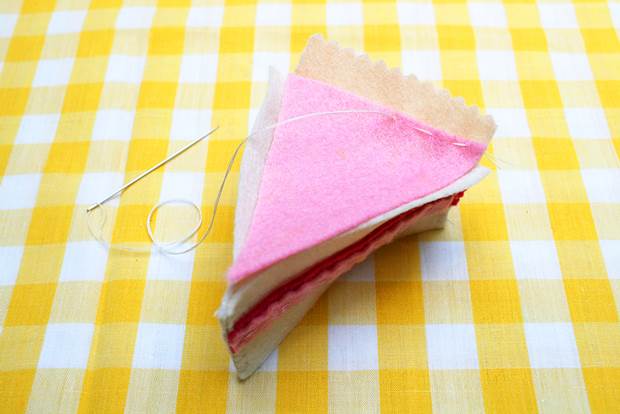
4. Take the icing coloured triangle and fit it inside the top of the cake slice. Use buttonhole stitch to sew the two longer edges together, then use a basic running stitch to sew the back edge onto the pie crust.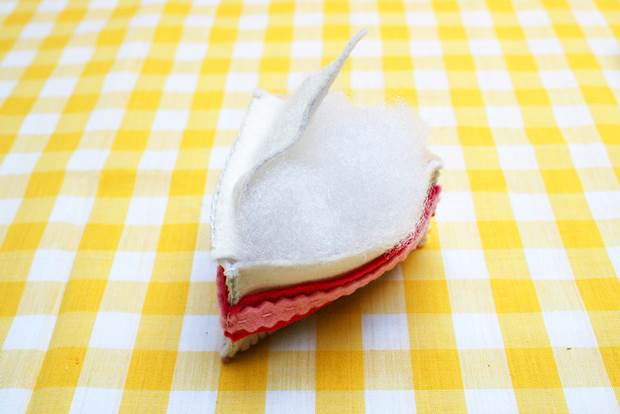
5. Turn the cake upside down and sew in the remaining triangle felt piece. This forms the base of the cake slice. Leave one edge unseen so you can fill the slice with stuffing, then close it all up using buttonhole stitch.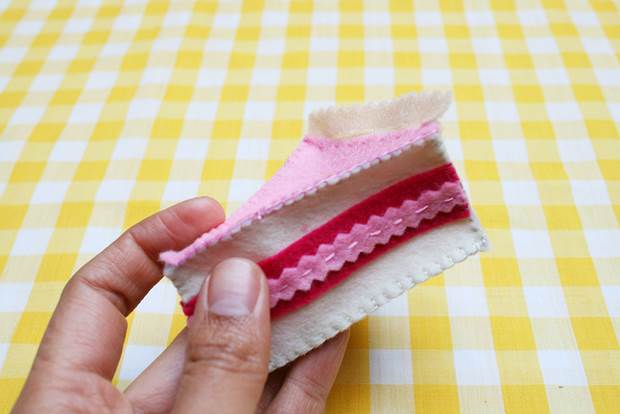
And you're done!


.jpg&q=80&w=316&c=1&s=1)


