
frankie exclusive diy: fringed cushion cover
Learn how to craft your own fringing and stitch up a plush velvet cushion.
Need a pop of colour to help zhuzh up your lounge room? This cushion cover is a little bit '70s and a whole heap cosy. Try whipping one up using the how-to below. 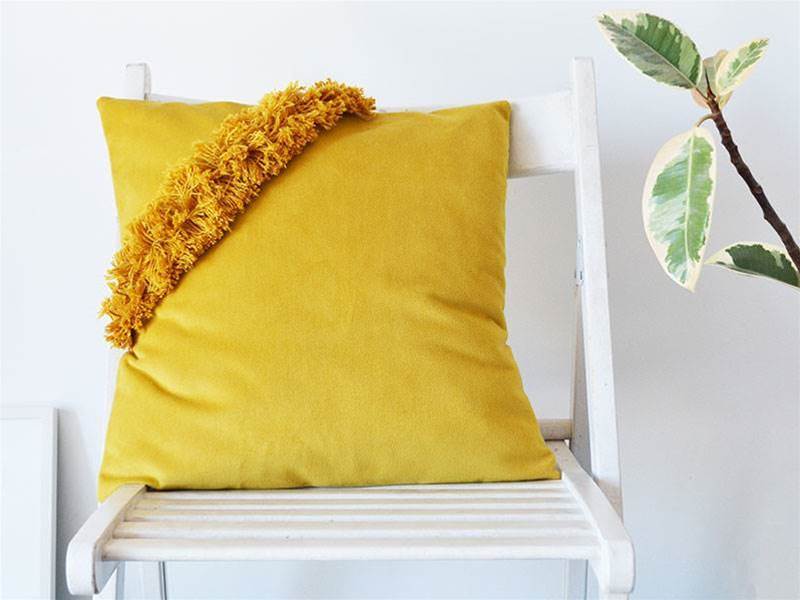
MATERIALS
- 42cm (h) x 100cm (w) fabric (I’ve used upholstery velvet but pretty much any non-stretchy fabric will work.)
- 1 ball of Lightweight yarn (non-stretchy) in a colour to match (or contrast) your fabric
- Piece of stiff card at least 22cm x 7cm. Make sure the card is REALLY stiff, so it won’t buckle as you wrap it with yarn
- Scalpel or craft knife
- Cutting board
- 40cm (h) x 40cm (w) cushion pad
- Thread to match your fabric (and your yarn if they are different colours)
- Sewing machine
- Basic sewing kit
METHOD
1. From your fabric cut: one piece that is 42cm x 42cm and two pieces that are 42cm (h) x 28cm (w). 2. Cut your card to 22cm x 7cm. Measure and draw a line 2cm in from each of the longer sides. Measure and draw a line 5cm in from each of the shorter sides. You will now have a rectangle drawn on your card, cut this out using a craft knife/scalpel.
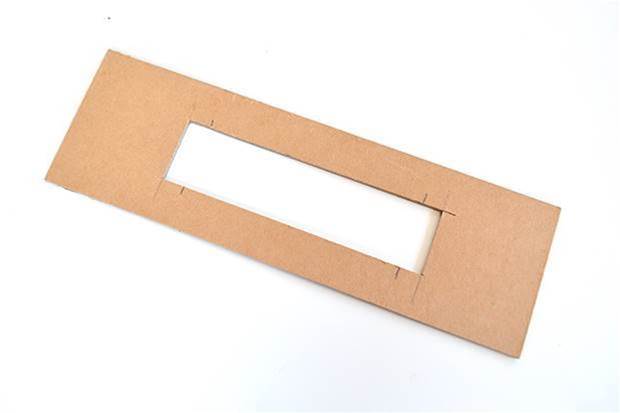
3. Take your yarn and begin wrapping around the narrow width of your card, starting about 1cm in from the end of the rectangular hole that you cut away, and ending about 1cm from the other end. I wrapped a couple of layers of yarn. If you want to make a really fluffy fringe, wrap your yarn a bit more thickly. For a lighter fringe. wrap fewer layers. 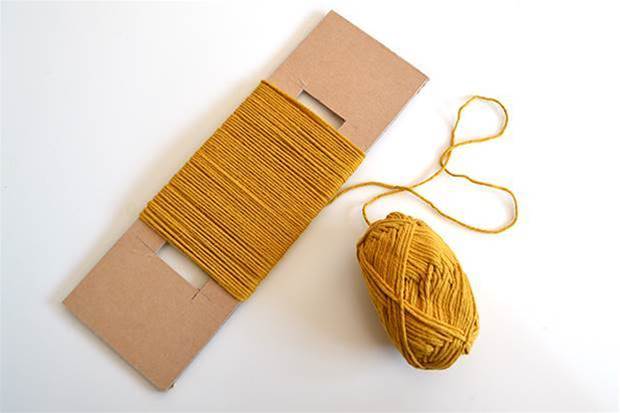 4. Sew along the middle of your wrapped yarn, over-sewing at both ends.
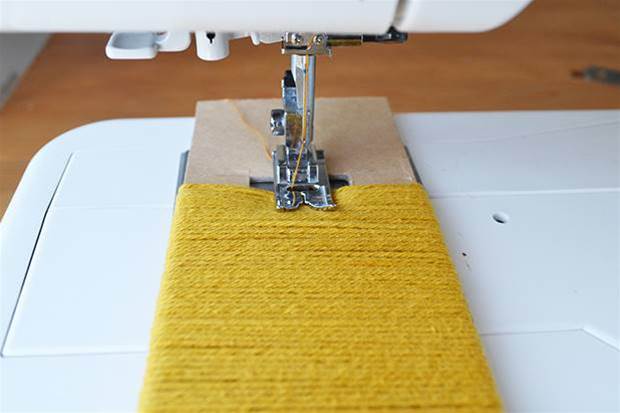 5. Once your fringe is stitched together, slide your scissors between the card and yarn and snip along both sides to remove your fringe from the card.
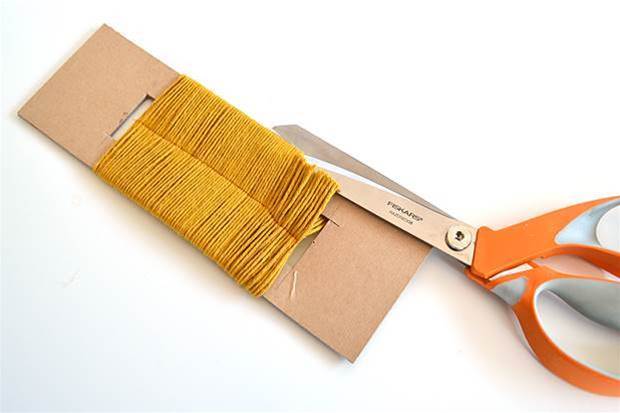 6. Lay out the square fabric panel, face-up. In the top left hand corner, mark a point 26cm along the top edge and another mark 26cm down the left hand side. Draw a line in tailors chalk, joining the two lines.
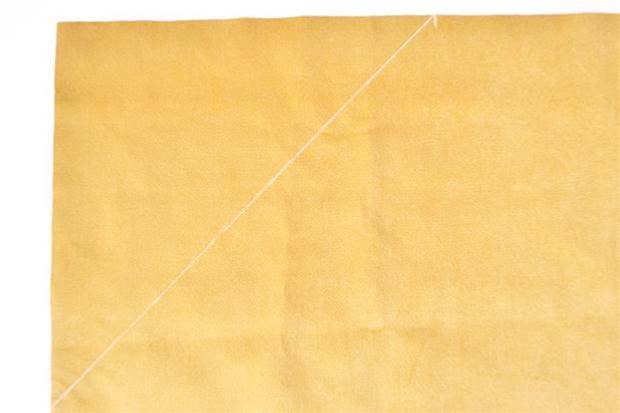
7. Lay the fringe you’ve made on top, so that the stitching along its centre runs along the line you marked across a corner of the panel, starting and finishing 1cm in from the fabric’s edge. Go back to your piece of card and make more lengths of fringe until you have enough to cover the line you marked (leaving 1cm empty at each end of the line).
Pin your fringe in place along its stitched centre. Machine sew your trim in place, trying to keep your stitching as close as possible to the stitching along the centre of your trim. Set this front panel aside for now while we prepare the back of the cushion.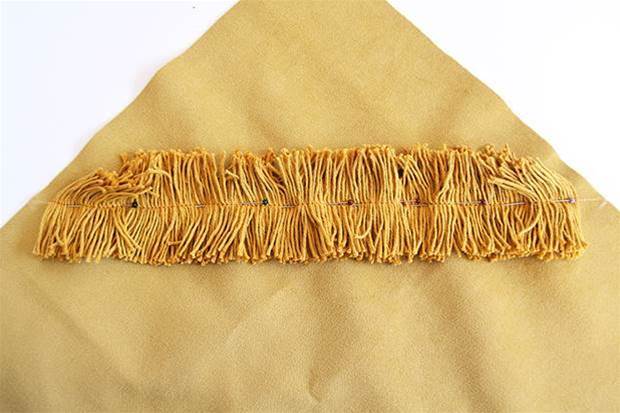 8. Lay out your two remaining fabric pieces, face down. On each of your pieces, fold one of the 42cm edges over by 1cm twice and pin to hold. Now sew along the edges you pinned to form a hem.
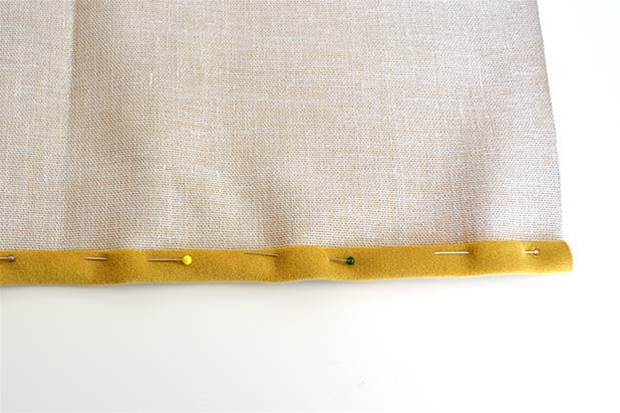 9. Lay out your front panel (with the fringe to the top left) face up. Tuck in any bits of your fringe that overlap the edges. Take one of your back pieces and lay it face-down on top of the front panel so that its hemmed edge is towards the centre, and the opposite raw edge lines up with the left raw edge of your front panel.
Lay the other back piece on top, again with the hemmed edge towards the middle, and with the opposite raw edge lining up with the right hand edge of the front panel. Pin all the way around the edges of your cushion cover. 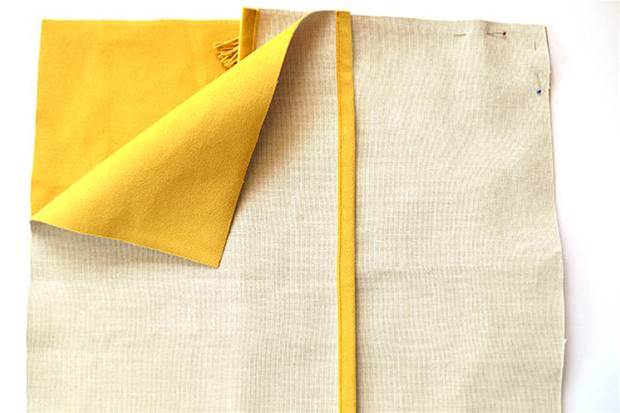 10. Sew all the way around your cushion cover, with a 1cm seam. Trim across the corners of the seams and then zigzag stitch all the way around the seam allowance. Turn your cover right way out through the overlapping gap in the back and poke out the corners.
 11. If you want to make your fringe super-fluffy, use a fine toothed comb to brush it (bit by bit and holding it down at the centre so you don’t pull the threads of yarn out) – this takes a while.
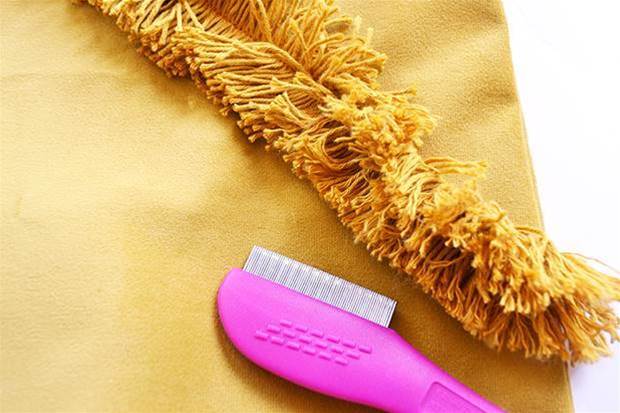 12. Push your cushion pad inside the cover through the overlapping gap on the back and cosy up with your new cushion!
 Anna is a freelance craft writer, designer, maker and mother based in East London. Anna’s latest craft book (out now with Quadrille Publishing) is all about one of her favourite things to sew – bags!


.jpg&q=80&w=316&c=1&s=1)


