
frankie exclusive diy: scratchie cards
Add this to your, 'Why didn't I think of that?' pile of DIY projects, because all the supplies you will need can be found around your house! Who knew?
Our love of scratchies started way back in childhood. As kids, we would beg our parents to let us borrow a coin so we would scratch away to our little hearts' content until the teeny pictures underneath had been unearthed. (And we had successfully managed to get tiny flecks of silver pretty much all over everything in a one metre radius. Including ourselves.)
Obviously, we are older and much more mature now, but there is still something so satisfying about clearing away every little bit of silver from a scratch-off ticket. So imagine our excitement when we discovered how easy it can be to whip up some scratchie fun in a matter of minutes.
Add this to your, 'Why didn't I think of that?' pile of DIY projects, because all the supplies you will need can be found around your house! Who knew?
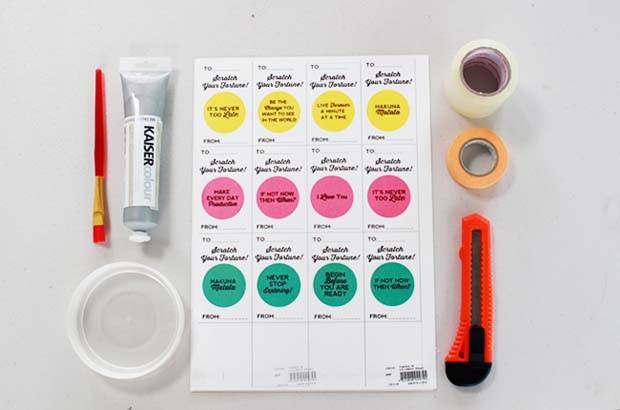
MATERIALS
Acrylic paint of any colour
Liquid washing detergent
Clear packing tape
Masking tape/paper tape
Card to print on
INSTRUCTIONS
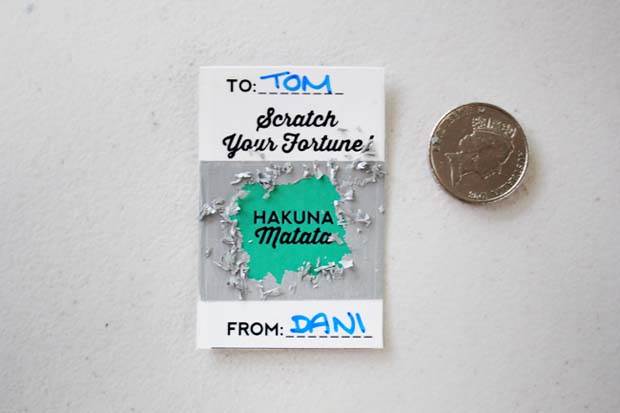
1. Prepare some cards with messages to hide. In this example we made some business-card-sized templates addressed to a friend, with encouraging messages to uncover. Use slightly glossy card stock for the best results.
2. Prepare your mixture. Mix together two parts acrylic paint for every one part dish washing detergent. Mix slowly until well combined. Don’t stir too vigorously or else you will get lots of air bubbles, and we don’t want that.
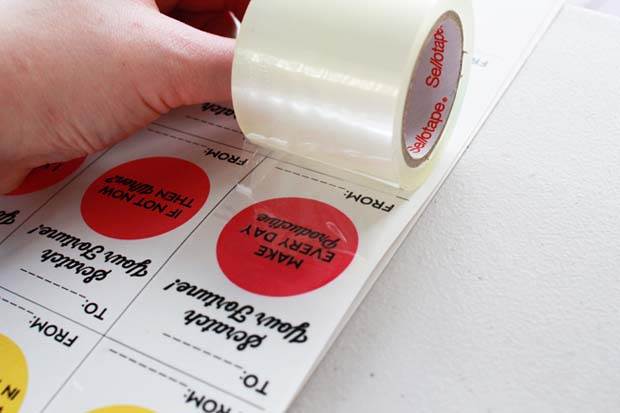
3. Lay down a layer of clear packing tape over the area you are going to cover, smoothing as you go to get rid of any air bubbles. If you want to cover a larger area, you can use clear contact instead.

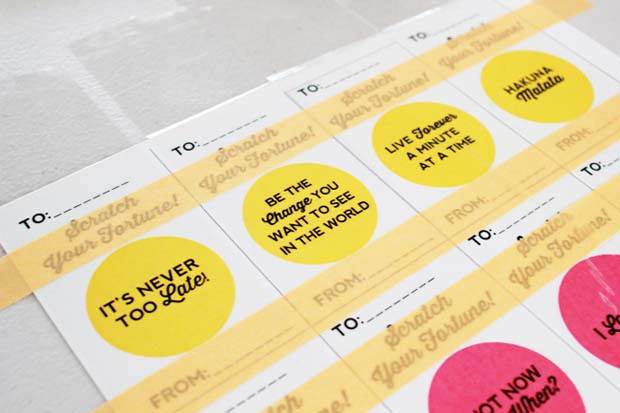
4. Using masking tape, mark off what you don't want painted over. If you have a steady hand you could skip this step but this method will give you lovely clean lines in your end result.
5. Paint over your message using thin, even layers. Allow to dry in between coats and keep adding thin coats until the message is completely covered.
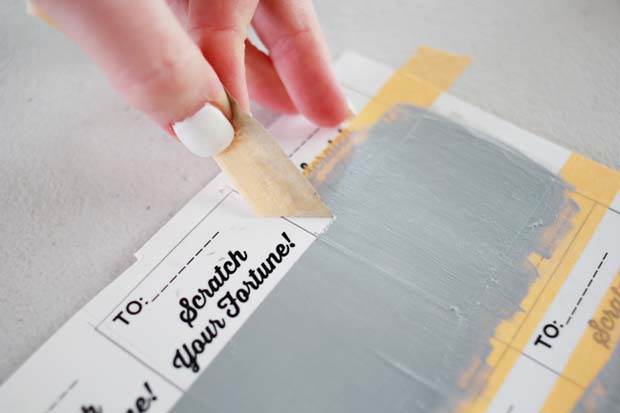
6. Once the paint is thoroughly dry, gently peel off the masking tape. Take it slow to avoid tearing the paint.
7. Cut out your cards and give them out to your friends!
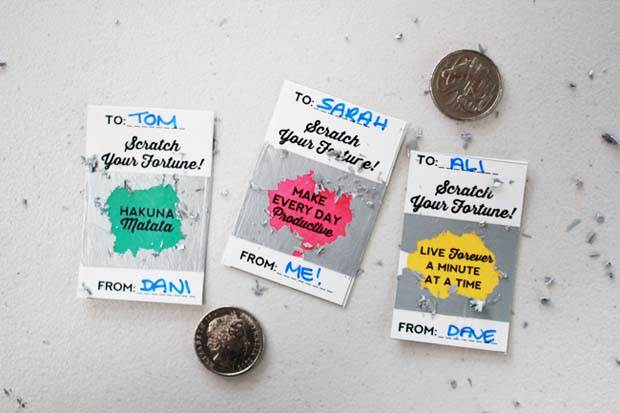
There are so many ways you can use this method: birthday cards, Valentine's, invitations, even trivia cards with the answers covered up!
Enjoy!


.jpg&q=80&w=316&c=1&s=1)


