
frankie exclusive diy: colourful countdown advent calendar
If 24 of these cheery treat boxes don't make your mantlepiece merry and bright this festive season, we'll eat our Santa hats.
If 24 of these cheery treat boxes don't make your mantlepiece merry and bright this festive season, we'll eat our Santa hats! And with tiny trinkets sealed inside each of these paper-crafted prisms, you'll feel like it's Christmas every day this month. Sounds good to us!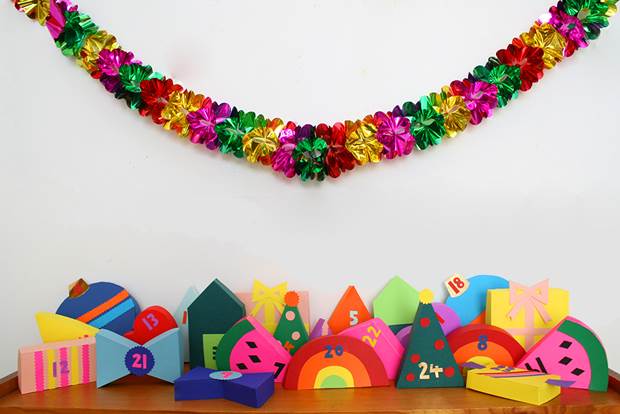
MATERIALS:
assorted coloured card
ruler
double-sided tape
glue
pencil
cutting knife
confetti
advent trinkets
INSTRUCTIONS:
We'll show you the techniques to make one box and then you can use these techniques to construct the other ones!
For the bon bon:
1. Cut the following pieces from coloured card:
- 2 identical rectangles approximately 6 x 8cm in size. These will form the front and back panels of the box.
- A long strip approximately 3cm in width which will form the side panel of the box. (The length of this strip will vary according to the shape of your box.)
- 3 strips of card in different colours and some "bon bon ends" to decorate the top panel of the box.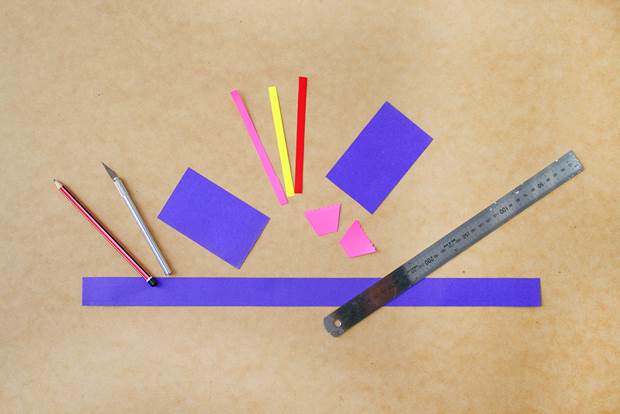
2. Decorate one rectangular panel with the coloured strips and bon bon ends. It should look like a festive lolly. This will form the top panel of your box.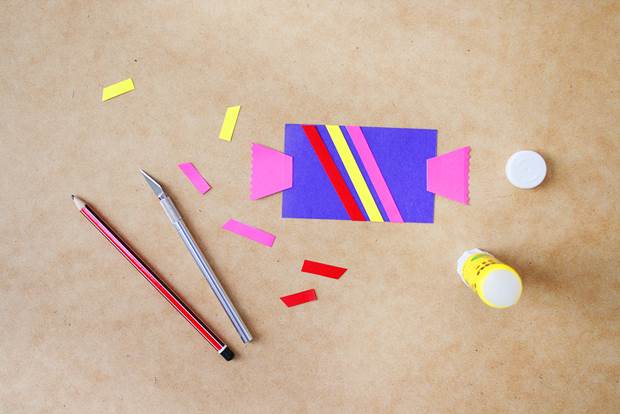
3. Use a ruler and cutting knife to lightly score a line along each long edge of the side panel strip. The score lines should be approximately 0.5cm from each edge.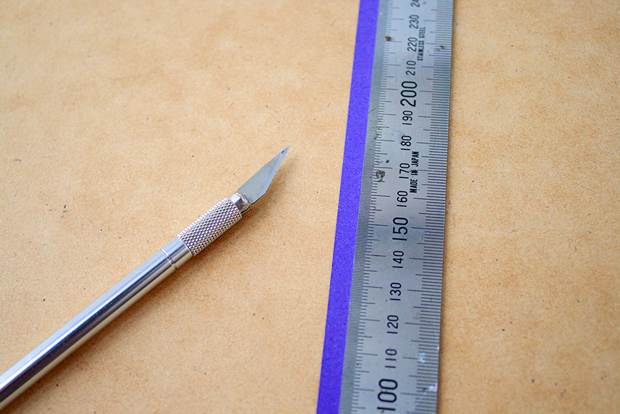
4. Make a 0.5cm fold at one of the short ends of the side panel strip. Make 2 cuts on each side where this fold meets your score lines. Fold along the score lines to create tabs.
5. Affix double-sided tape around the edges of the bottom box panel. Stick the side panel tabs to the bottom panel. Whenever you get to a corner, make a light score line on the side panel and a cut on each side. This will allow the side panel to fold neatly around each corner.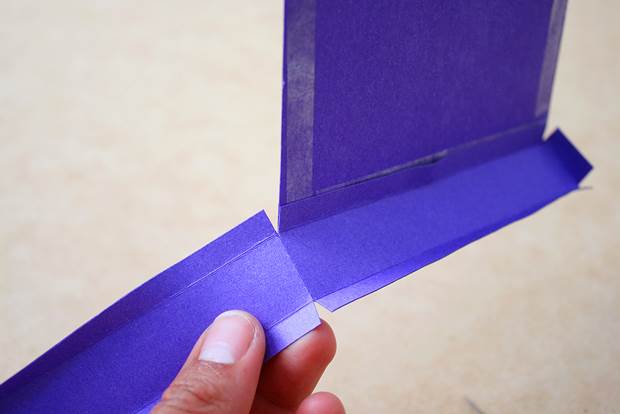
6. Fill the box with confetti and trinkets (the fun bit!)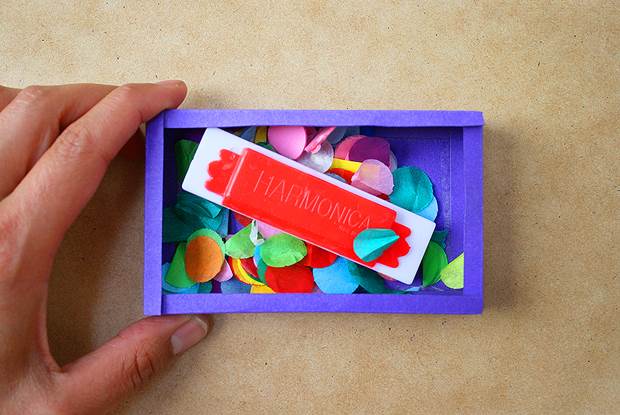
7. Stick double-sided tape around the back edge of the top panel and affix it on top of the box, sealing it shut. Cut a calendar number from cardboard and glue it to the top. Your trinket box is complete!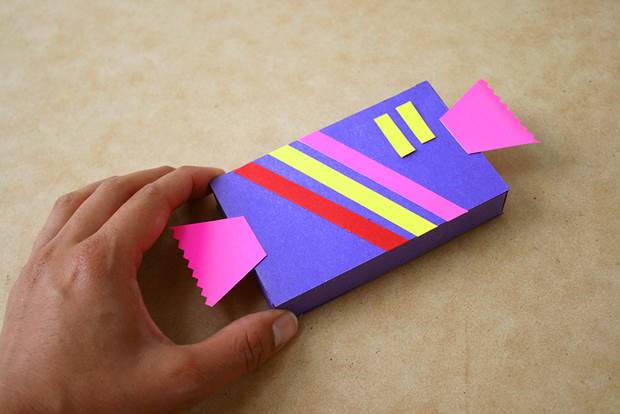
Hot tips for other box shapes:
8. The boxes can be any in form your heart desires, but we recommend sticking to simple shapes, as they're easier to construct. Plain shapes like rectangles, squares and diamonds work really well, and can be embellished with cardboard to turn them into different things like presents and gems.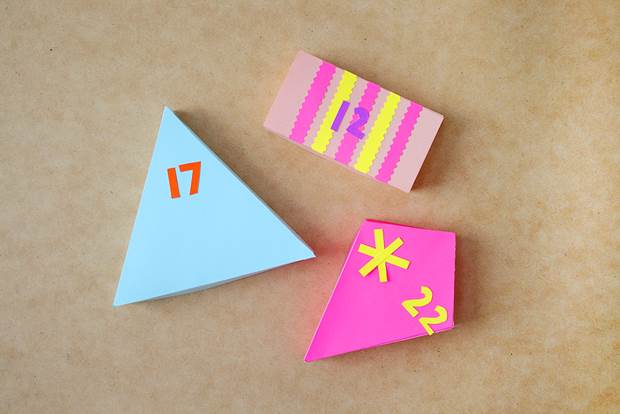
9. Triangles can turn into all sorts of different things, like Christmas trees or slices of watermelon (if you add a curved edge).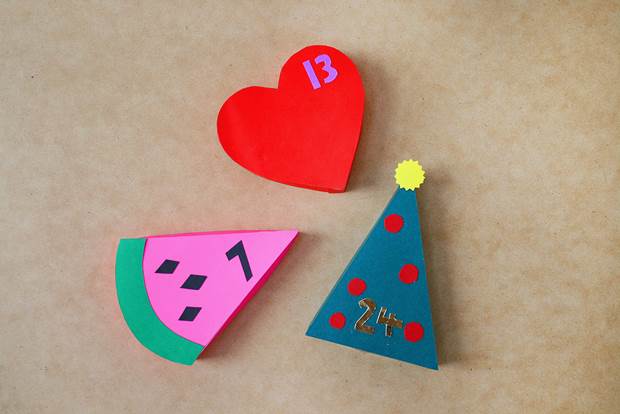
10. Turning shapes with curved edges into boxes is easy! All you need to do is make little snips all the way along the tabs on the side panel strip so that the strip bends neatly to the curve of each shape.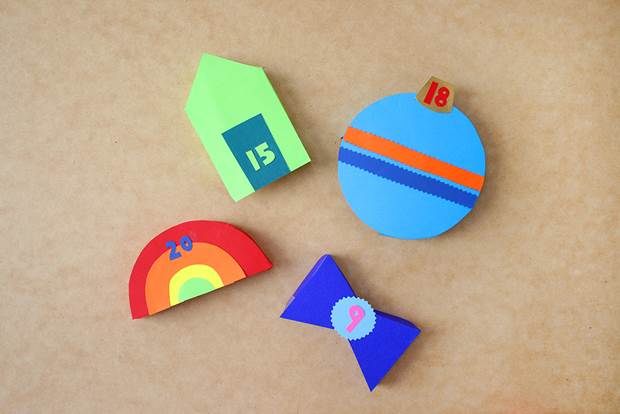


.jpg&q=80&w=316&c=1&s=1)


