
frankie fodder: diy croissants
We show you how to make your very own buttery, crumbly croissants from scratch – oui, oui!
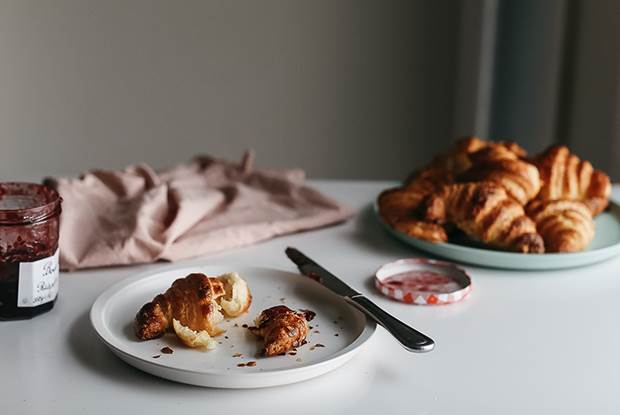
Croissants and coffee are what Saturday mornings were made for. What if I told you that you could make a batch of croissants from scratch, and that they’d be waiting for you when you wake up next weekend? Sure, it’s a two-day process, but it’s mainly a lot of resting and waiting, in between some gentle rolling and folding – which is basically the perfect weekend. Oui, oui!

INGREDIENTS:
For the dough
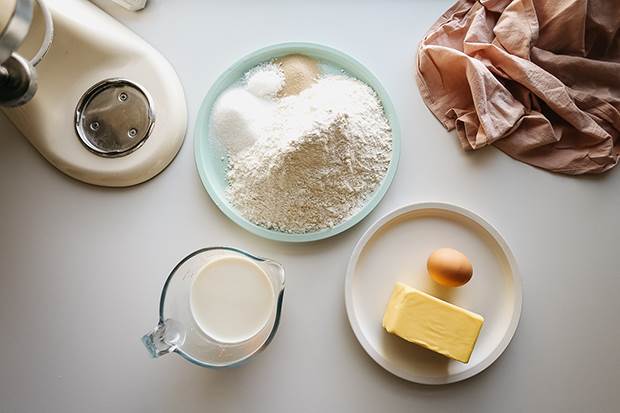
500g plain flour
10g yeast
50g caster sugar
12g sea salt
300ml milk
For the butter block
250g unsalted butter
To assemble
1 large egg, beaten
small amount of flour for dusting
INSTRUCTIONS:
Making your dough
1. Place the flour, sugar, yeast and salt in the bowl of an electric mixer with the dough hook attached.
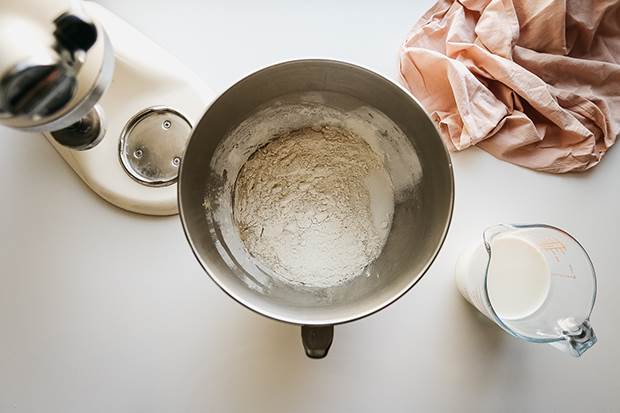
2. With the mixer on low, gradually pour in the milk, and continue mixing until a dough forms.
3. Increase the speed to medium and allow the dough to knead for about 10 minutes or until the dough is smooth and silky. Allow the dough to prove until it has doubled in size (which will take about two hours).

The butter block
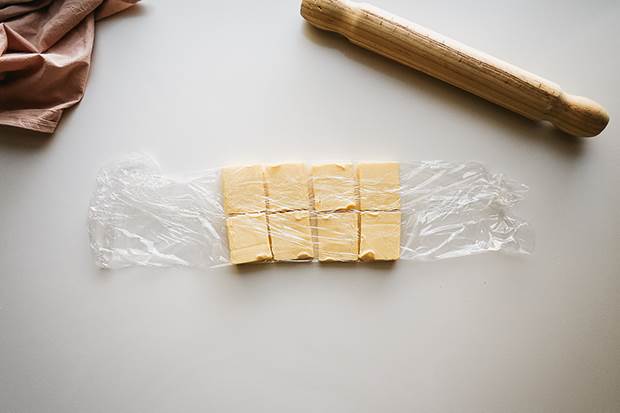
4. While you’re waiting for your dough to prove, make the butter block by slicing the butter into eight even portions. Line them up on cling wrap to create a 10cm x 20cm rectangle.
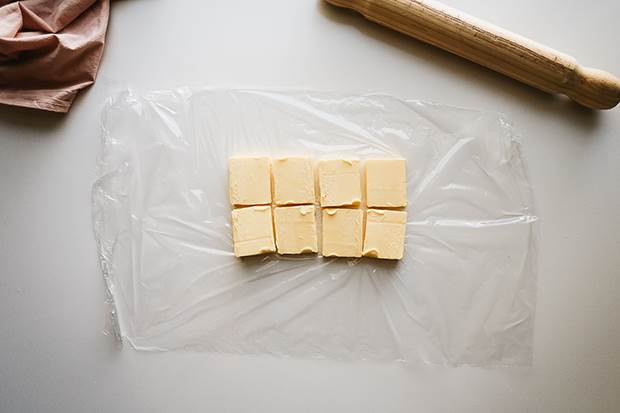
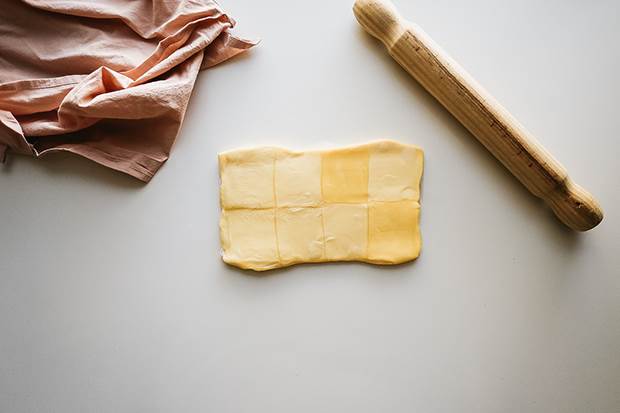
5. Enclose the butter in cling wrap, then use a rolling pin to press and smooth the butter and join its edges, while slightly increasing its size. Refrigerate for at least an hour.
Rolling your dough
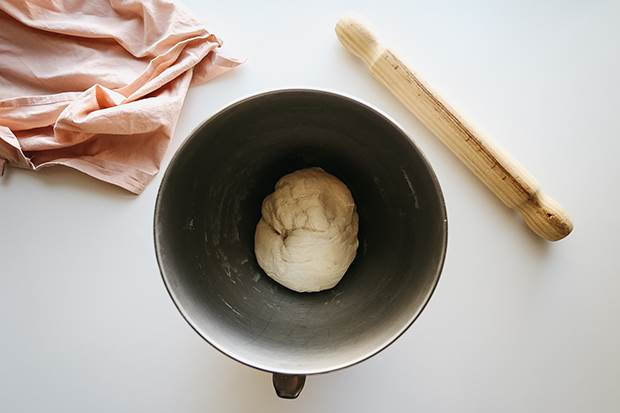
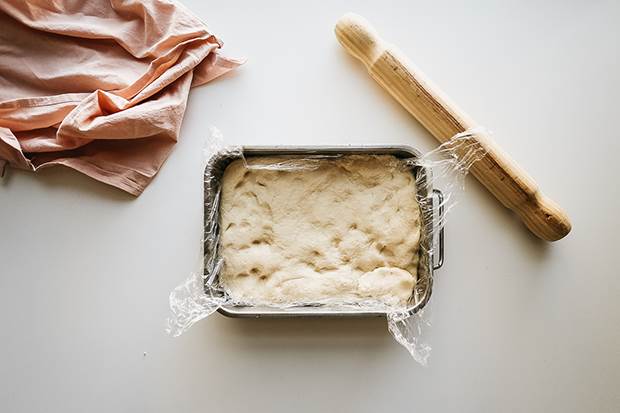
6. Punch down the proved dough and place it in a baking dish. Refrigerate for at least an hour.
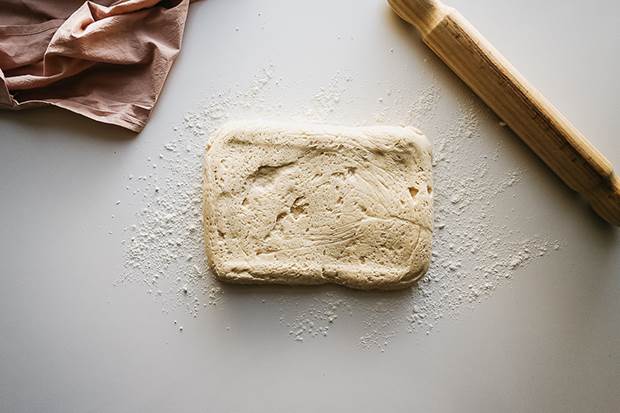
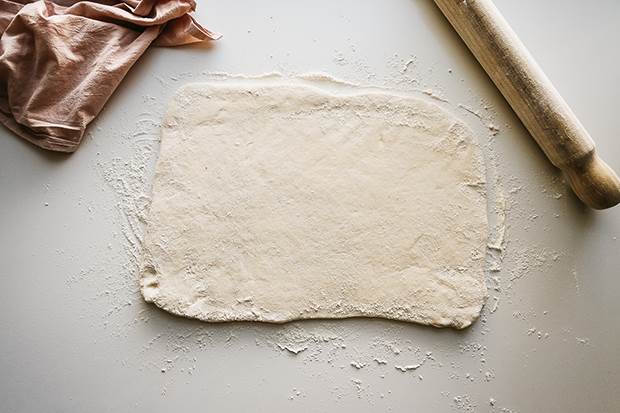
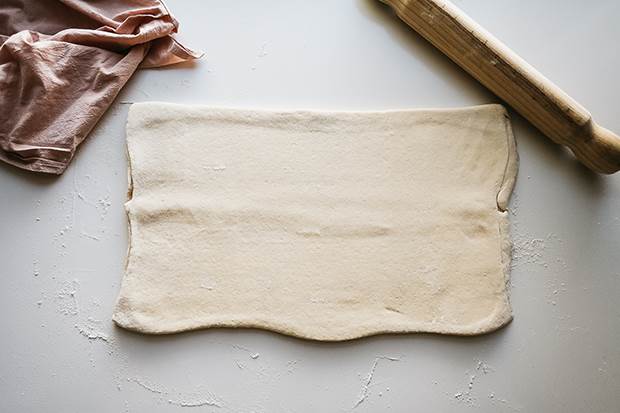
7. Once the dough is cool, lightly dust the bench with plain flour and roll it out to create a 20cm x 40cm rectangle, continuing to dust with flour underneath the dough if needed.
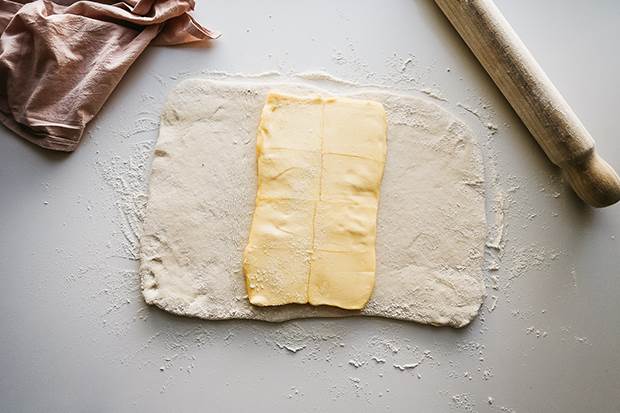
8. Place the chilled butter block on the centre of the dough rectangle, then bring the short edges of the dough to the centre. Seal the edge closed by pinching.
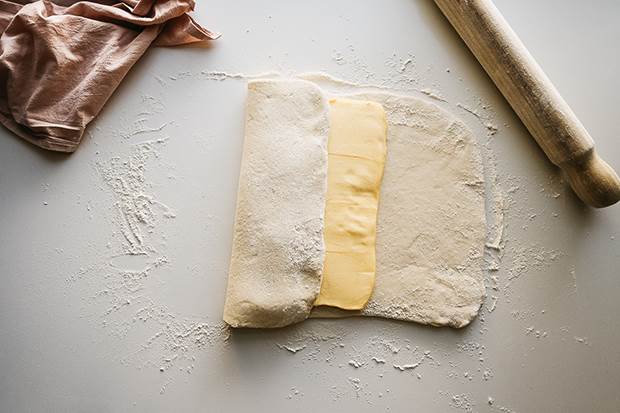

9. With the short edge facing you, roll away from you, lifting the dough and dusting as needed.
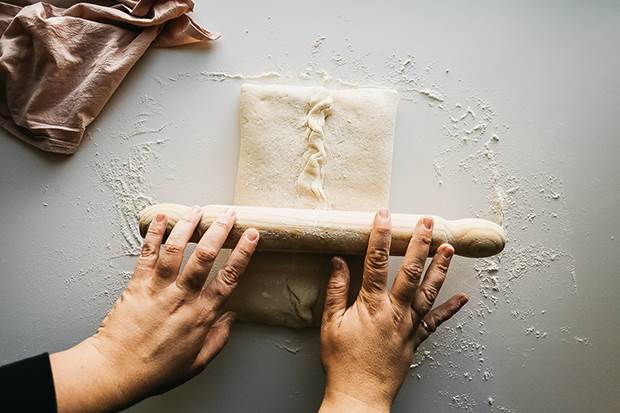
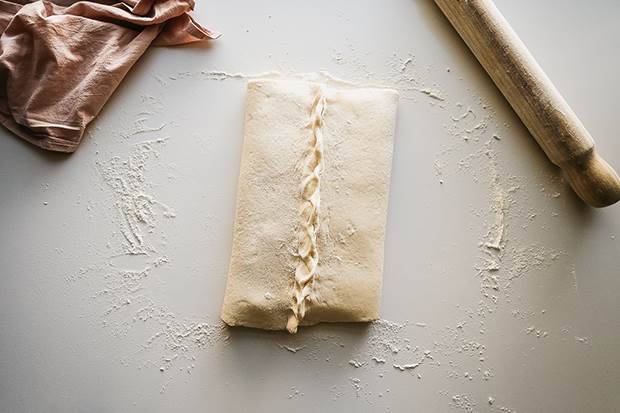
10. Once the rectangle is 20cm x 40cm, make the first fold by folding one third over the centre third, then the remaining third to encase the fold, as you would a letter.

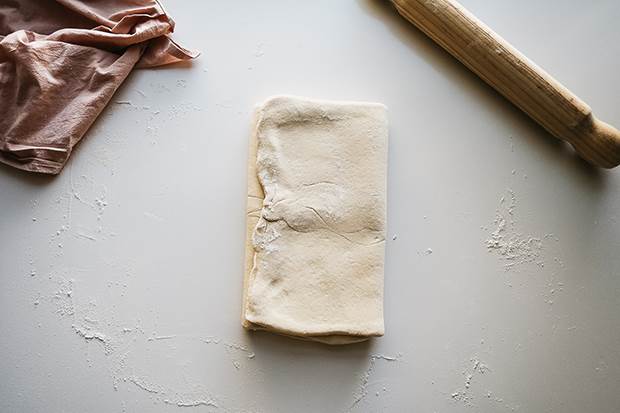
11. Cling wrap and chill for at least an hour, then repeat the previous step two more times. After the third and final round, you can refrigerate overnight or chill for two hours to ensure the butter is cold enough for shaping.
Shaping your dough
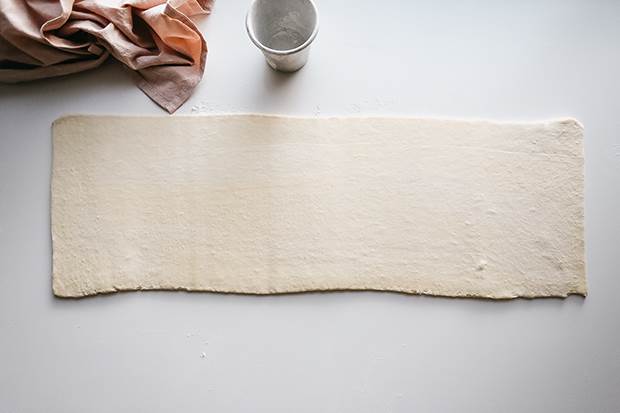
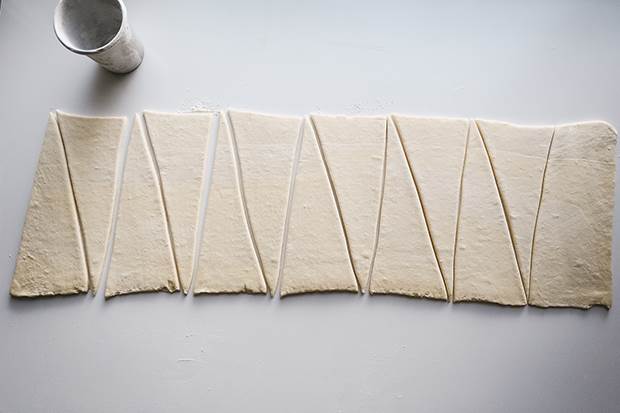
12. Roll out the chilled dough to a 20cm x 60cm rectangle. This might take some effort and constant readjustment, as the dough retracts – but be patient. Trim the short edges.
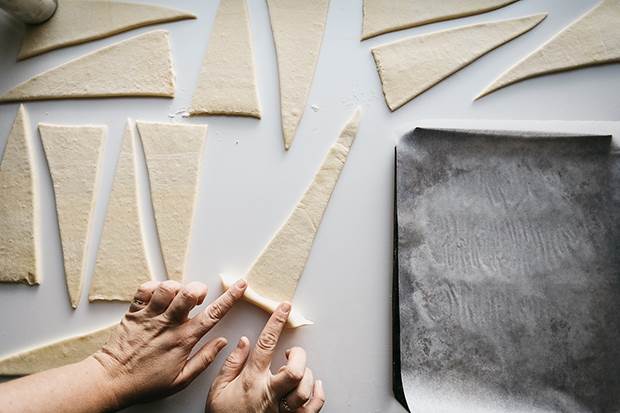
13. Cut the rectangle into 12 triangles, each with a 10cm base. Make a 3cm cut in the middle of the base of each triangle, then stretch the centre of the triangle to increase the length to 25cm.
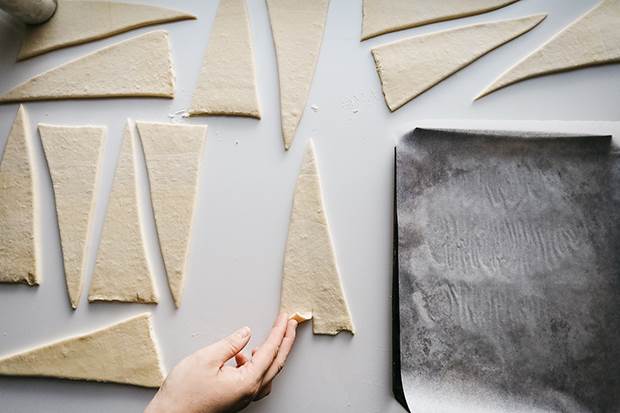
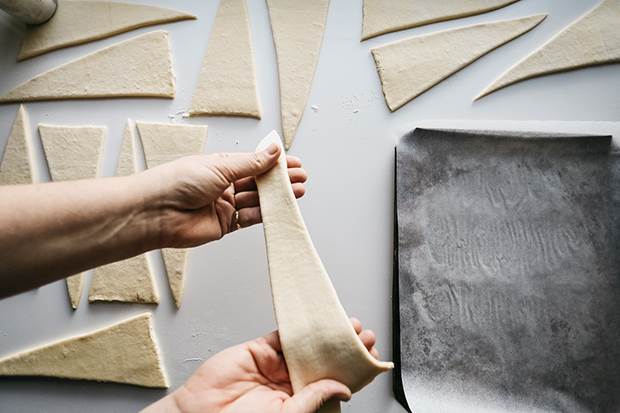
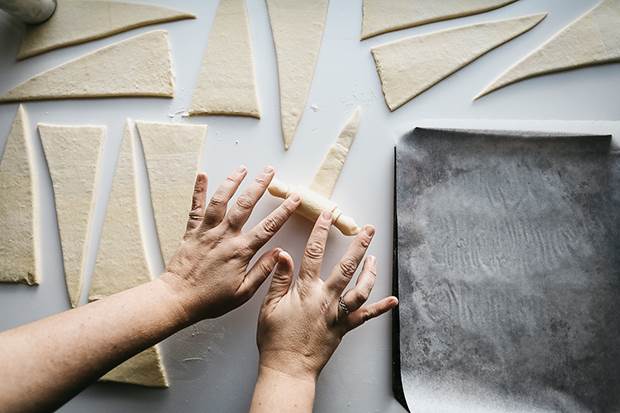
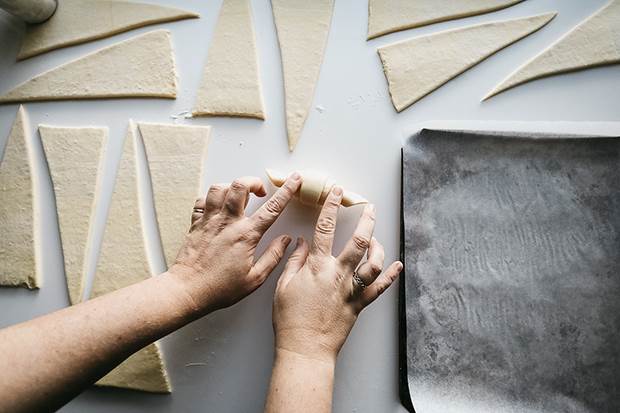
14. Starting from the base, roll the triangle to form a crescent. Place on lined baking tray.
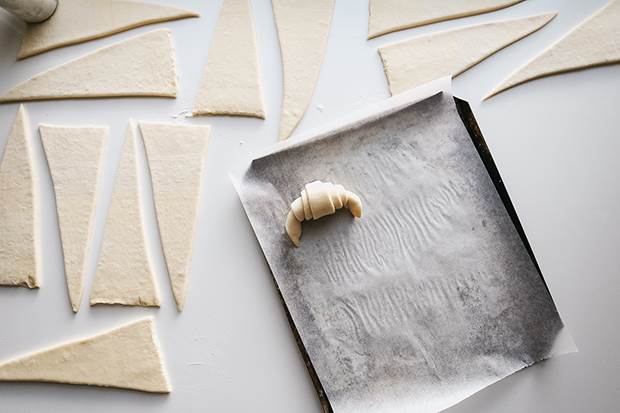
15. Allow croissants to prove for two hours, or until jiggly and puffy. Brush with beaten egg and bake for 20 to 25 minutes in a 190 degree Celsius oven. Allow to cool slightly before eating.
NOTES:
- Croissants are not for the faint hearted, especially in summer! Ideally, you are best making croissants on very cool days, no more than say 20 degrees. If you insist, you can chill your dough for longer between folds, or even stop halfway to refrigerate.
- You could complete up to step 15 the night before you’d like your croissants, then bake them when you wake. Just let them come to room temperature for 10 minutes or so.
- You can also freeze your shaped croissants at step 15! They will only keep for a few weeks and just need about four hours at room temperature or overnight in the fridge to prove.

To check out more delicious recipes from Erin, pop past her blog, Erin Made This.