
frankie exclusive diy: vellum wall art
Making your own graphic art is easy-peasy.
Painting or drawing something special for your abode can feel pretty intimidating if you’re not super-confident in your art skills. The good news is that you can whip up some eye-pleasing graphic art using this simple but effective technique of layering vellum paper. You might even want to frame your masterpiece by the end of it.
MATERIALS:
For each picture, you will need:
Sheet of heavy white card – A3 or larger (mine were 32cm x 45cm)
Several sheets of vellum paper in a range of colours (I’ve used 3-4 A4 sheets for each picture)
Spray mount
Scissors
Pencil
Paper for sketching (optional)
Compass (optional)
METHOD
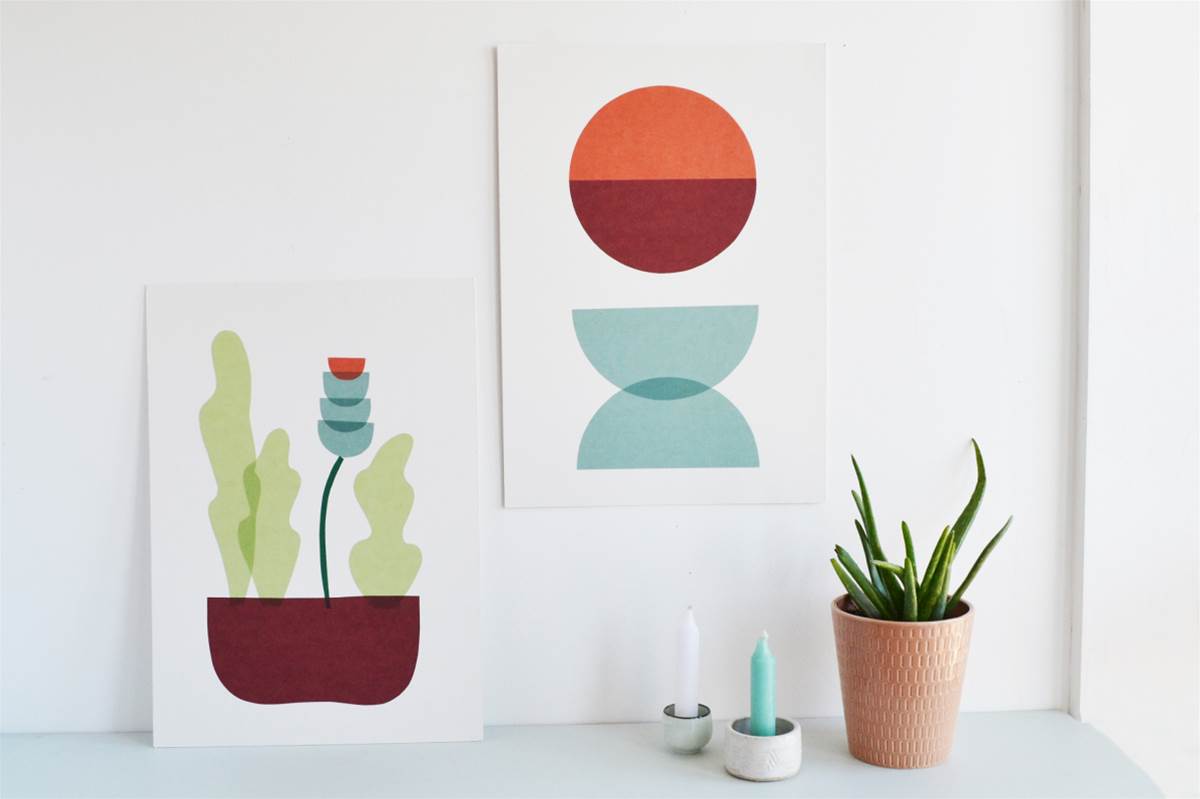
1. First, decide what kind of picture you want to make! I’ve made a really simple geometric design and a more organic plant shape to give you an idea of what you can make with this technique. You can sketch a few options if this helps, or just start cutting out pieces and playing around. You can also focus on using only 3-4 colours like I have, or go for a really busy and colourful look. 2. If you want to copy the geometric design I made, use a compass to draw out four semi-circles with a diameter of 18cm, two in blue and one each in different shades of red. Carefully cut out your semi circles.
For a plant design, cut out a pot shape roughly two thirds the width of your card. Cut some long green leaves in different heights and shapes (you could use different shades of green and different styles of leaf for a busier picture), and cut a long stem and several small semi-circles to make the flower. 3. Whatever your pattern, lay out the pieces and play around with the positioning until you feel happy with what you’ve created. With a geometric pattern like the circles, it’s worth measuring to make sure your shapes are positioned in the middle.
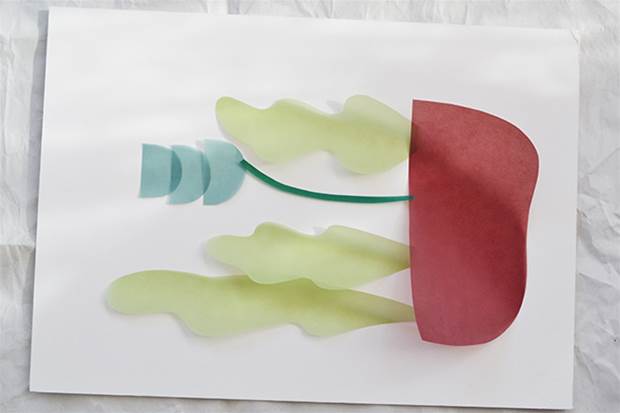 4. Take your first shape off your card and lay it out (face-down if it has a right way up) on a piece of scrap paper or newspaper. Spray it thoroughly with spray mount.
Carefully lift your shape and place it with the sticky side down in position. Make sure you stick your shapes in the right order – for instance, I wanted the bottom of the leaves to be under the top edge of the pot, so I stuck the leaves down first.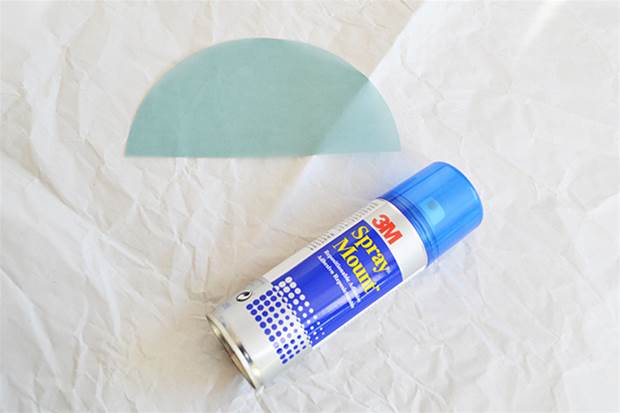 5. Continue with each shape until they are all stuck down and you’re happy with your design.
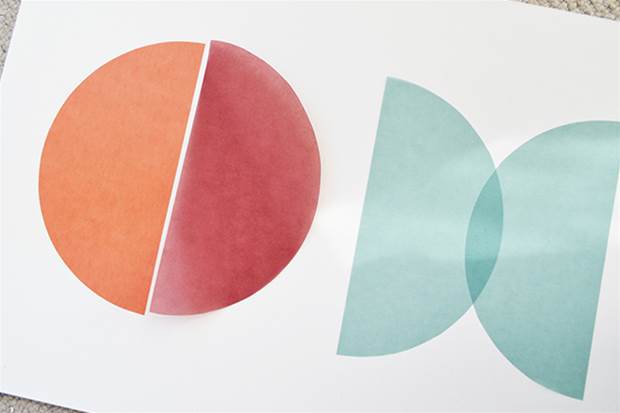 6. I love how the vellum looks when layered (you get darker or different-coloured areas), so try to have some points in your design that overlap. Sit your picture straight on a shelf or pop it in a clip-frame and hang on your wall!
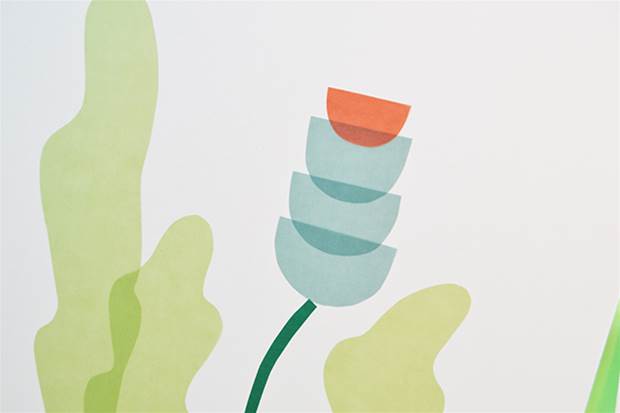
 Anna is a freelance craft writer, designer-maker and mother based in East London. Anna’s latest craft book (out now with Quadrille Publishing) is all about one of her favourite things to sew –‘Bags’!