
frankie exclusive diy: printed wall hanging
Let's hear it for indoor plants! Brightening up our homes and purifying our air, all while looking so darn pretty.
Let's hear it for indoor plants! They're such trusty companions, brightening up our homes and purifying our air, all while looking so darn pretty. We thought it was about time to pay homage to these loyal pals, so we knocked up this leafy printed masterpiece in celebration of their greeny goodness.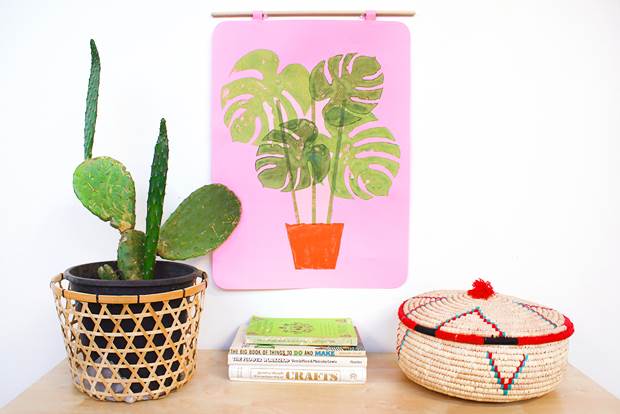
MATERIALS:
1 large piece pink card
2 thin strips pink card, approximately 8cm long
A4 craft foam sheets
3 scrap pieces of wood or MDF in varying sizes
acrylic paint in the following colours: green, black, orange, white
round dowel rod, the same size as the short edge of your card
square dowel rod, approximately 40cm long
foam paint roller
scissors
hot glue gun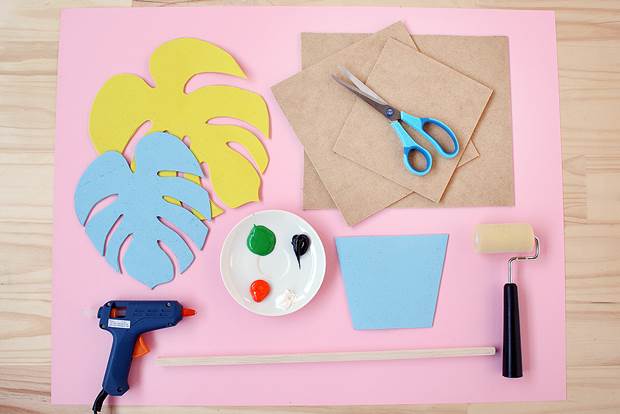
INSTRUCTIONS:
1. To create stamps for printing, cut one planter pot and two different-sized tropical leaves from the craft foam (we used a monstera leaf shape). We made our shapes large enough to comfortably fill the pink card when stamped. Use the hot glue gun to stick each foam shape onto a separate piece of wood.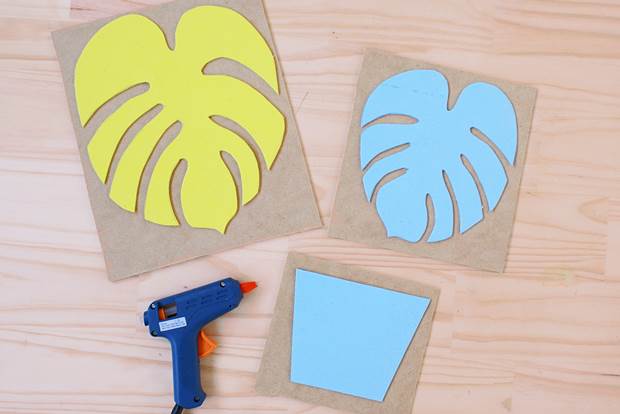
2. Roll some orange paint evenly onto the sponge roller (use a scrap container lid or plate as a palette), then transfer to the pot plant stamp, ensuring that you get an even coverage of paint over the foam.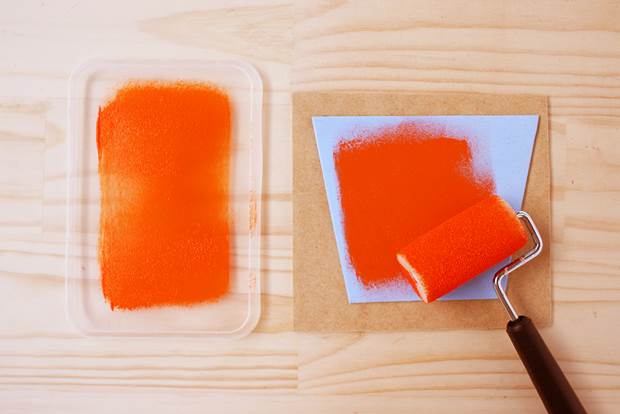
3. Carefully print your pot plant shape onto the bottom part of your pink card, using the palm of your hand in firm circular motions against the back of the stamp board to transfer the paint onto the paper. Don't worry if some of the paint doesn't transfer the first time, you can always re-coat the stamp and print over the top again. Allow this to dry.
4. Coat one side of the square dowel rod with green paint and use it to stamp three stems onto the pink card. Allow this to dry.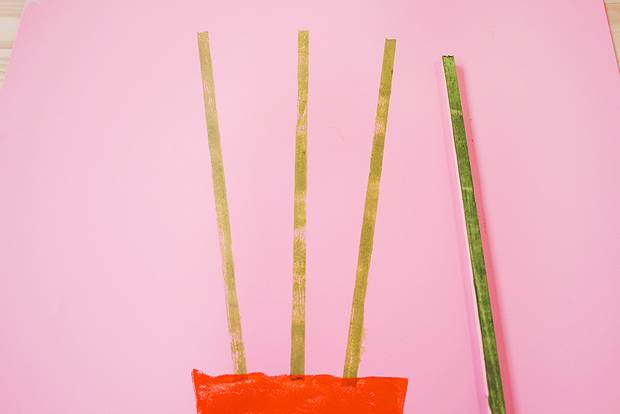
5. Use the white and black paints to mix into the green to form two different shades of green for your leaves. Coat one of the leaf stamps in paint and use the same stamping technique from step 3 to print two leaves onto the pink card, in any position you like. Allow this to dry, then coat the remaining leaf in a different shade of green and print two more leaves.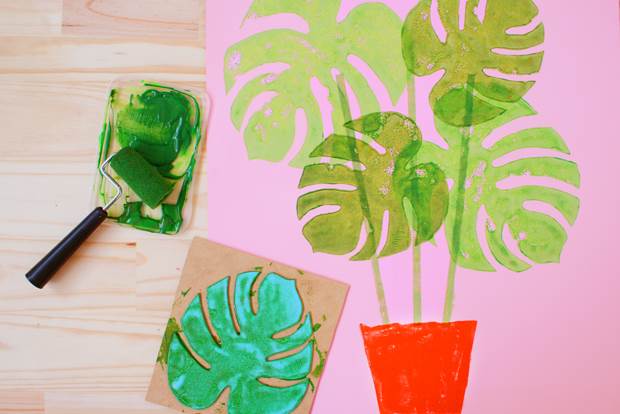
6. Use the hot glue gun to stick the short edges of each pink card strip together to form loops. Glue each loop onto the back of your print, approximately 10cm in from each end, along the top edge.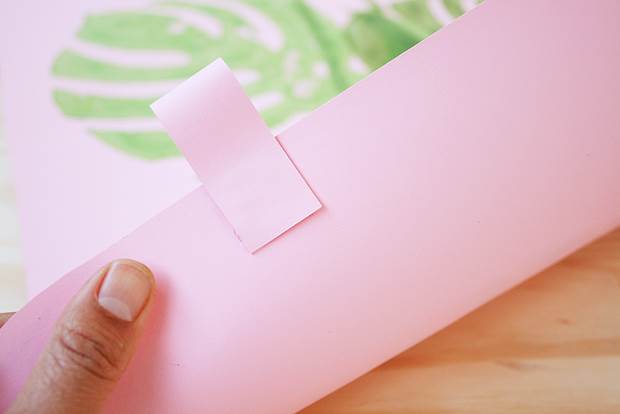
7. Insert the round dowel rod into the paper loops to form a hanger for your print. Hang your masterpiece somewhere special, and enjoy!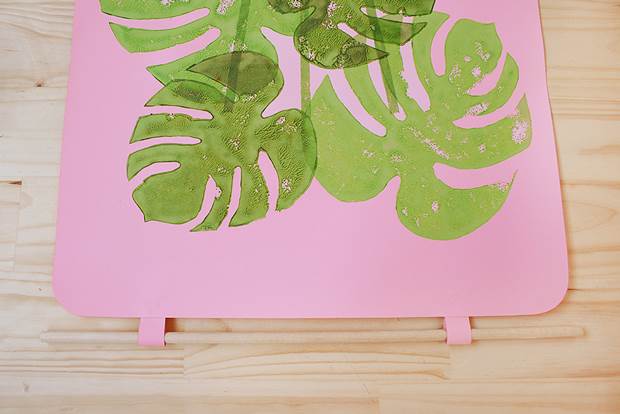
To see more of Kitiya's projects and bits and bobs, head here. 