
frankie exclusive diy: paper lipstick gift box
Singapore paper artist Cheryl Teo shows us how to make this DIY giant paper lipstick.
Got a bridesmaids’ party coming up? Or a girlfriend in need of a pick-me-up? Then why not surprise them with a few of their favourite things inside this hilarious treat box? Alternatively, you can choose to keep it for yourself. We promise not to tell! 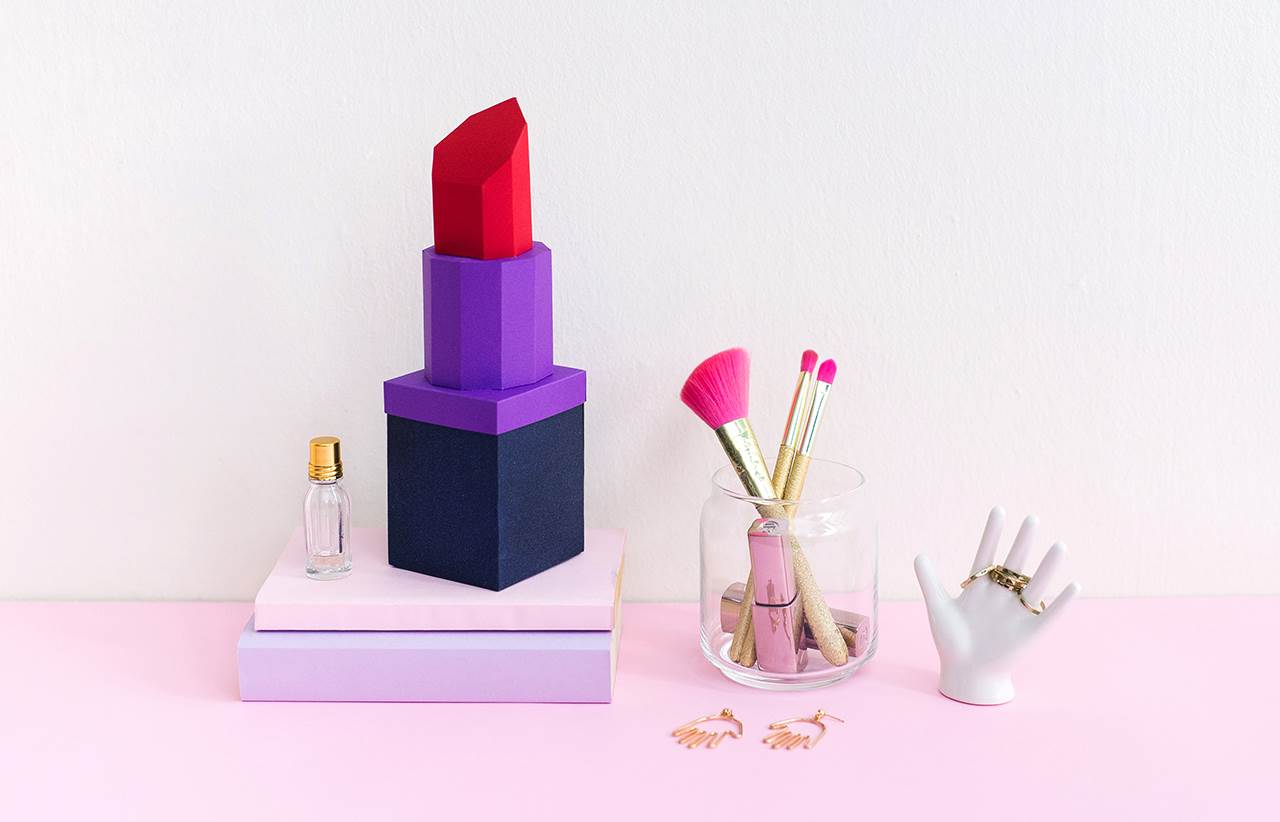 MATERIALS:
medium weight paper (160 – 180 gsm)
scissors
craft knife for scoring
fast-drying adhesive
toothpicks to thin out glue
ruler
cutting mat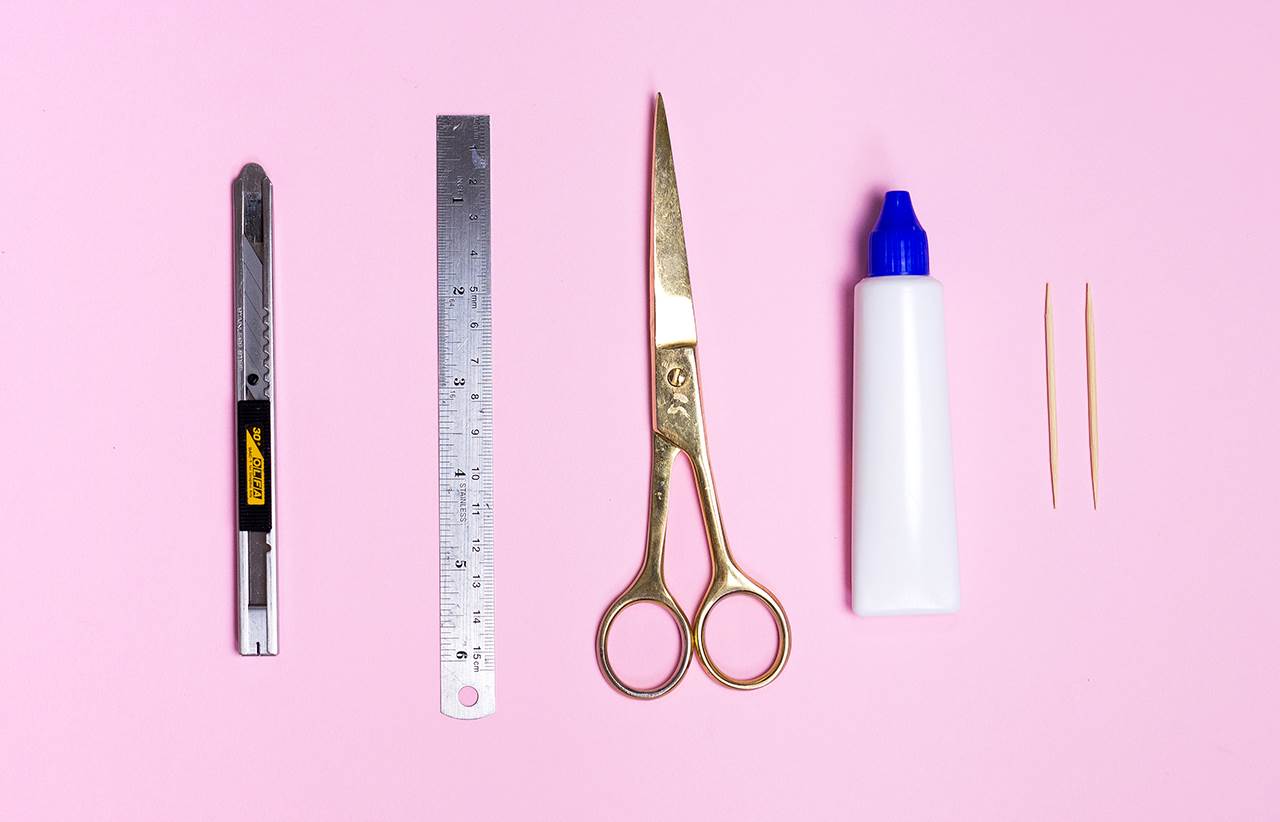 INSTRUCTIONS:
1. Print out all three templates in this PDF and cut out the solid lines only. You can use either a scissors or craft knife to cut. (The dotted lines are meant for scoring.)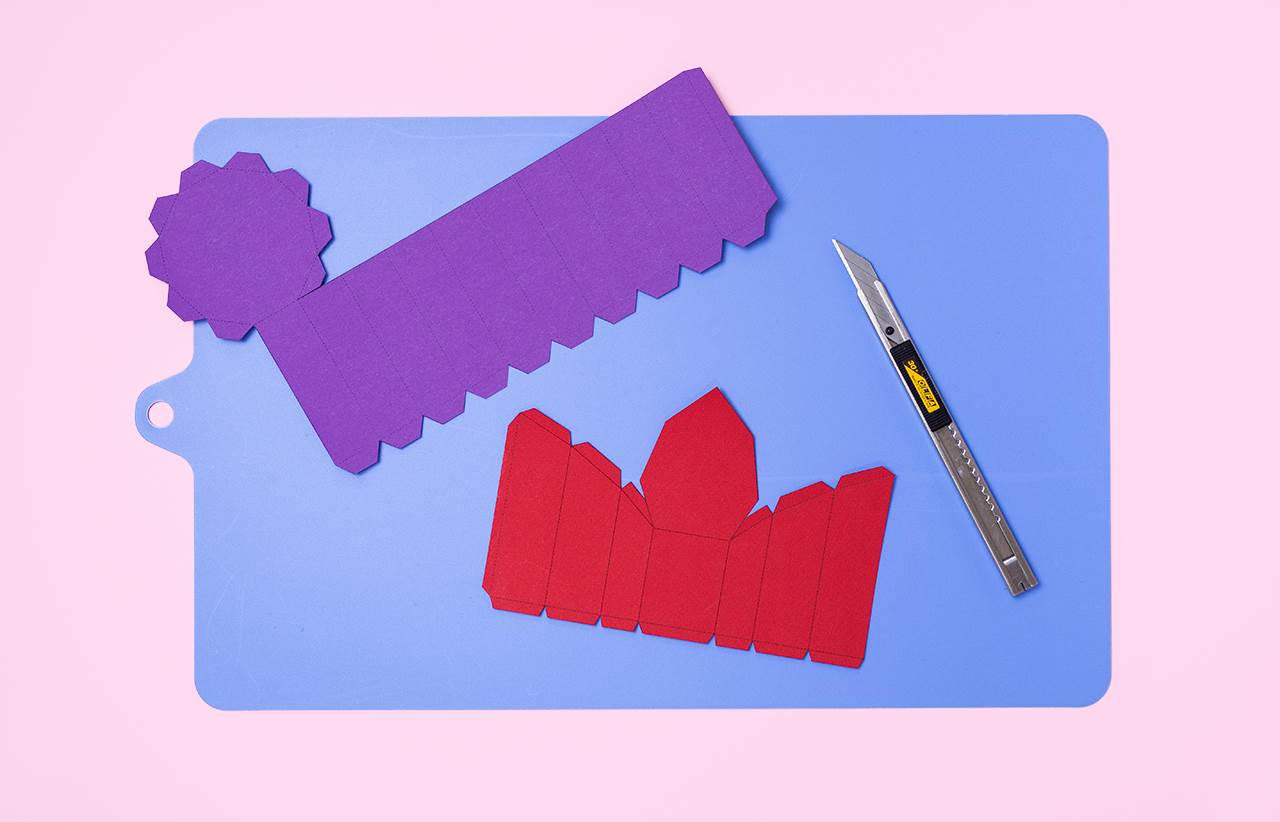 2. Score all dotted lines using the back of your craft knife. Hold your ruler firmly in place with one hand and run the blunt side of your craft knife along the dotted lines, dragging it down gently and creating a crease. It’s necessary to score your lines before folding them.
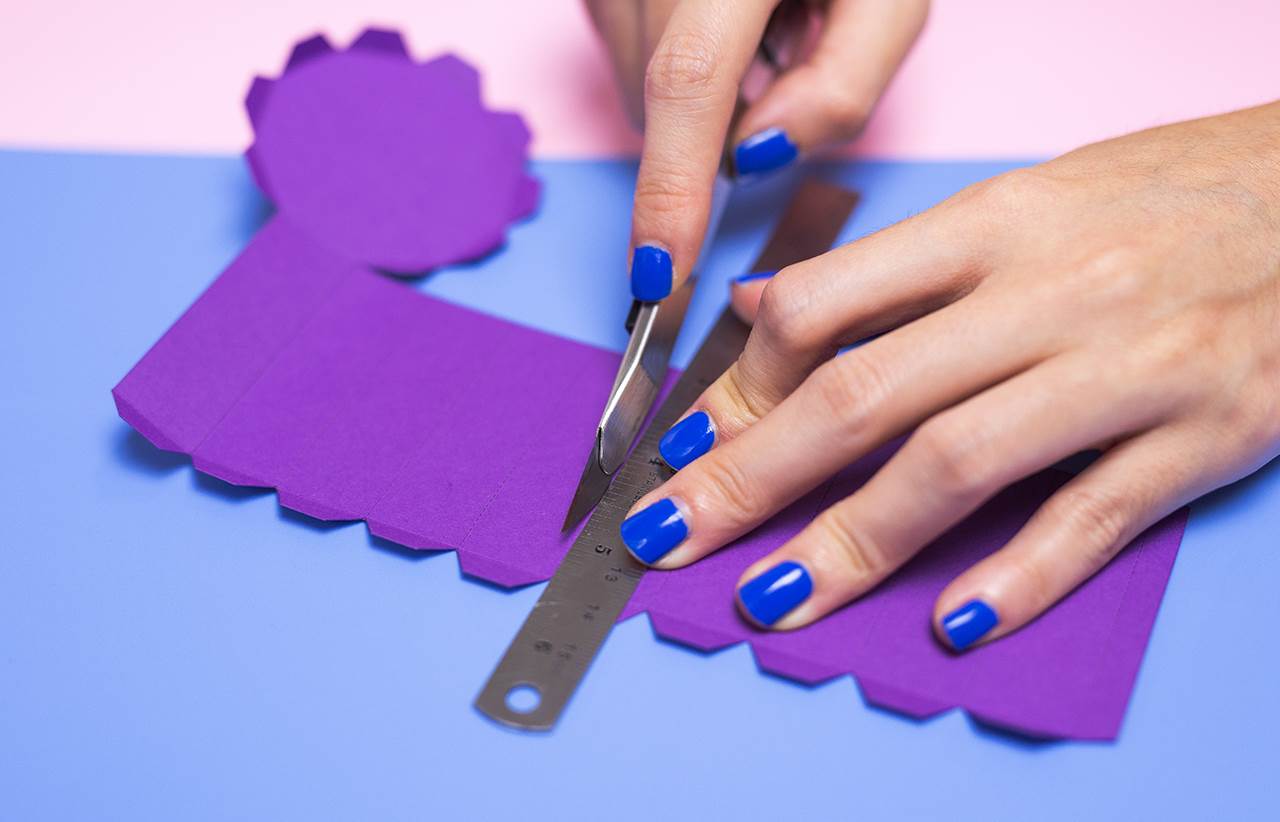 3. Fold all the creases. Glue the top tabs in place for both the lipstick and the middle casing. Use a toothpick to spread the glue out evenly on each tab.
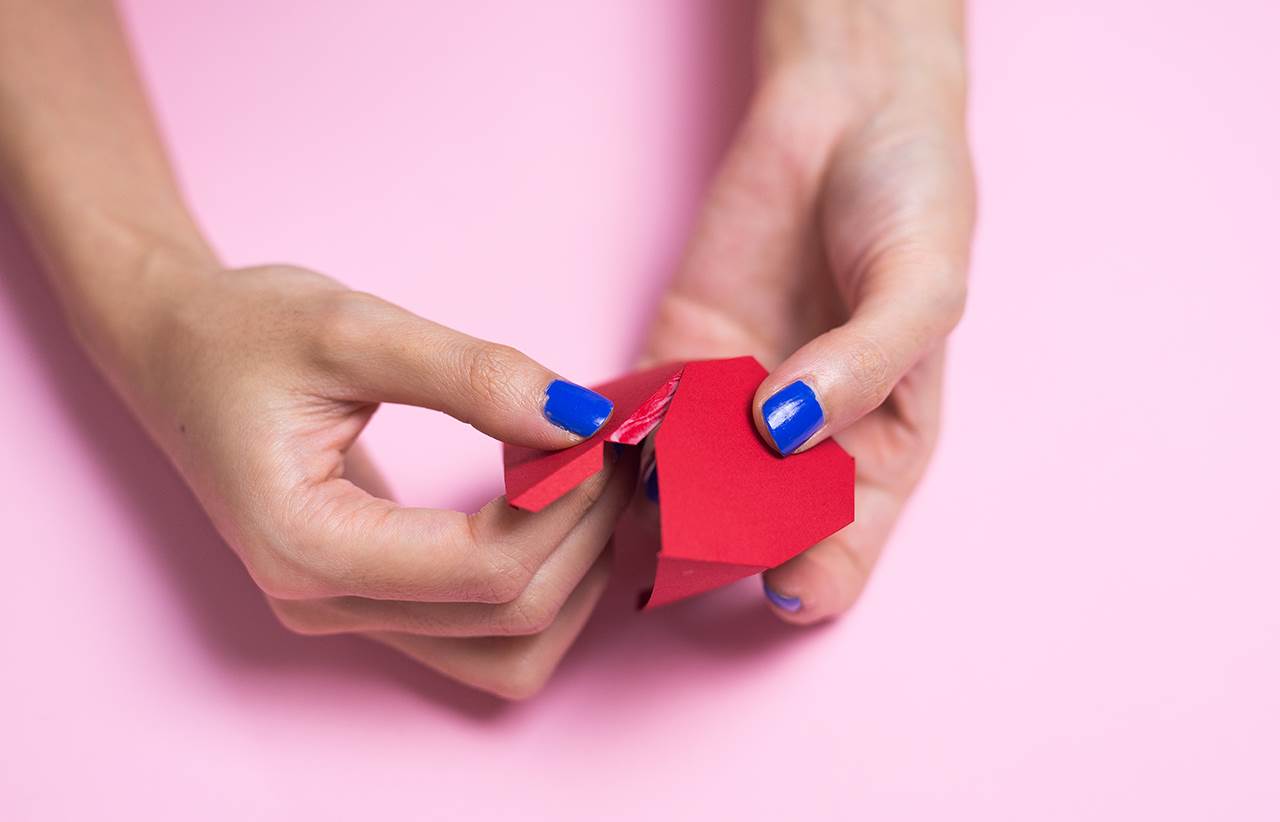
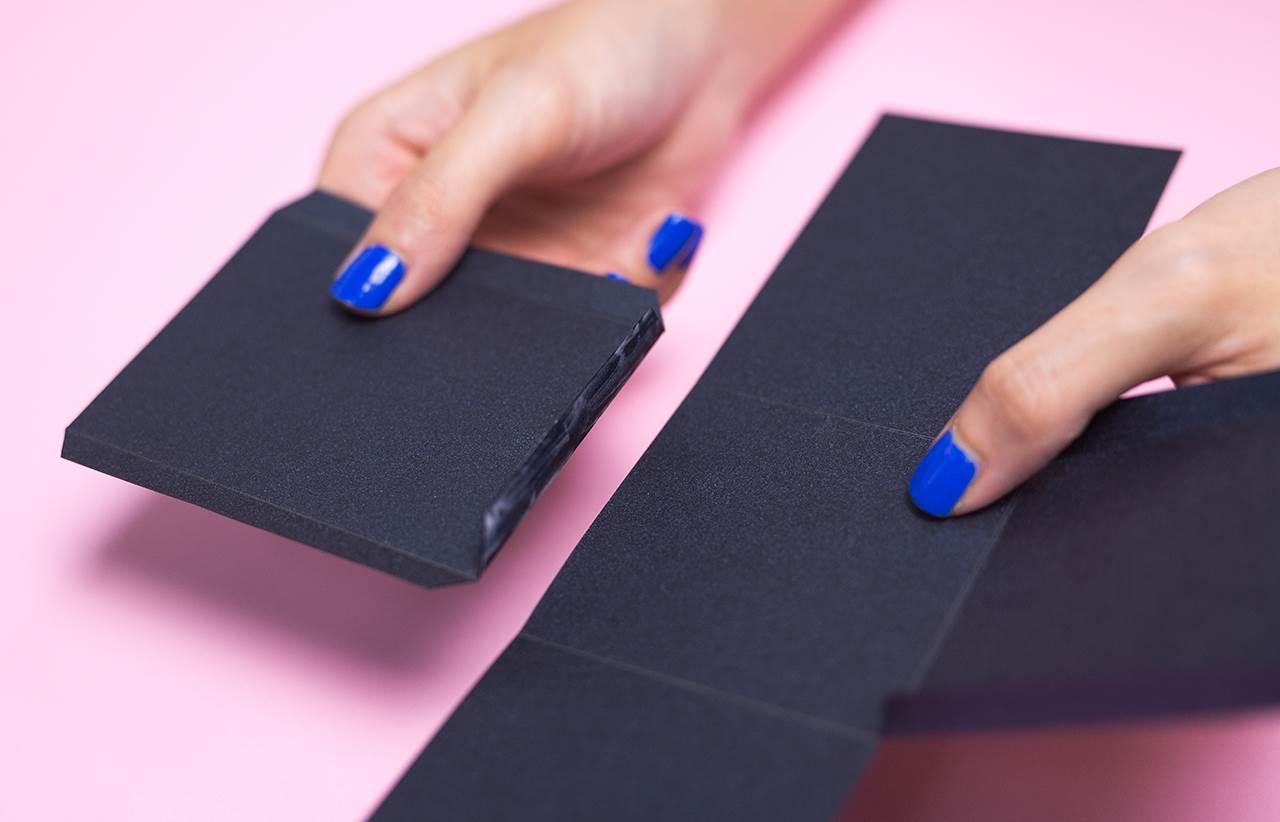
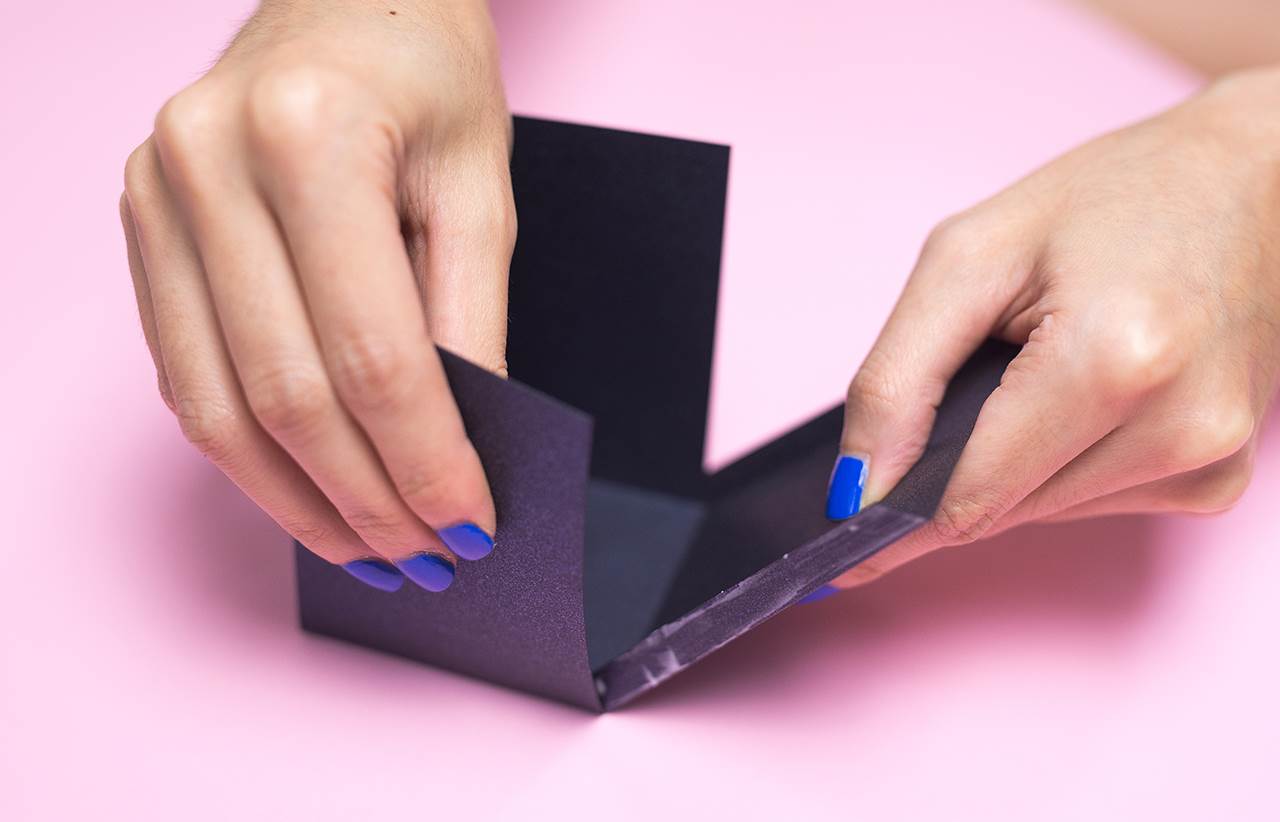
 4. For the box, glue tab number 1 together first before gluing the other tabs in place.
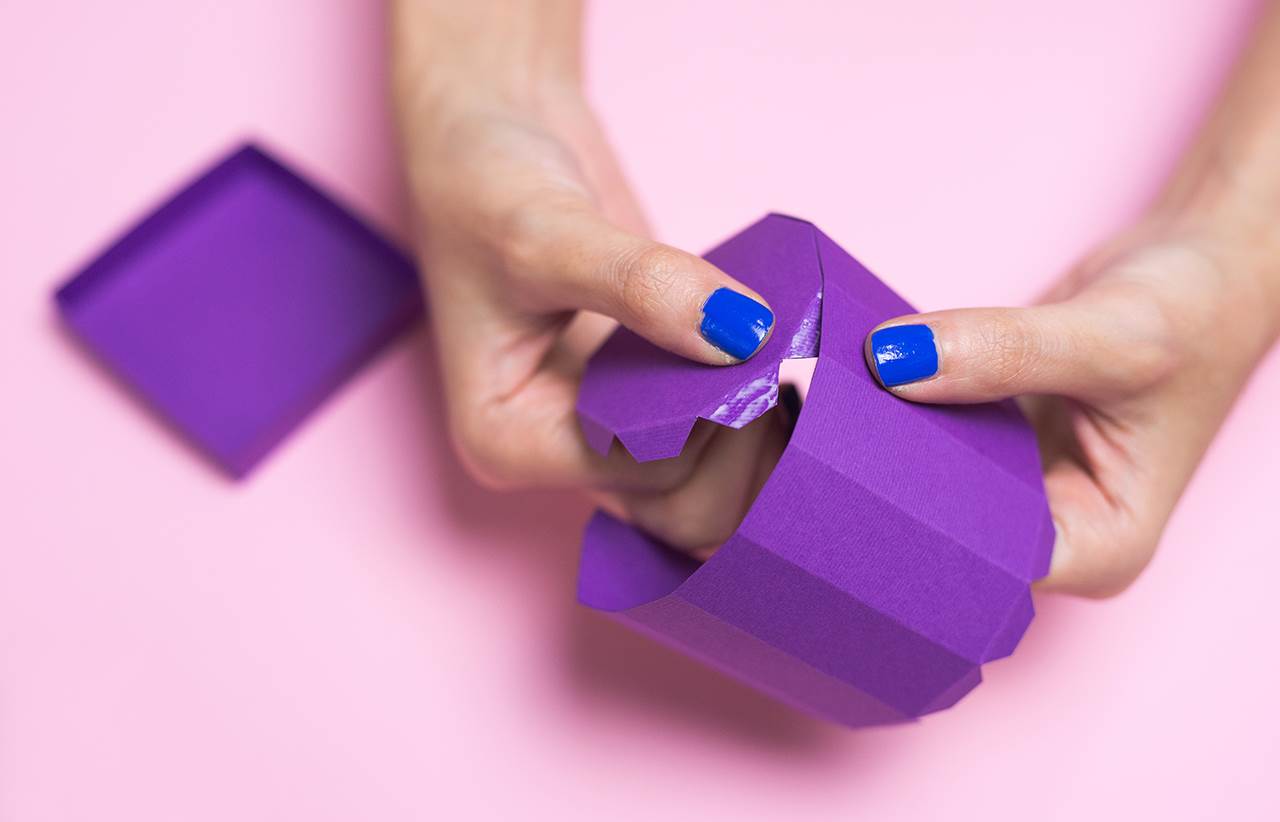
 5. You should now have four separate components ready to be pieced together.
 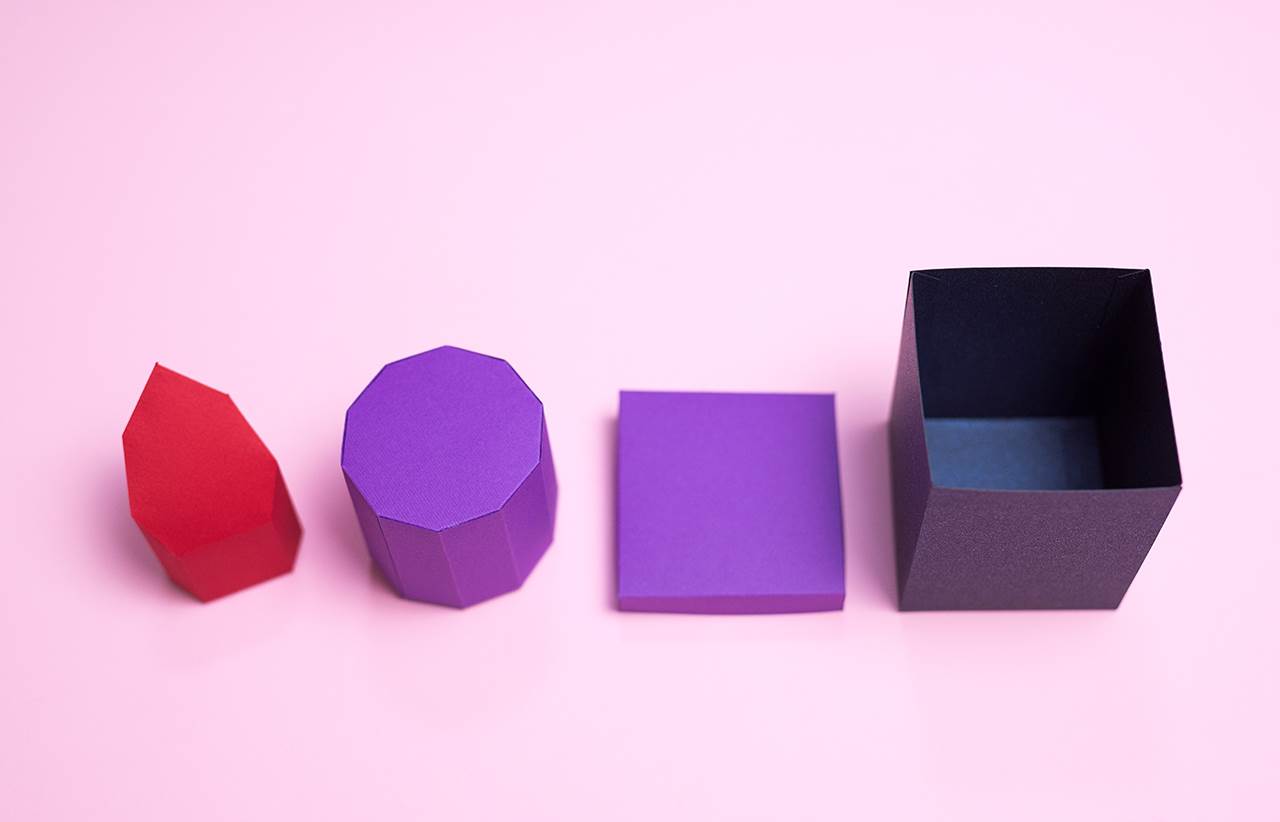 6. Apply glue to the tabs on the underside of the red lipstick and press it gently onto the top of your purple tube casing. Hold it in place for a few seconds.
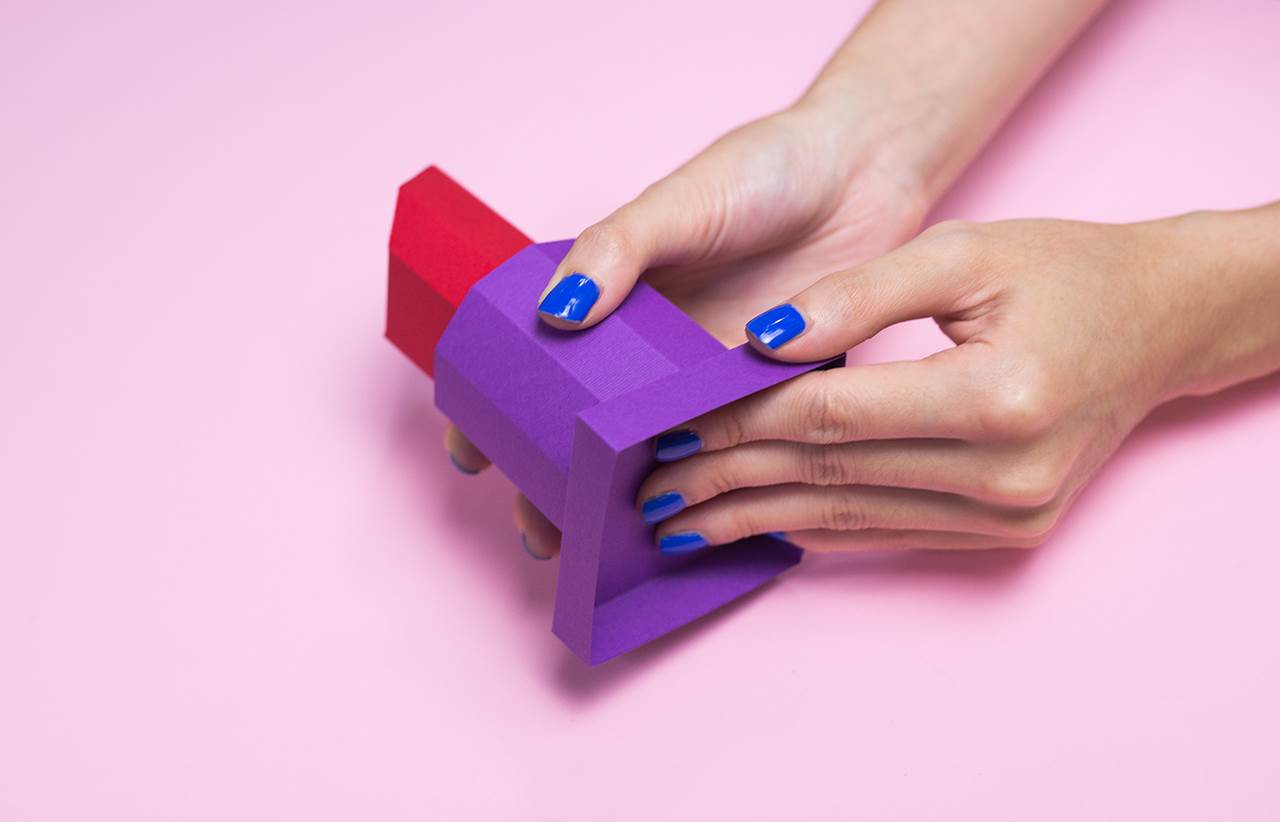
 7. Glue the tabs on the underside of the purple tube casing and press it gently down on to the purple box lid. Hold it firmly in place till completely dry.
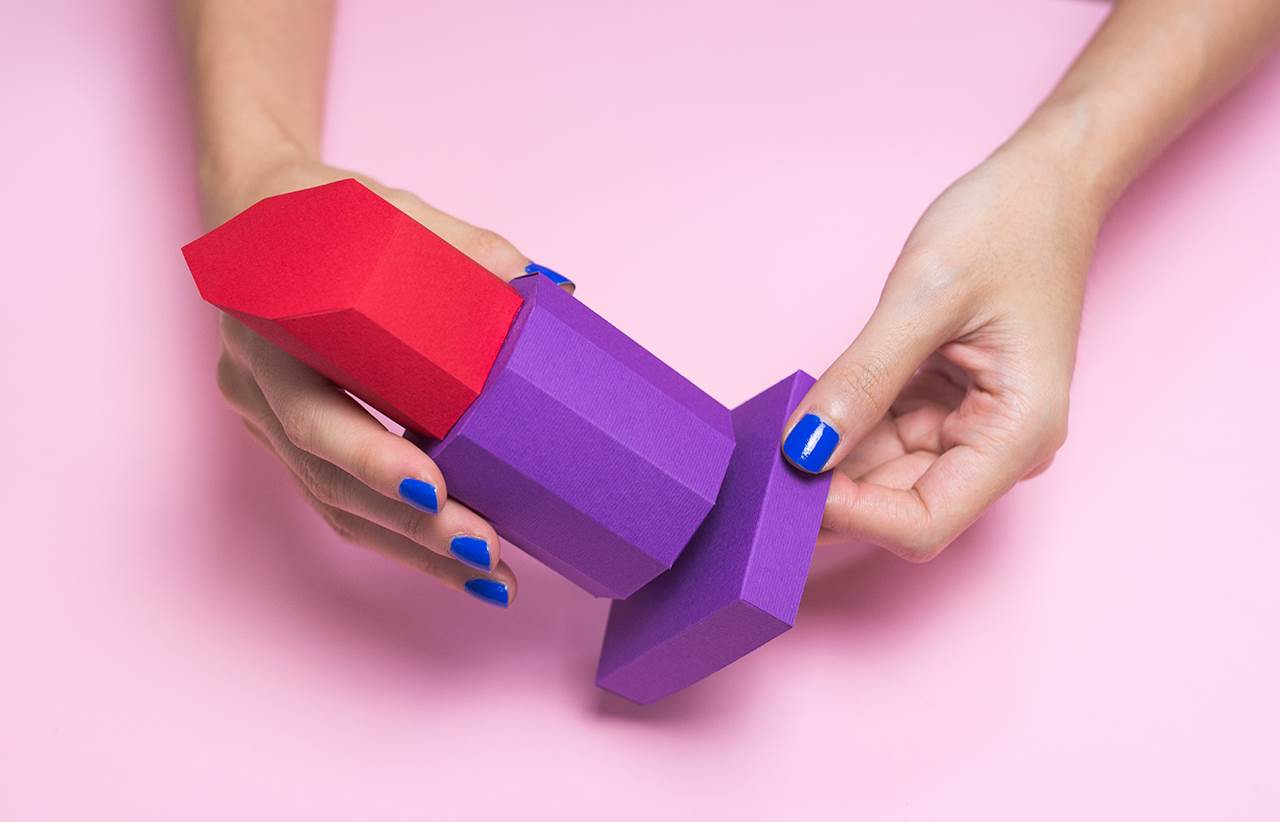
 8. Your lipstick box is now complete!
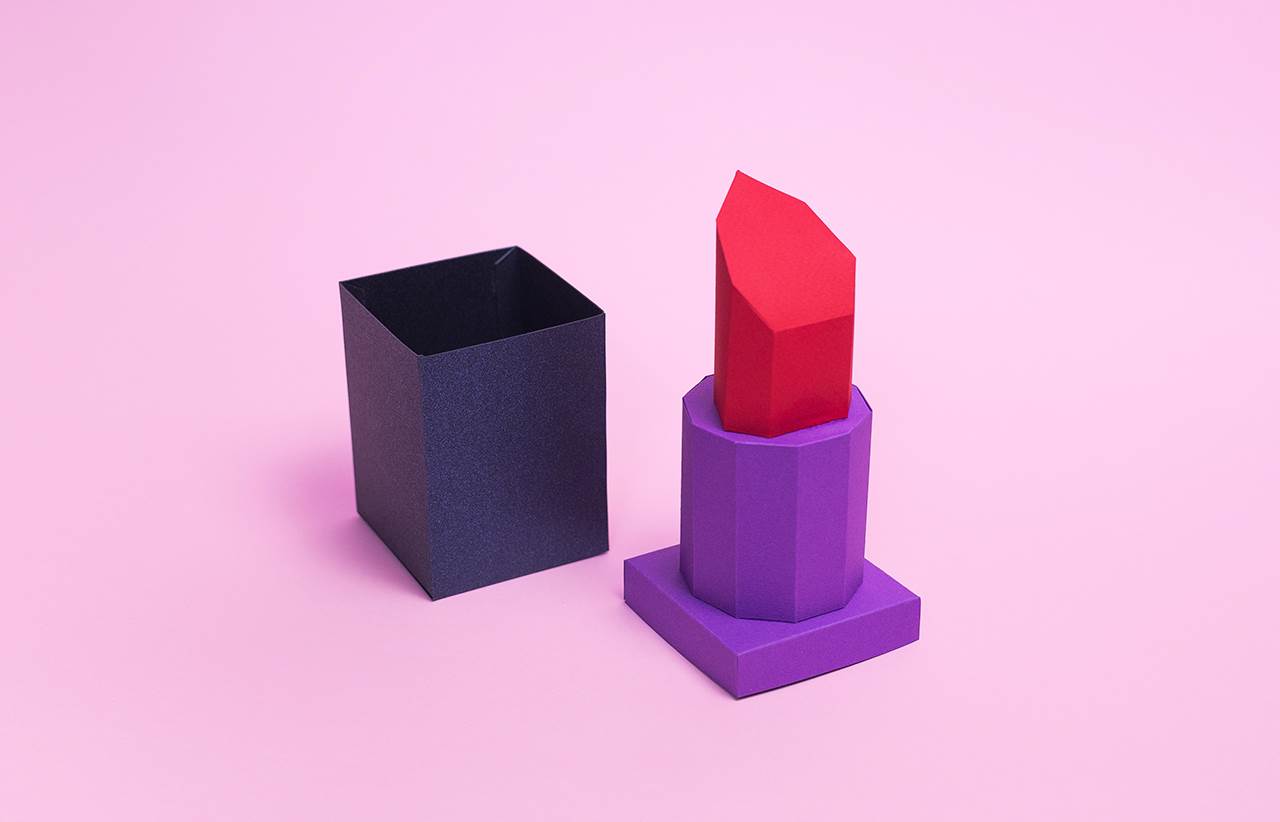 Cap the lid onto the box and there you go – a giant lipstick fit for a queen!
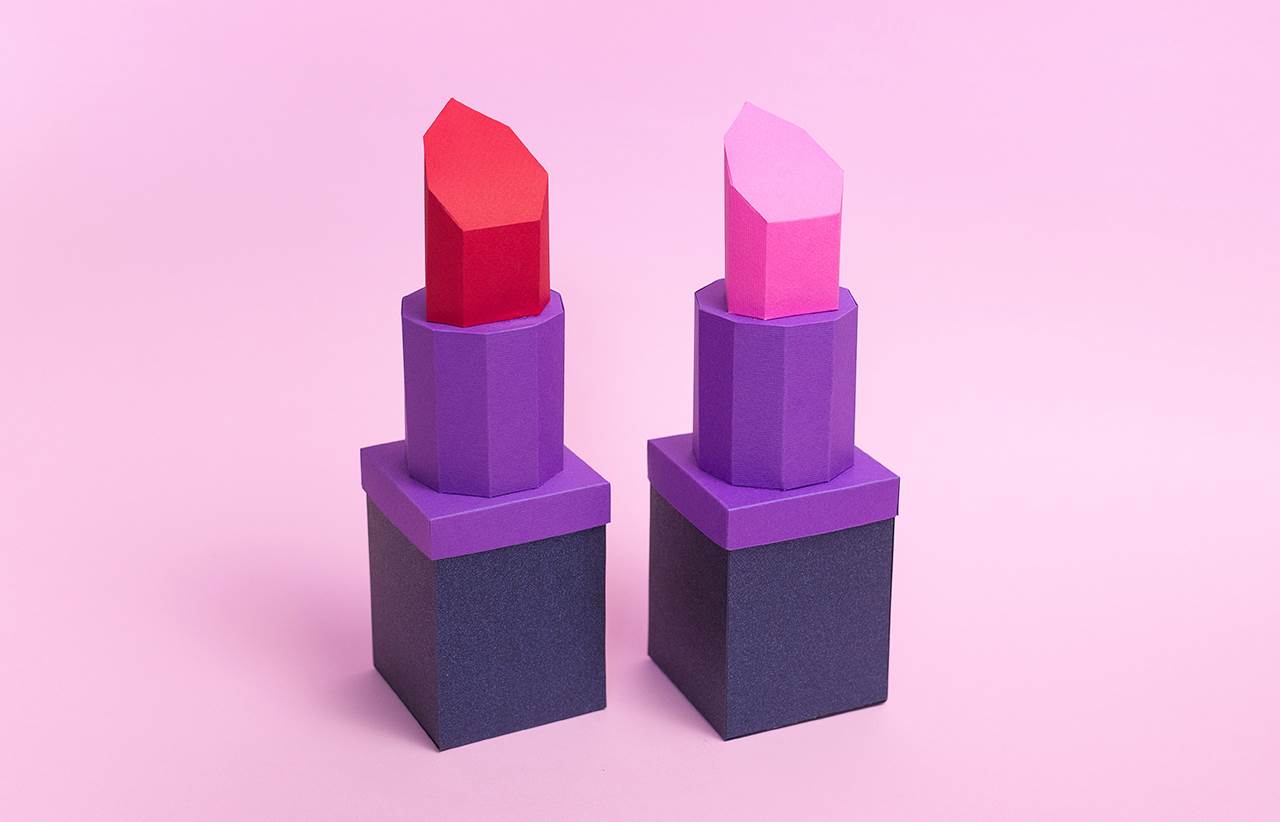 To see more awesome paper-based creations from Cheryl, check out her Instagram.
This story was originally published on August 2, 2017.