frankie exclusive diy: fuzzy felt organiser
This desk organiser will keep your bits and bobs tidy and leave your desk wonderfully clutter-free, all while prettying up your workspace. Huzzah!
We're suckers for a good storage solution at frankie HQ, especially one that's this colourful and snazzy, not to mention easy to make at home. This desk organiser will keep your bits and bobs tidy and leave your desk wonderfully clutter-free, all while prettying up your workspace. Hang it in your studio at home, or take it to the office and to cheer up your desk. Either way, you're winning!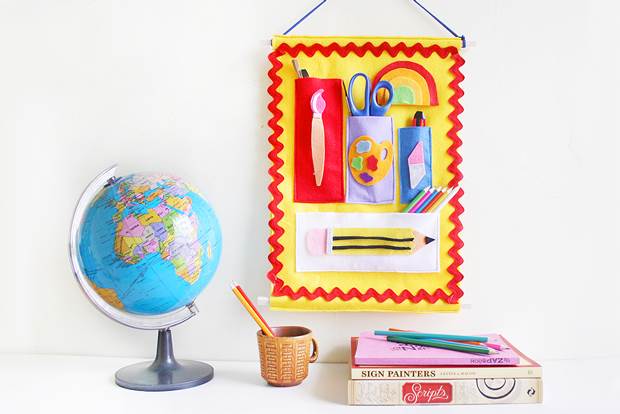
MATERIALS:
2 large pieces of felt, approximately 30x45cm in size
assorted coloured felt to create storage pockets and embellishments
2 dowel rods, approximately 50cm long
jumbo ric rac
thin rope, for hanging
glue gun
fabric scissors
sewing machine
INSTRUCTIONS:
1. Cut four rectangles in varying sizes from different coloured felt. These will become storage pockets. You can make them as large or as small as you want, depending on what kinds of stationery you'd like to store in them.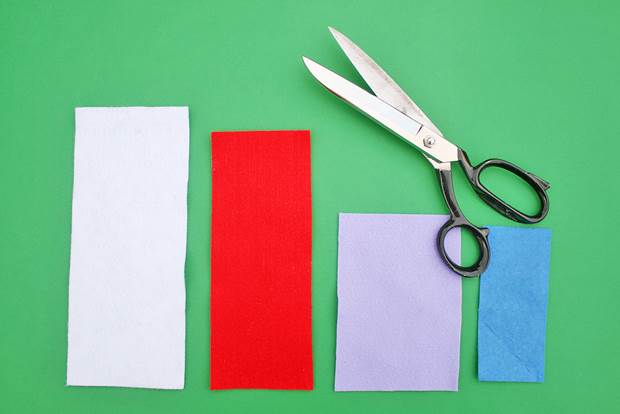
2. Create some fun shapes from coloured felt to embellish each storage pocket. You can draw the designs on paper first and use them as templates if that helps, or go completely rogue and free-hand cut. We used a glue gun to stick the details down onto each shape.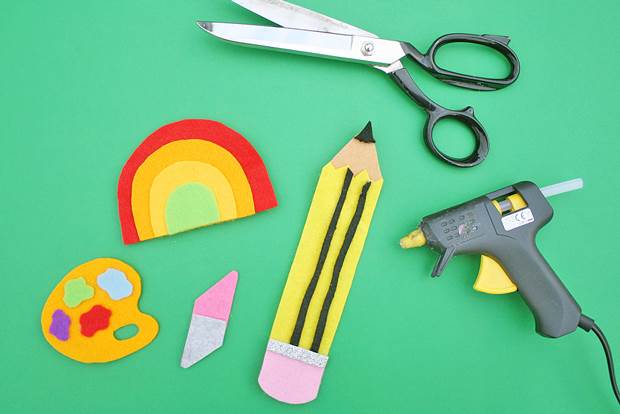
3. Use the glue gun to affix an embellishment to each storage pocket.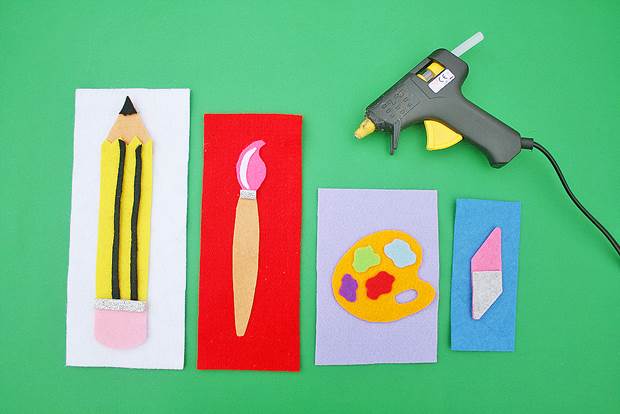
4. Sew the storage pockets onto one of the larger pieces of felt using a simple stitch, in a formation of your choice. Make sure to leave the top edge of each pocket unsewn so you can store things inside.
5. Stitch the two large pieces of felt together down the longer edges, leaving 2.5cm unsewn at the top and bottom. Then, sew two lines across each short edge in this unsewn section to create a little sleeve for your dowel rods to slot into.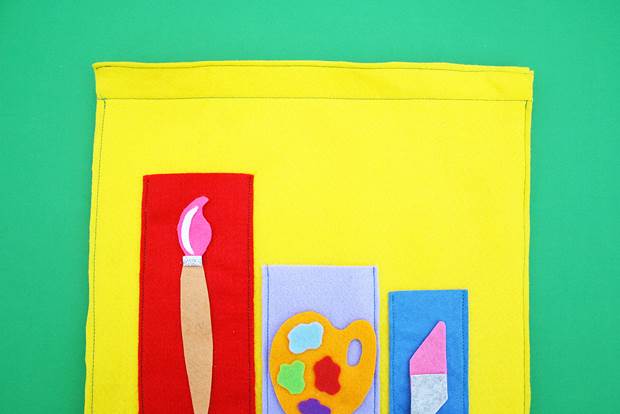
6. Slide the dowel rods into their little sleeves and glue on any extra embellishments, if you made them.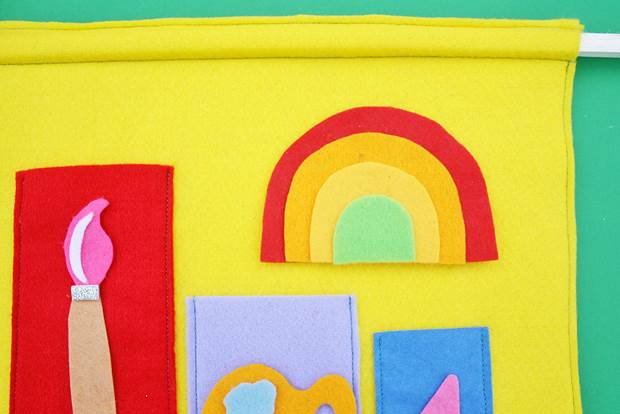
7. Glue the jumbo ric rac around the edge of your organiser to hide the stitch marks (and look mega cute, as well!).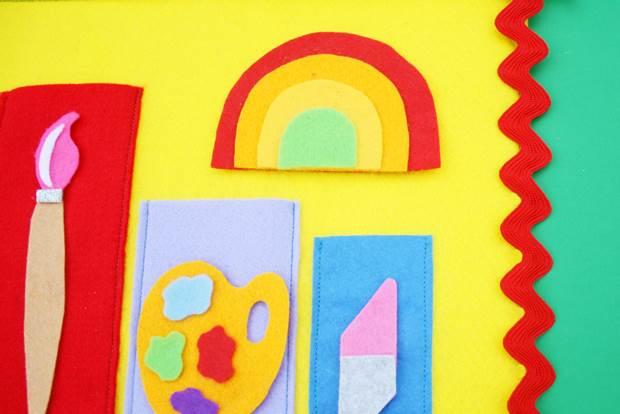
8. Tie the rope onto the top dowel rod so you can hang your organiser on the wall to brighten up your workspace. Fill with all your favourite stationery and enjoy!