frankie exclusive diy: floral embroidered t-shirt
Download our free embroidery pattern to turn a basic tee into something rather adorable (and completely unique).
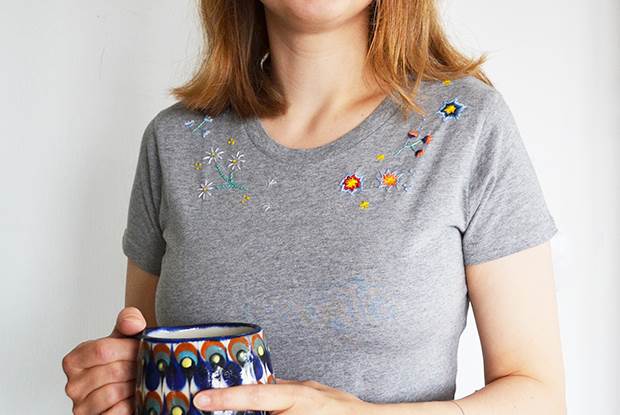
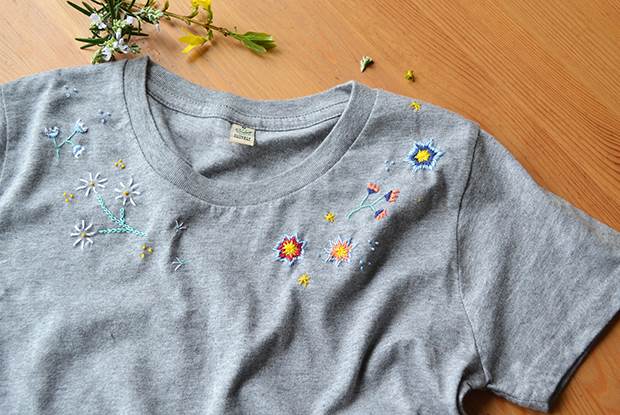
As a cash-strapped ’90s teenager, uninspired by the high street fashion chains, altering my own clothes (cutting, sewing, tie-dying!) was a big part of exploring my individuality through fashion. Actually, it started even earlier than that… When I was maybe eight or nine (and wanted to be a mermaid/marine biologist) I remember sewing a lot of sequins onto a lot of netting! Although it’s not something I do so much now my teenage years are literally decades behind me, every now and then it’s fun to put my own stamp on something in my wardrobe. This cute project turns a basic tee into something rather adorable – and completely unique. I’ve designed an asymmetrical floral pattern here that adorns the neckline (you could use it on a sweater or shirt, too) with subtle colours on one side and brighter blooms on the other. You can use the template provided as a guide or inspiration, or design your own around your favourite blossoms.
MATERIALS:
plain t-shirt in your size (I chose an organic cotton t-shirt in grey marl)
embroidery thread in a range of colours
embroidery needle
small embroidery hoop (I used one about 10cm across)
biro or pencil
scissors

INSTRUCTIONS:
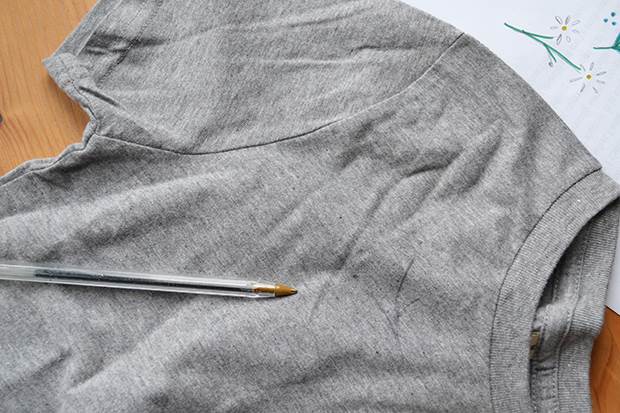
1. Print out the embroidery template if you’d like to copy this, or make up your own pattern. In Biro or pencil, lightly draw your embroidery pattern on your t-shirt, positioning it to curve around the neck of the t-shirt.
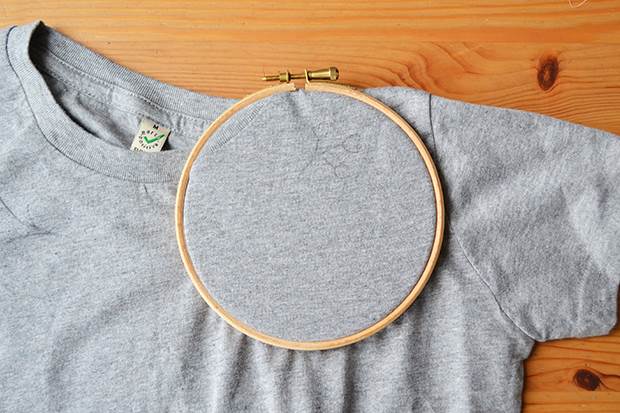
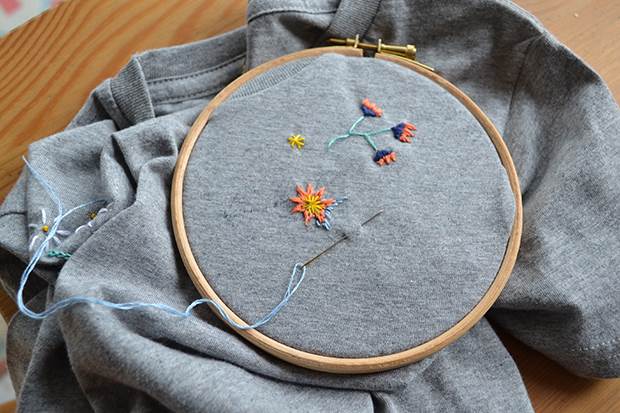
2. Place your embroidery ring over an area of your drawing. Usually you’d want to stretch your fabric, but as t-shirt jersey is usually stretchy, you actually want the fabric to be just held by the ring, not stretched taut. To do this, place the inner ring inside the t-shirt, making sure the fabric is loose over the ring. Then loosen the outer ring and gently place it over (so it doesn’t stretch the fabric too much), tightening it to hold the inner ring in place.
3. Choose your first colour thread and cut a length about from your fingertips to your elbow. Separate out two strands. Thread your needle with your two strands, tie a knot at the end of your thread and start sewing! (I’ve used a mix of straight stitch, chain stitch, satin stitch and French knots. If you’re not sure how to do any of these, a quick search for tutorials on YouTube should sort that out!) Again, because of the stretchy fabric, you don’t want to pull your stitches as tight as you usually would. As you finish each section or colour and move on to the next, make a few stitches in the back of your embroidery to secure your thread before trimming.
To see more cool stuff from Anna Alicia, head over this way.