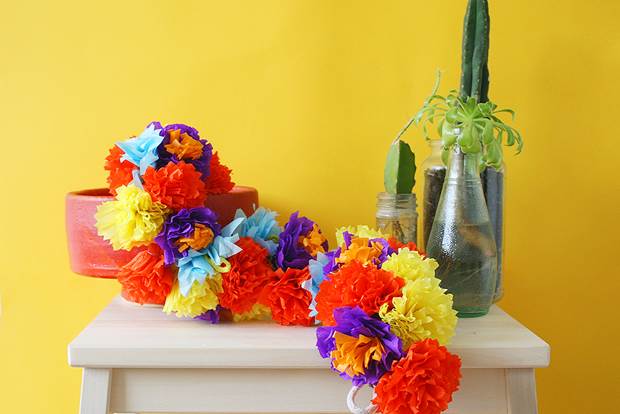
frankie exclusive diy: festive floral wall hanging
These pretty paper petals will tide you over as you wait for Mother Nature to do her springtime thing.
Spring has well and truly sprung, and while we're mighty happy about it, we can get a bit impatient waiting for those budding blooms to show their faces. What better way to pass the time than to make something that will flower all year round? These pretty paper petals will tide you over as you wait for Mother Nature to do her thing.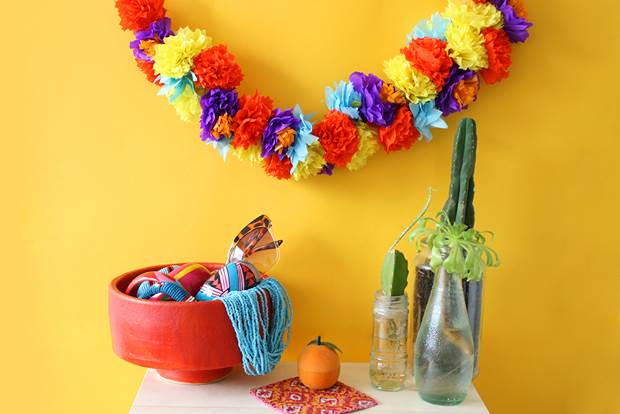
MATERIALS:
assorted coloured segments of crepe or tissue paper (to make a segment, cut a 5cm chunk off the end of a folded piece of crepe paper, straight from the packet.)
scissors
thin wire
double-sided tape
rope or twine
wire cutters or pliers

INSTRUCTIONS:
RED FLOWER
1. Choose a crepe colour and hand-cut a zigzag along one long edge of the segment.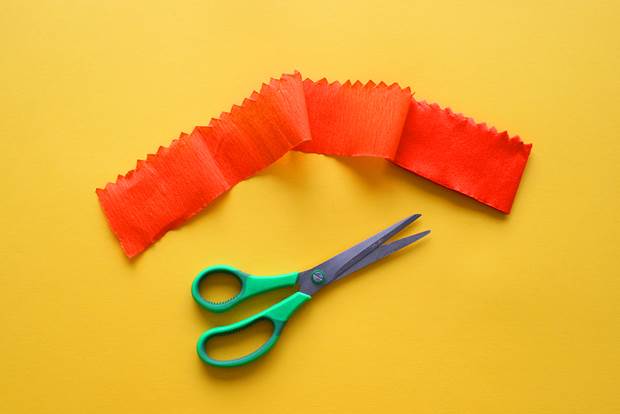
2. Begin rolling the strip of crepe around itself, gathering it as you go. You will see a flower shape beginning to form.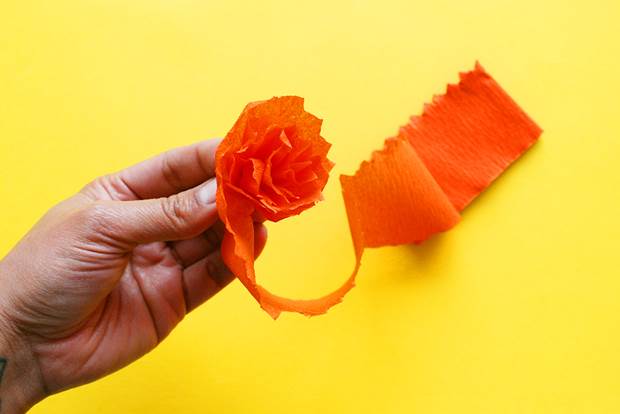
3. Cut a 10cm piece of wire. When the flower is the size you want it at (more wrapping will make a bigger flower, less will make a smaller flower) wrap the wire tightly around the base of the bloom and twist to secure.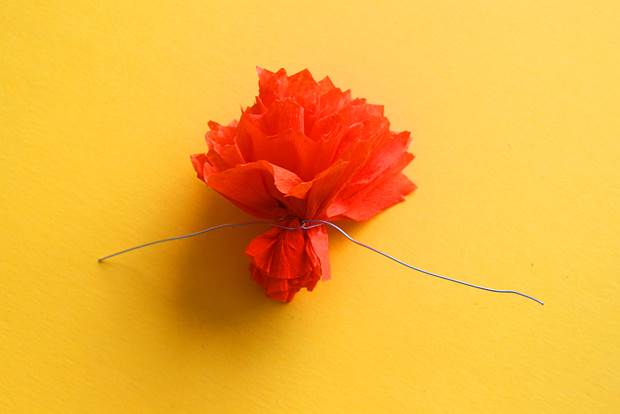
PURPLE FLOWER
4. Use the same technique from step 1, but hand-cut a scalloped edge onto a segment of crepe. Cut a 15cm strip from a contrasting colour and make cuts all the way along it to form a thin line of fringing (make sure you don't cut all the way through!).
5. Using the same rolling technique from step 2, roll the fringe up and secure in place with a piece of double-sided tape.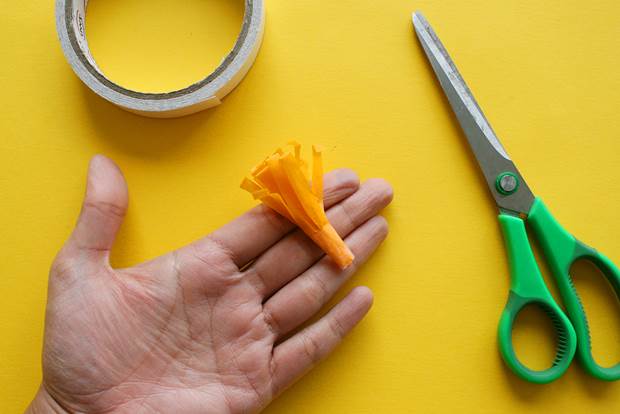
6. Wrap the purple strip around the fringe roll, gathering it as you wrap. Again, the more you wrap, the bigger the flower.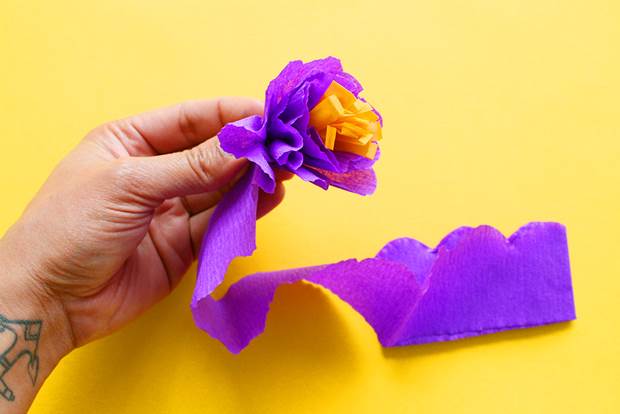
7. Secure the flower in place by wrapping a 10cm piece of wire around the base.
BLUE FLOWER
8. Wrap a yellow piece of crepe around a 14cm piece of wire, twisting it as you go.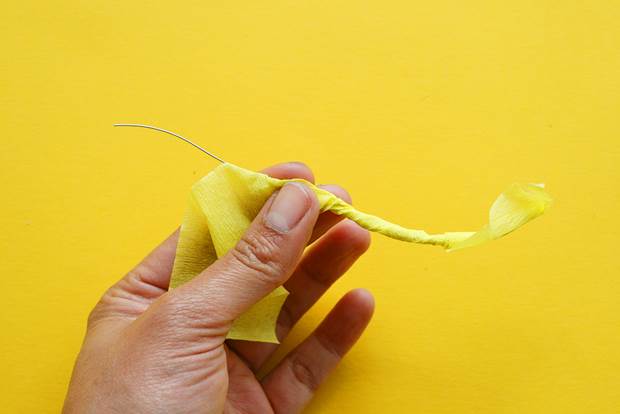
9. Fold the wire in half and twist it together.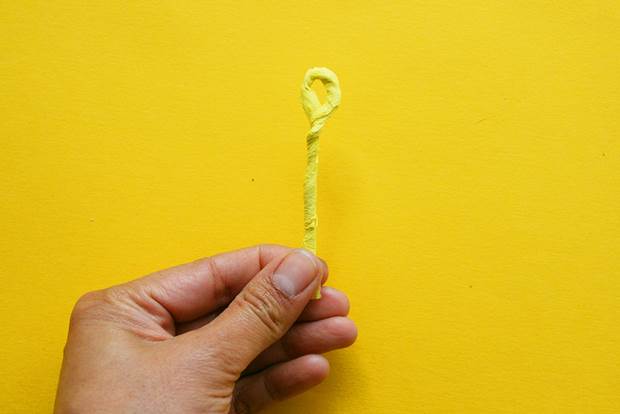
10. Use the same technique from step 1, but hand-cut a pointy petal edge onto a piece of crepe or tissue (we used tissue for more delicate petals).
11. Use the same wrapping technique as for the other flowers, but wrap around the twisted yellow wire, gathering slightly as you go.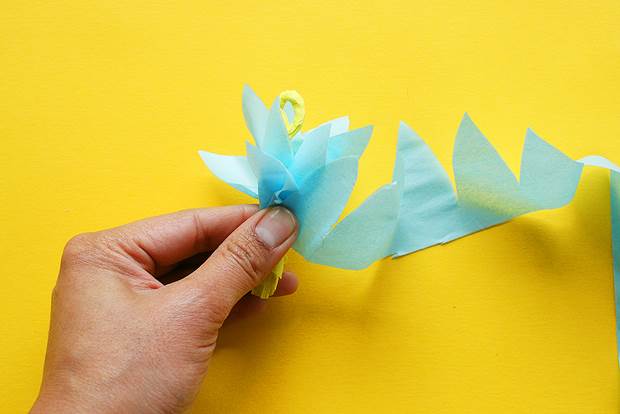
12. Secure the flower together with a 10cm piece of wire.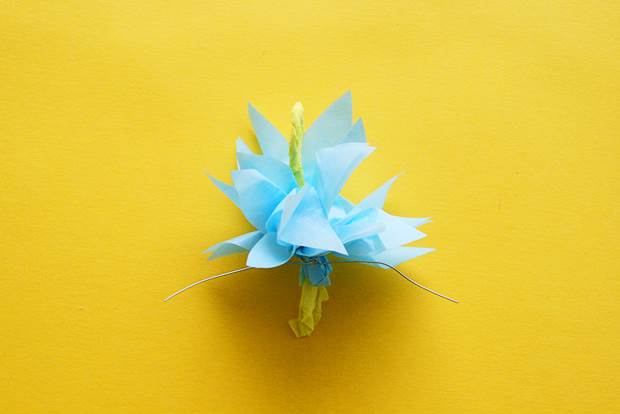
ASSEMBLING THE GARLAND
13. Cut a piece of rope and create loops on either end, secured by wrapped wire. It's up to you how long you want to make the garland.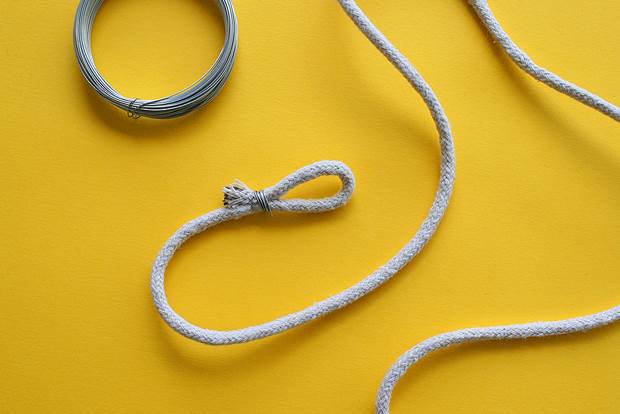
14. To attach each flower, use the wrapped wire on the flower to secure it to the rope.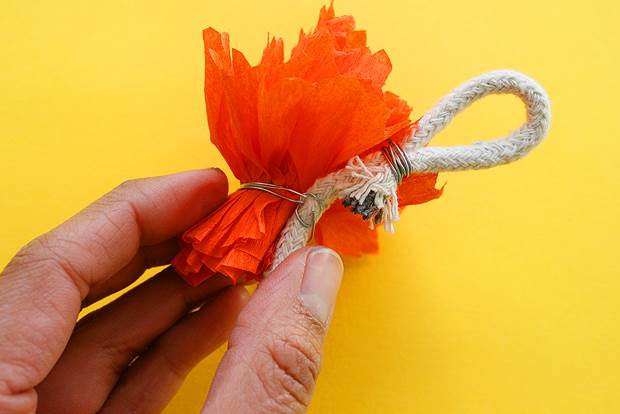
15. As you attach flowers you'll notice that there's a 'pretty' side with all the flowers, and a 'not-so-pretty' side with the wire wrapping visible. As this will be facing the wall when you hang it, you don't need to worry about this so much. But if you're hanging the garland across a room, make sure you attach flowers in the other direction too.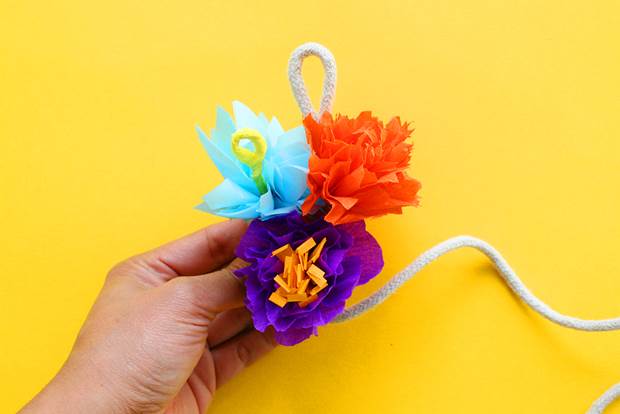
16. Continue attaching flowers until you have reached your desired garland length. Then hang your garland in your favourite spot and enjoy!