
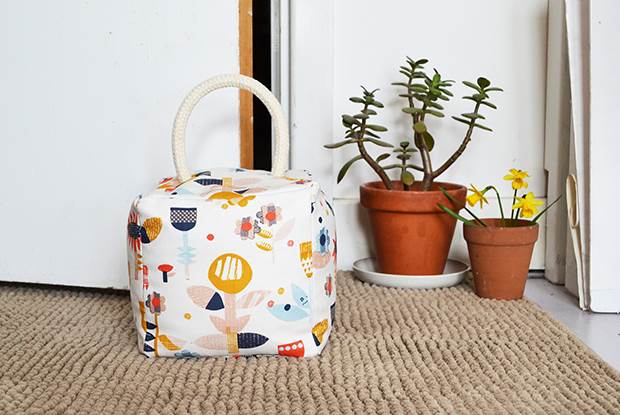
frankie exclusive diy: fabric and rope doorstop
No more keeping your door wedged open with a dirty sock.
Often my favourite projects to sew are the practical (some might say mundane) everyday things that, with a little craft love lavished upon them, can be elevated to something that’ll bring a smile to your face every time you use it. Sure, I could continue to prop my bedroom door open using a dirty sock wedged underneath it – or I could choose some pretty fabric, pair it with some gorgeously chunky rope and sweet gold eyelets, and make myself a beautiful doorstop!
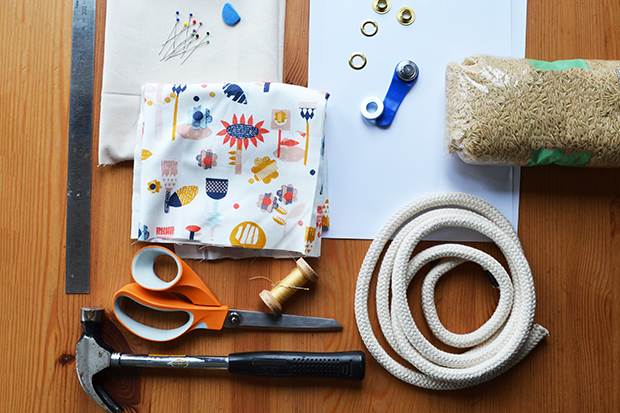
MATERIALS:
1/2m patterned cotton fabric
1/2m cotton canvas, or similar heavier weight fabric
thread to complement your fabric
14mm eyelets kit (make sure this comes with a tool to fit your eyelets)
60cm rope, 14mm thick
about 3-4kg rice* (or you could use sand, gravel or anything similarly heavy – I just happened to find some out-of-date rice at the back of my kitchen cupboard!)
2 sheets of plain paper
pencil
ruler
tailors’ chalk
hammer
scissors
sewing machine
pins
needle
* If you’re planning to use this outside, go for something like gravel instead of rice, so it won’t mind getting wet.
INSTRUCTIONS:
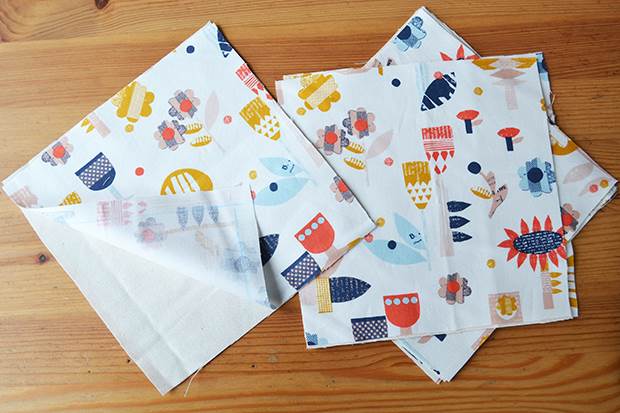
1. Draw and cut out a 15cm x 15cm square template from one of your sheets of paper. Using your template and tailors’ chalk, draw out 6 squares on each of your fabrics and cut them out with a 1cm seam allowance. Match up your canvas and patterned squares so that each canvas square has a patterned square on top (right-side up). From now on, treat your six canvas/patterned pairs as if they are each one piece of fabric.
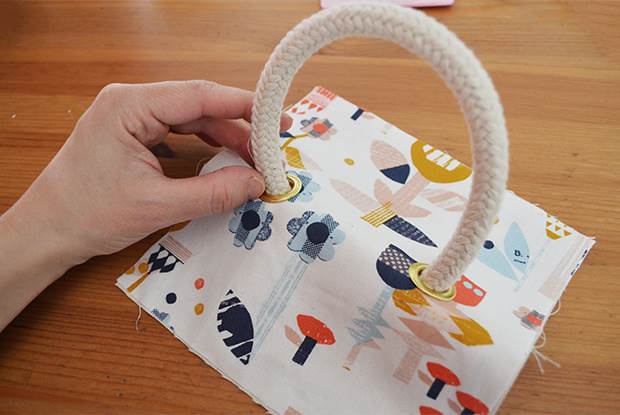
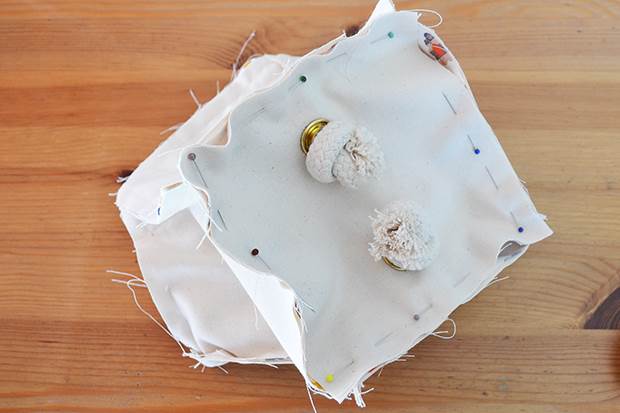
2. On one of your squares (face-up) mark a point 5.5cm in from the left edge and 8.5cm from the top and bottom edges. Repeat, but 5.5cm from the right-hand edge this time. Cut a small cross (about 1cm across) at each dot. Take the main part of one of your eyelets and push its inner ‘tube’ through one of the crosses you cut.
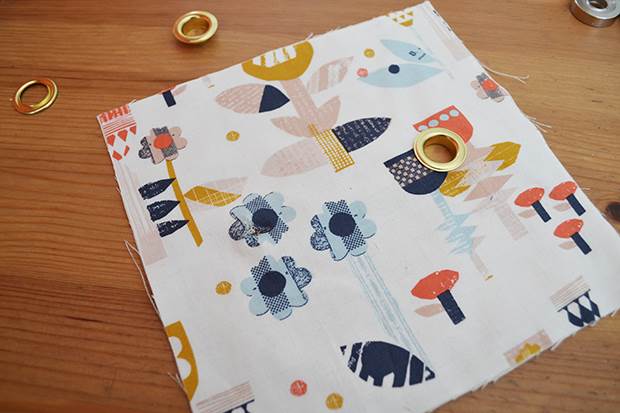
3. Turn your fabric square over (wrong-side up) and place the eyelet’s washer over the inner ring. Use your eyelet tool and hammer your eyelet in place (as per the packet instructions). Repeat for the other eyelet. Cut 60cm of your cord and tie a knot at one end. Push the other end through one of your eyelets, from the back to the front, then back through the other eyelet. Tie a knot at the other end.
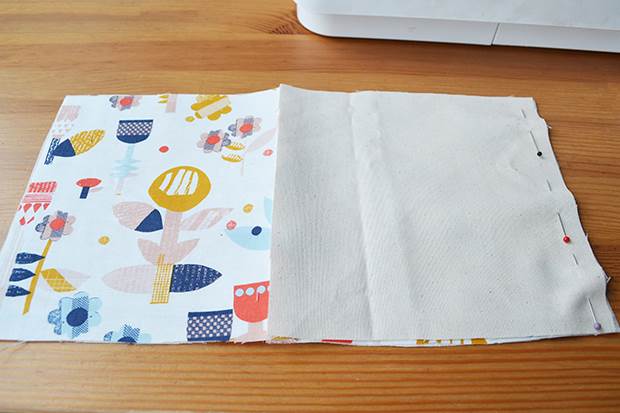
4. Lay one of your canvas/patterned squares out, face-up and place another on top, face-down. Pin together along one edge and sew 1cm in. Unfold and pin another square on top of the right-hand square, face-down, pinning along the right-hand edge. Sew, 1cm in. Repeat with a fourth square.
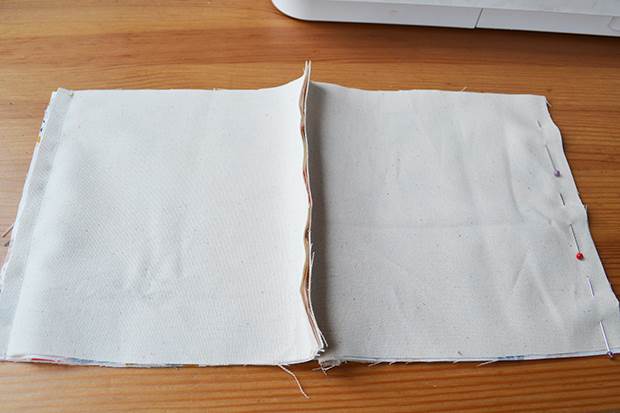
5. Now match up the edges of the first and last of the four squares, pin along the left-hand edge and sew, 1cm in. You should now have a ‘tube’ of squares that will be the sides of your doorstop.
6. Pin another square in place as the base, face-in, so that its edges match up with each of the four sides of your doorstop. Sew in place, 1cm in, but leave a roughly 6cm opening for turning your cube the right way out.
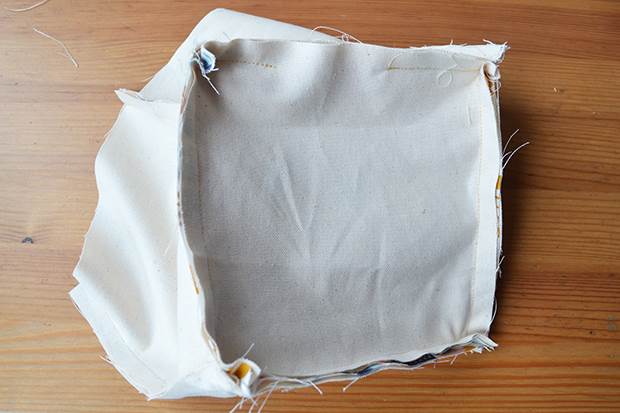
7. Finally, take your square with the handle and pin in place in the same way, right-side in. Sew all the way round, 1cm in.
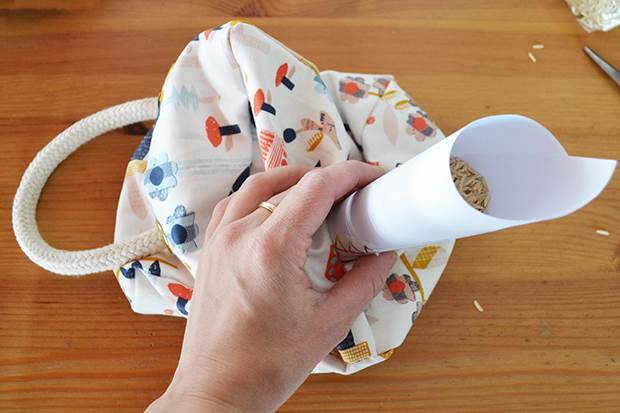
8. Turn your cube right way out through the gap you left. Using a funnel (or a cone made from the other sheet of paper), fill your cube with your chosen heavy filling.
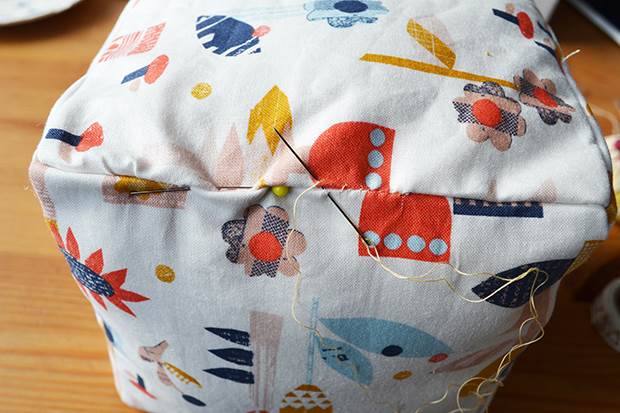
9. Lastly, hand-sew the opening closed and pop your doorstop in place!
To see more cool stuff from Anna Alicia, head over this way.