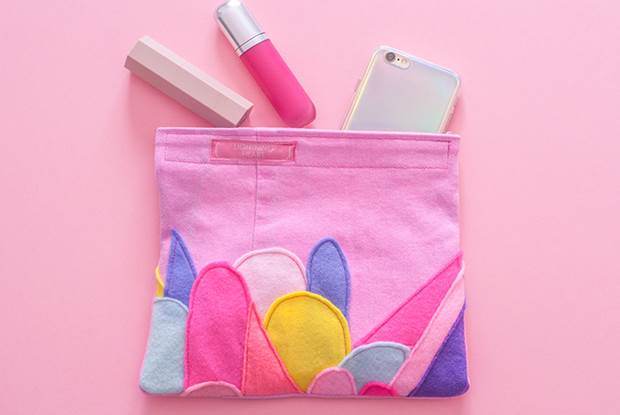
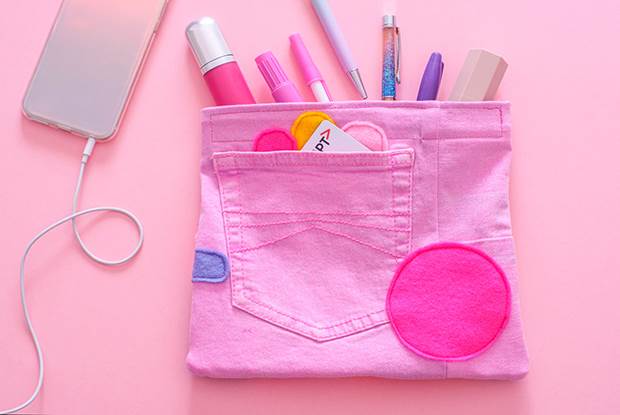
frankie exclusive diy: denim pencil case
Turn a pair of old jeans into a cute-as-can-be pencil case! We show you how, step by adorable step.
Whether you’re heading back to school or just need more storage space for your ever-expanding make-up collection, you’ll need a pencil case. Because – let’s not kid ourselves – we’ve all already managed to build up a nice stash of stationery (or make-up brushes). This quick and easy DIY will show you how to turn an old pair of jeans into something you can use every day!
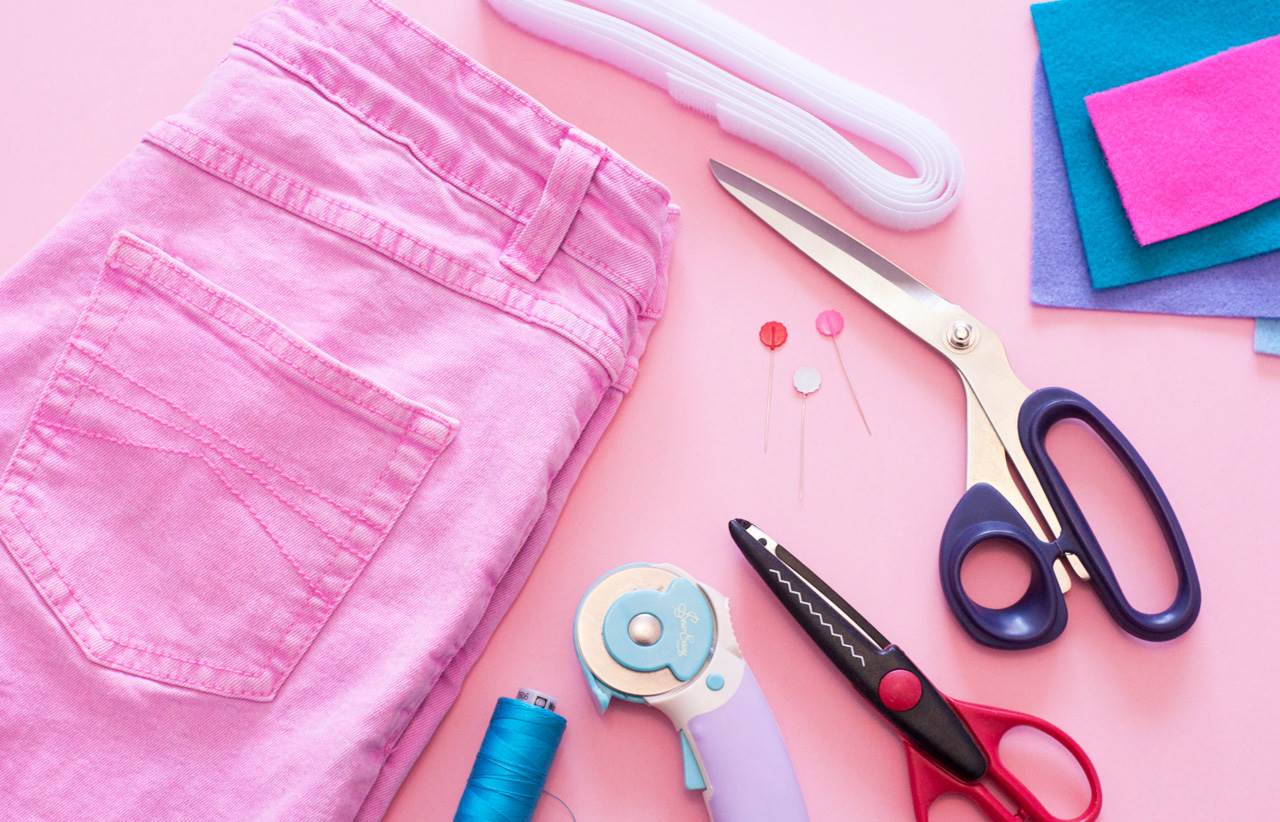
MATERIALS:
old pair of jeans (preferably without holes)
scraps of coloured felt
scissors
pins
hook and loop fastener (Velcro)
rotary cutter and mat
pinking shears
sewing machine
iron
INSTRUCTIONS:
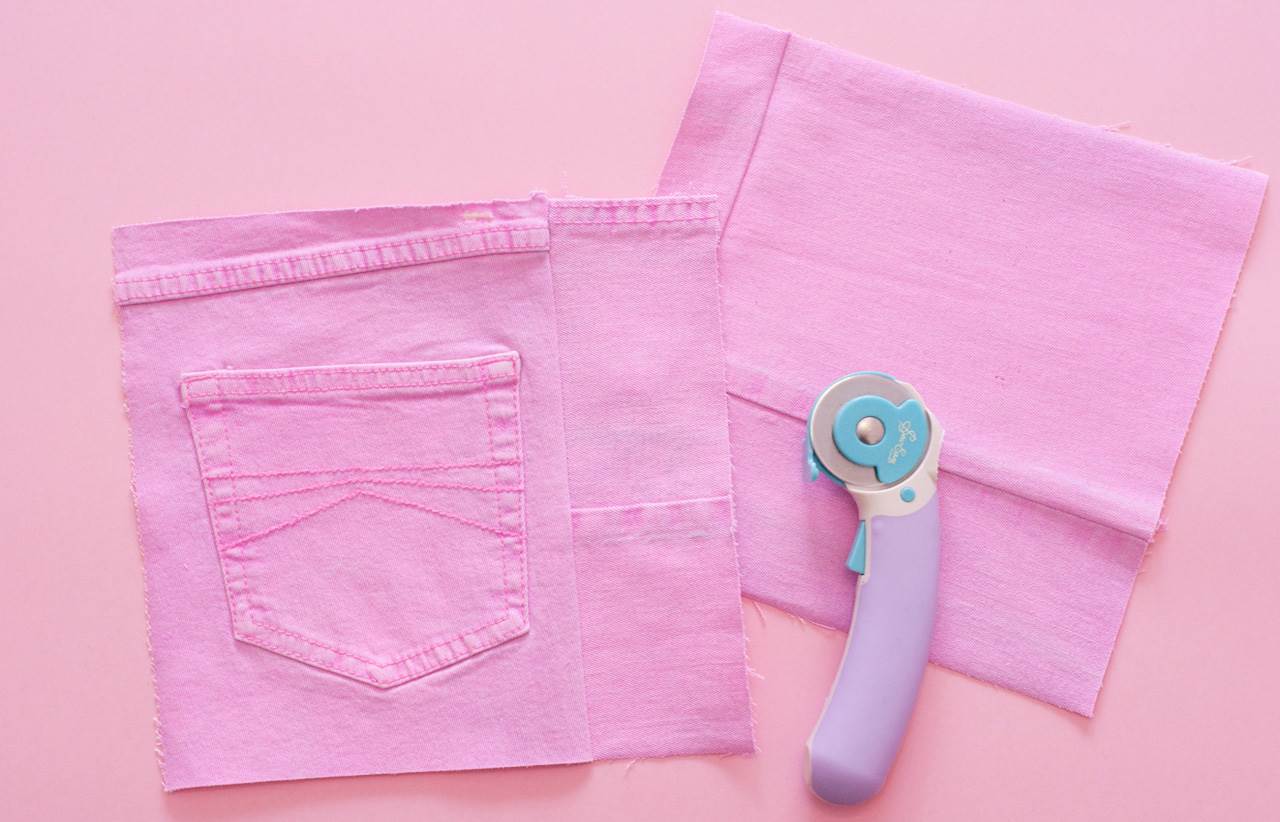
1. Grab your unwanted jeans (or pop down to you local op shop and find a cute pastel pink or orange pair like I did) and cut along the seams to open them up. You’ll need two squares 9” x 9” and try to include a back pocket if possible. It’s possible the butt cheeks may not be wide enough, so you’ll have to add on strips from the legs to make up the full size.
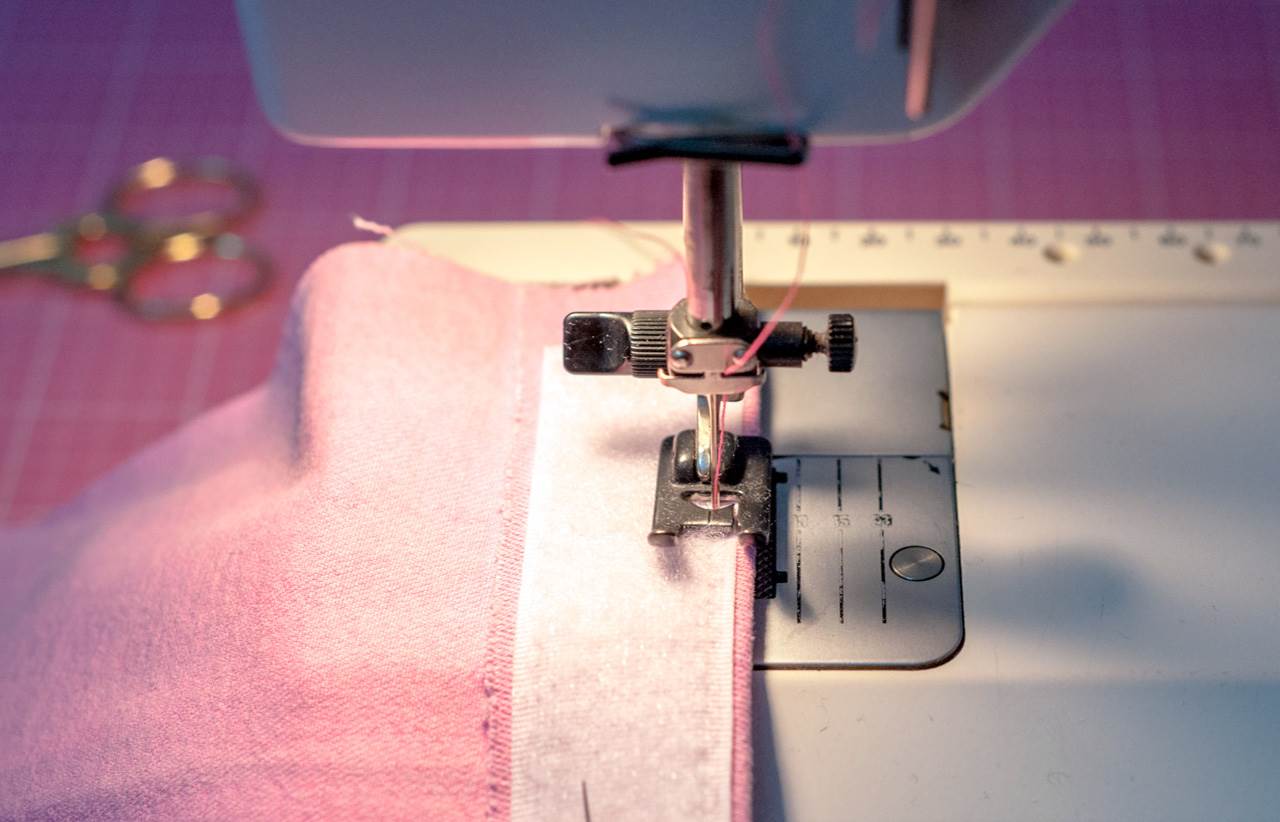
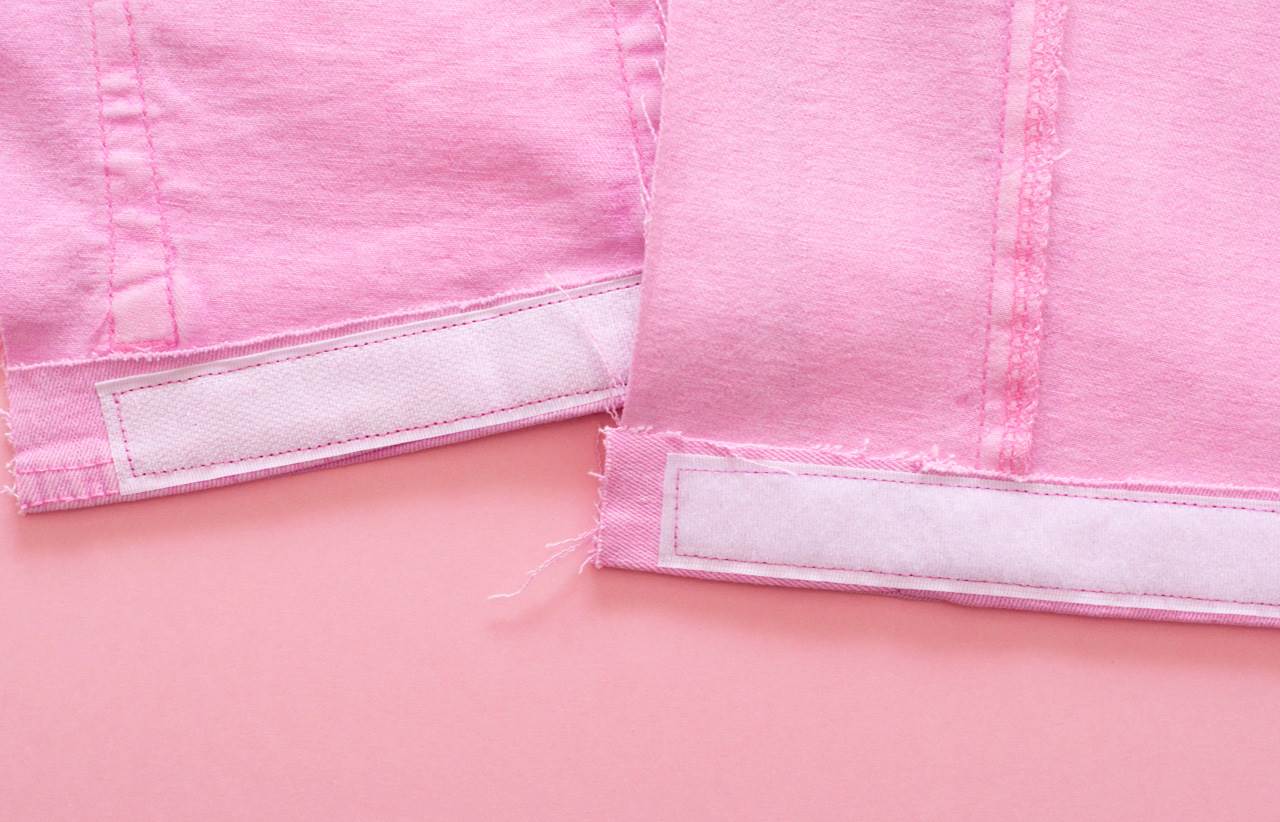
2. Fold over the top of each square 1”. Measure and cut a strip of Velcro 8” long. Iron down the fold and make sure you iron the squares nice and flat. My mum always snapped at me if I didn’t press the fabric before sewing, so consider this me passing on her lesson! Open the Velcro strips and pin each side to the folded down parts of the squares.

3. Sew around the inside edges of the Velcro, keeping it lined up against the inside edge of the sewing machine foot.
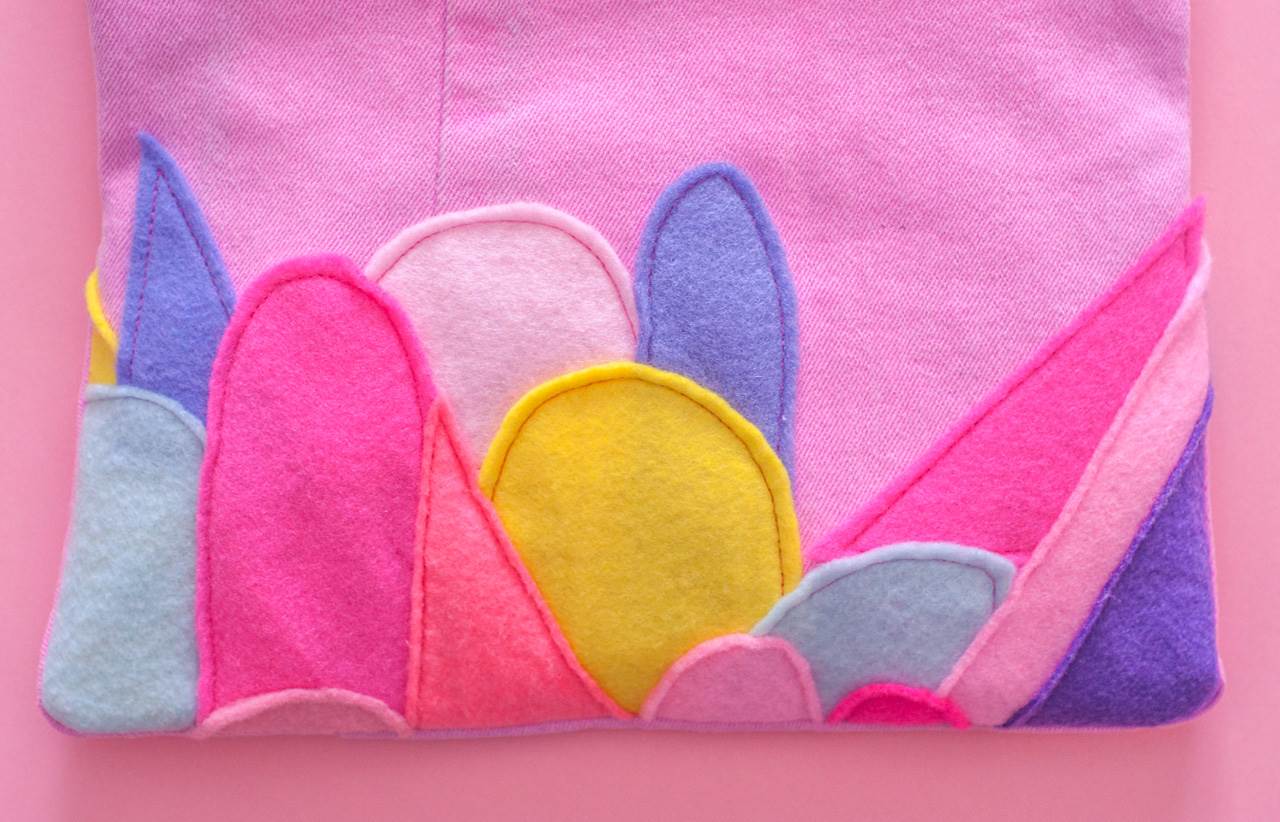
4. Now for the super-fun part! Gather together all your scraps of coloured felt and cut-out circles, half-circles and triangles to create a sort-of collage. The more colourful, the better! Once you’ve mapped out how you want it to look, take a quick snap on your phone so you can keep a record of it, because you will have to deconstruct it to sew the bottom layers on first and then build from there. You can either hand-stitch these on if you have the time, or you can do it with your machine – whichever you prefer! Try to stay as close to the inside edge of the shapes as possible. You can always gently trim off any excess felt if you missed the mark.

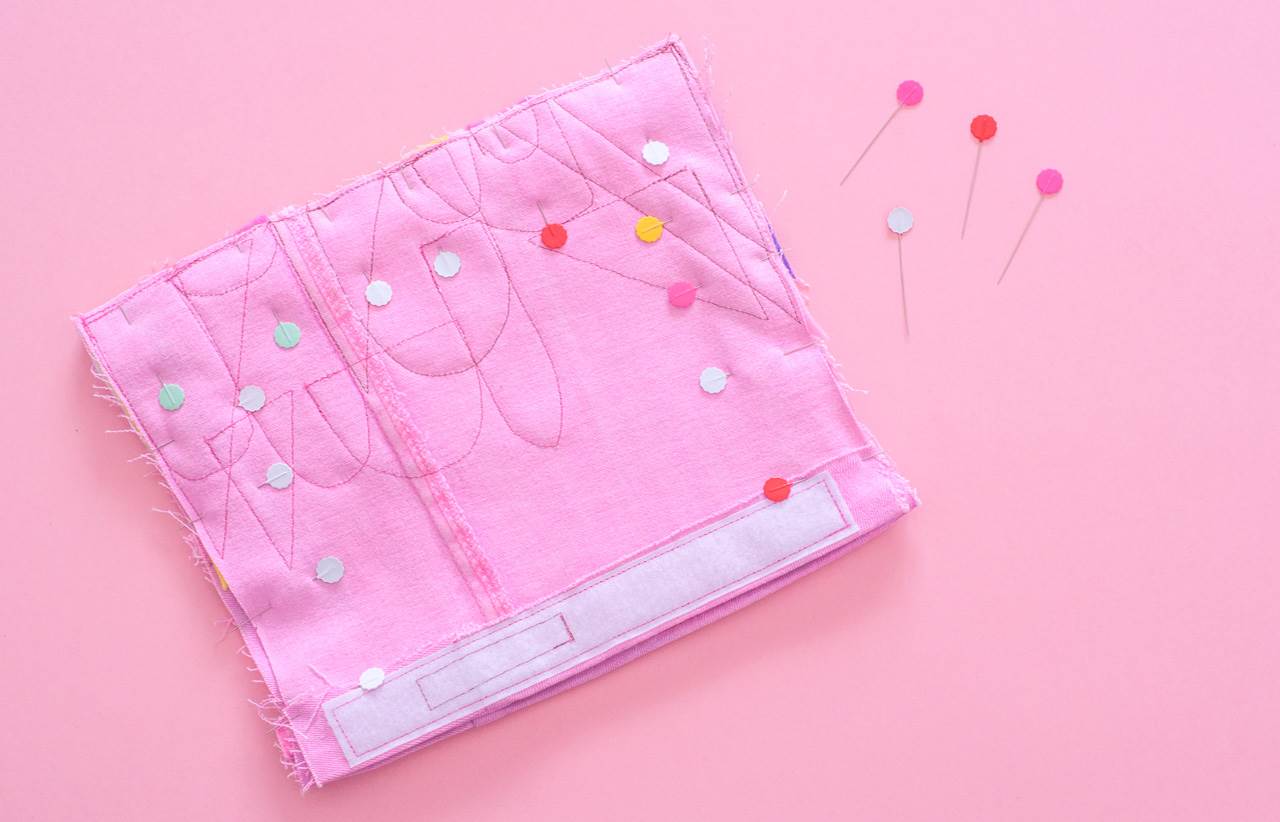
5. Place both front sides of the pencil case facing together and pin along the sides and bottom edges. Sew along these three edges leaving a 1cm seam allowance. If you don’t have an overlocker (like moi) you can use a zig-zag stitch on your sewing machine or use pinking shears to cut along the edges to prevent fraying.
6. Turn it the right way out and poke the inside corners with a pencil to make sure it’s all tickety-boo, and you’re good to go!
For more crafty goodness from the super-talented Phebe, scoot over this-a-way.