
frankie exclusive diy: classic '80s backpack
Check it out – instructions for making your very own classic '80s backpack! Includes a nifty little front pocket for your Walkman… uh, we mean mobile.
I'm a total sucker for good fabric design – the repeating patterns, the gorgeous colours, the endless making possibilities! And I was totally captivated by Cotton & Steel’s Snap to Grid collection. So, as is often the case, I just had to manufacture an excuse to get my hands on some – like making a new backpack! This is one rather like the (actually ’80s) one I carried my books to school in every day, only classier and cooler (I was most definitely not one of the cool kids!). It’s a slightly (only slightly) more grown-up version. Choosing just two fabrics from the collection was a big challenge, one that’s left me thinking, What do I need to make next…? Anyway, for now, here’s how to make an update on the classic backpack in gorgeous ’80s inspired fabrics, with a nifty little front pocket for your Walkman keys and a slim main section perfect for your school books laptop!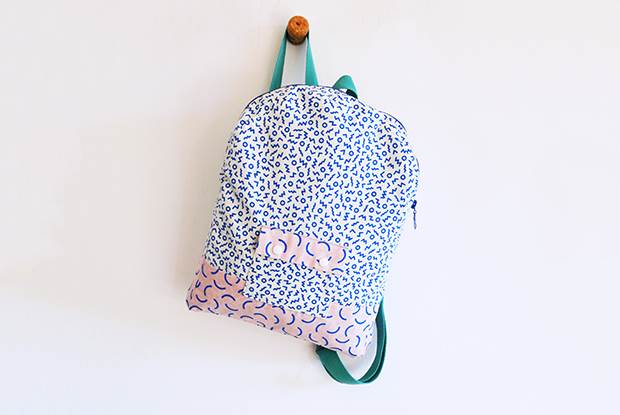 MATERIALS:
1/2m main fabric (I’ve used this one)
1/2m lining fabric (something with a bit of body, like a medium weight canvas, is good here to add a bit of structure)
1/4m accent fabric (I’ve used this)
cotton thread to match your fabrics
40cm chunky zip
2m webbing (2.5cm wide)
2 x D-rings (2.5cm wide)
2 x strap adjusters (2.5cm wide)
2 sets of Kam snaps and a Kam snap tool (you could use sew-on poppers if you don’t have a Kam snap tool)
pins
needle
sewing machine
ruler
set-square
tailors chalk
INSTRUCTIONS:
1. Fold your main fabric in half, right sides in, and lay your template out on top. (Download your template right here and here.) Draw around it with your chalk and cut out with a 1cm seam allowance. Repeat this with your lining fabric.
Next, draw out the following rectangles on your fabric (still doubled, so you end up with 2 of each) and cut each out with a 1cm seam allowance:
- sides 6cm x 23.5cm
- zip edges 5cm x 42cm
Also cut the following from your folded lining fabric:
- sides 6cm x 23.5cm
Unfold your lining fabric, draw and cut one rectangle:
- base 6cm x 25.5cm
Unfold your outer fabric, draw and cut one of the following:
- pocket 12cm x 19cm
Now lay out your accent fabric folded in half, right side in. Draw and cut out (with a 1cm seam allowance) the following rectangles:
- sides 6cm x 8cm
- front/back strips 8cm x 25.5cm
Unfold your fabric, draw and cut out one of each:
- base 6cm x 25.5.cm
- pocket flap 8cm x 12cm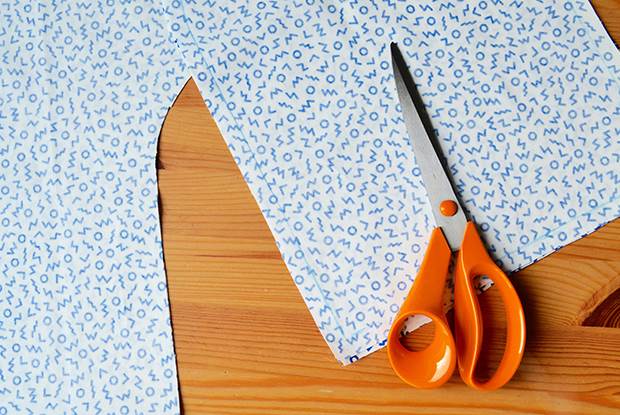 2. Take the little side pieces you cut from your accent fabric. Turn one of the short edges over on each by 1cm (right side out) and press. Take your front/back accent strips and do the same but this time with one of the long edges.
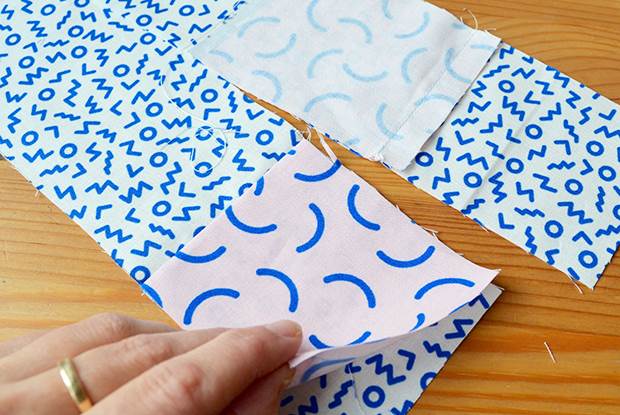 3. Lay out your main fabric front and back pieces and your side pieces, face up, then line up the accent pieces on top, also face up, so that the bottom edges meet and the folded edge is pointing towards the top. Carefully unfold each accent piece and pin along its crease. Sew along the creases, removing the pins, re-fold and press.
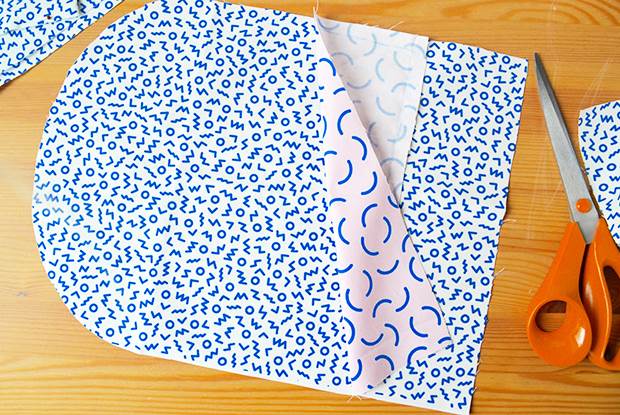 4. To prepare your lining, start by folding one of the short edges on each of your side pieces over by 1cm and pressing. Next, lay out one of your back/front pieces face up and lay your side pieces on top (face down), so that they line up with the bottom corners and the folded edges are towards the top. Pin along the outer edges. Sew along the outer edge of each side piece, 1cm in.
Lay out your other front/back lining piece and line up the other edges of your side pieces with its bottom corners, pinning in place. Sew along the outer edges as before.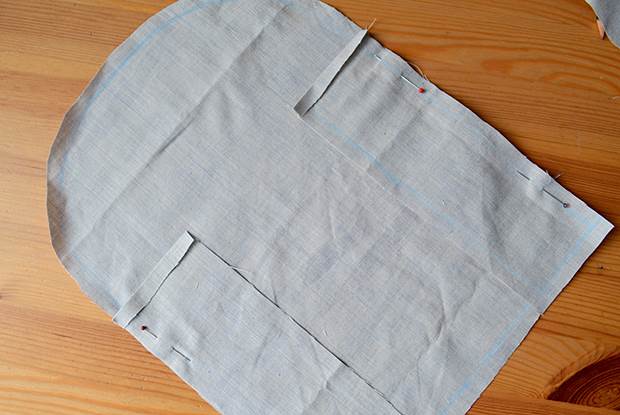 5. Add your base piece by pinning in place, lining up with the bottom edges of your front/back and side pieces, and sew in place 1cm in. Set your lining aside for now.
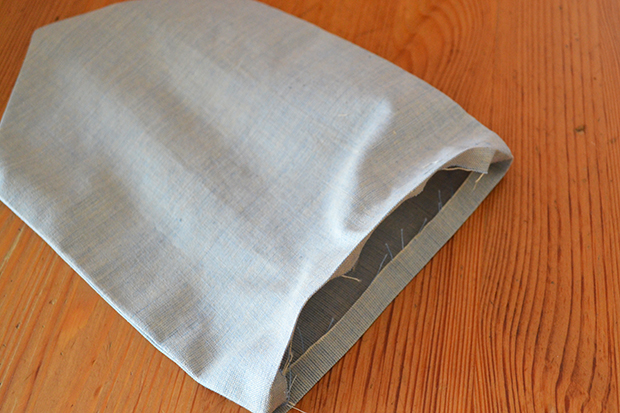 6. Take your pocket piece and fold in half so the shorter edges meet, right-side in. Pin together along the sides. Take your pocket flap piece and fold, right-side in, bringing the long edges together. For both parts of your pocket, sew along the two shorter sides 1cm in, leaving the longer edge unsewn. Trim across the corners, turn right way out and press. On both pieces, fold the open edge in by 1cm all the way around and press.
 7. Measure and mark 2.5cm from the sides and 1cm from the closed edge of your flap. Add a ‘positive’ Kam snap at each of the two points you’ve marked. On your pocket piece, do the same with the other halves of your snaps but measure 2.5cm from the sides and 1.5cm from the closed edge. Do up your snaps so that the two parts of your pocket are held together.
 8. Pin your pocket in place on the front panel of your bag (make sure it’s equidistant from both sides). Sew along the top edge of your flap about 2mm in. Now undo your snaps and fold the flap back. Sew around the side and bottom edges of your pocket about 2mm in.
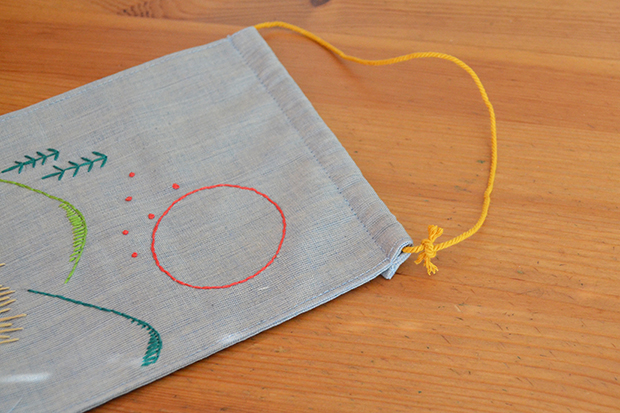 9. Cut a piece of webbing 80cm long for one of your straps. Thread one end through one of your strap adjusters, over the central bar. Fold the same end over by 2cm twice then pin about 5cm up the strap. Sew your folded-over end in place by sewing a little rectangle around the edges about 2mm in. Now thread the other end of your strap through one of your D-rings then through your adjuster. Repeat for a second strap.
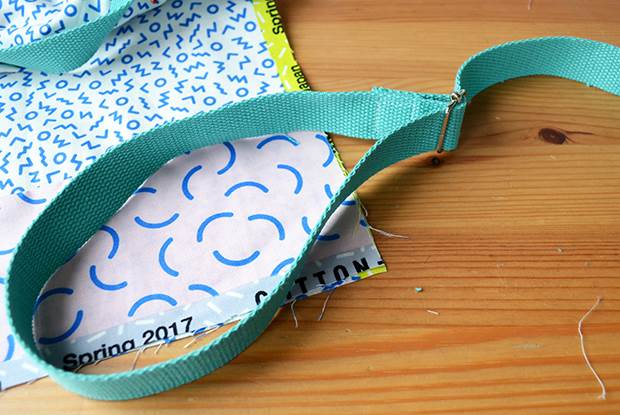 10. Take your back piece and lay out face-up. Use your template to mark point A (the centre of your back piece). Cut two strips of webbing each 13cm long. About 5cm from the top of your back piece, pin your webbing across (lining up its centre to point A). Fold each end under by 1cm and pin. Fold your second piece of webbing into a loop, poke the cut ends under the first strip of webbing, at the centre, and pin in place.
Tuck the cut end of each of your straps under the strip, 1cm in from each edge. Make sure your straps are the right way round, so the neater side of your adjusters shows (rather than the side with stitching). Now sew all the way around the edge of your little strip that’s holding your loop and straps, about 2mm in. Sew twice to make sure it’s secure.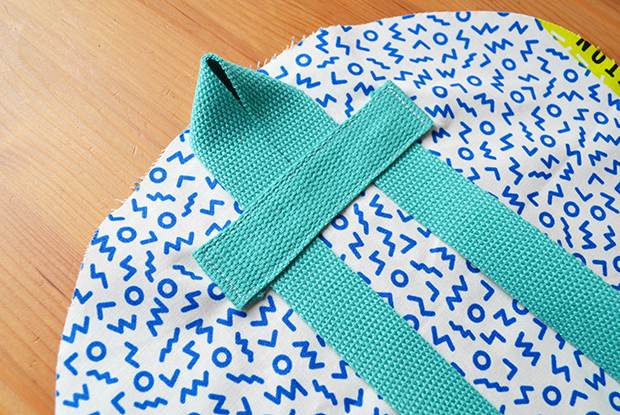 11. Cut a length of webbing 10cm long. Thread through one of your D-rings and fold so the ends meet. Pin in place so that the ends line up with the bottom of your back piece and it’s 5cm in from the right hand edge. Repeat for your other strap on the left. Check your straps aren’tt twisted. Sew across the ends of your webbing 5mm in to hold in place.
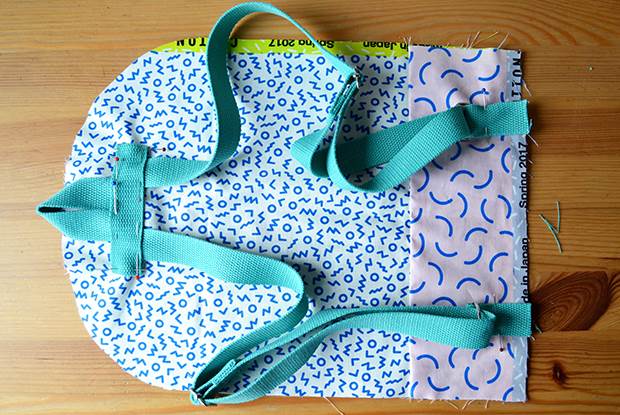 12. Take the two ‘zip edge’ pieces you cut from your main fabric and fold them in half so the long edges meet (right-side out), then press. Next, pin them along either side of your zip (with the folded edge closest to the zip), leaving 1cm between them (where your zip shows). Sew along the folded edges about 2mm in.
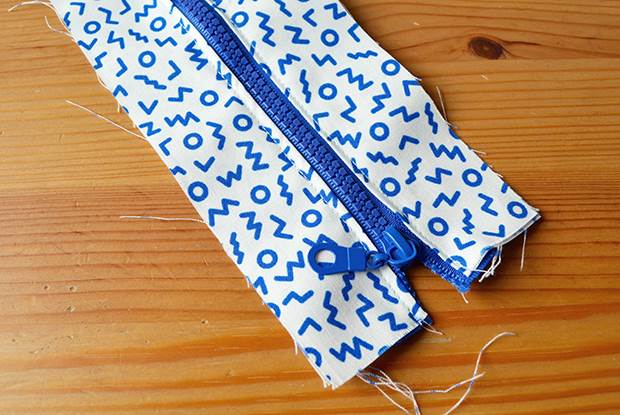 13. Take your side pieces next, fold the top short edges (not the edges where the accent fabric is) over by 1cm (right-side out) and press. Next, lay out your front panel and pin your side pieces in place so they line up with the bottom corners (make sure your accent fabric is towards the bottom and the folded edge is toward the top). Pin one edge of your zip panel along the top of your front panel (zip facing in), making sure the short ends overlap your side pieces. Sew your zip and side panels in place, 1cm in.
 14. Pin the ends of your zip panel to the folded edges of your side panels and sew about 2mm from the folded edge.
 15. Pin your back panel in place all the way around your side and zip panels. Sew in place 1cm in. Unzip your zip! Pin the base piece (which should be in your accent fabric) in place as you did for your lining (face-in) and sew, 1cm in.
 16. Take your lining up again and turn it right way out. Slip your outer bag into the lining and line up all the edges and corners. Fold over the top edges of your front/back lining by 1cm and pin along the seam between your zip panel and outer front/back pieces. Also pin along the top edges of your lining side panels.
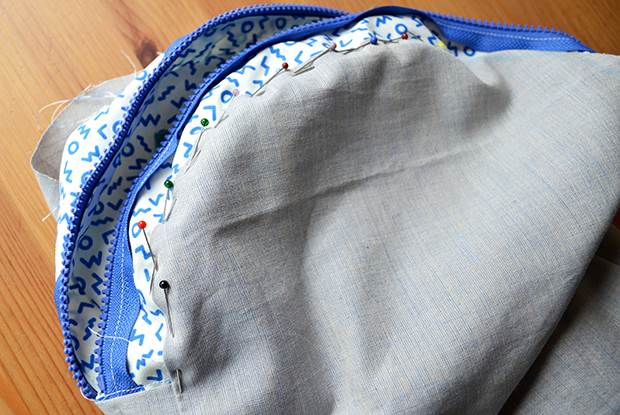 17. Hand-sew your lining in place where you have pinned. Turn your bag right way out through the zip and voilà!
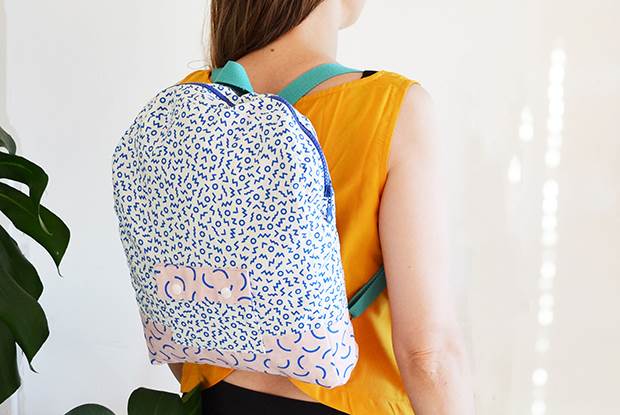 This story was originally published on December 18, 2017.