
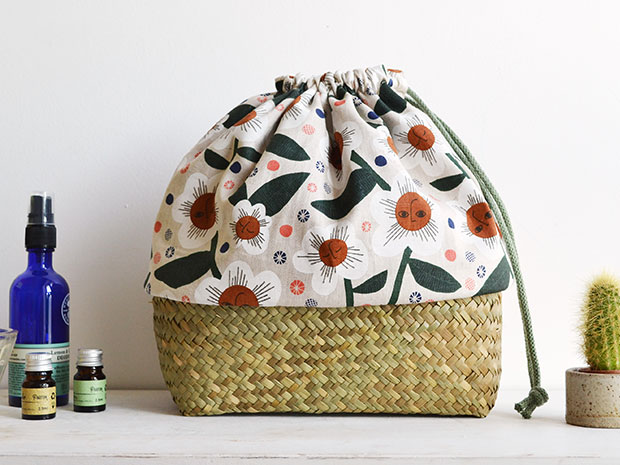
frankie exclusive diy: basket bag
How to turn an old basket into a nifty storage bag.
If you're looking for an extra-nice place to store your knitting projects and crafty bits and bobs, we're pleased to tell you you can make one yourself. Dig out an old woven basket, grab yourself some lovely fabric and follow the below instructions to get started.

The below instructions can be tailored to your exact basket size.
MATERIALS
-Small or medium-sized shallow seagrass (or similar) basket
-Medium weight patterned canvas for the outer – do steps 1 and 2 to work out your exact -measurements
-Medium weight plain canvas for lining – again, you will have measurements after steps 1 and 2
-Strong thread or fine yarn in a colour similar to your outer canvas
-Needle big enough for your thread (you’ll be sewing through the basket, so you want a sturdy needle)
-Cord (about 5-8mm thick) – this should be 10cm longer than the width of your fabric
-Sewing machine
-Standard sewing kit
-Fabric clips
METHOD
1.Start by measuring the rim of your basket around the outside. Add 2cm to this measurement – this will be the width measurement for your fabric.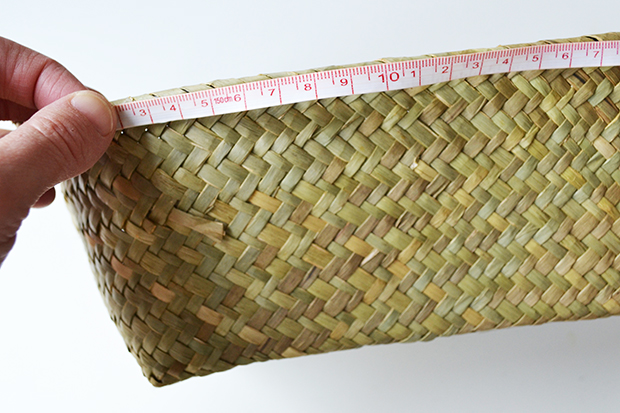 2. Measure the inside depth of your basket – we’ll call this D. Measure the base of your basket from front to back – we’ll call this E.
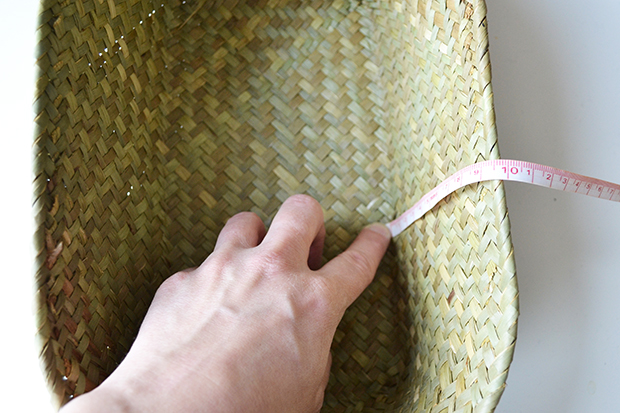 3. To work out the length of your fabric, do the following sum: (D x 3) + (E x 0.5) + 4cm.
Now you have your width and height measurement, cut out one rectangle that size from your plain canvas and one from your outer fabric. 4. Lay out your two fabric rectangles, face down, with the sides that are the width measurement at the top and bottom. At the top right and left edges of each piece, fold your fabric in by 5mm twice, as though hemming the edges, and pin in place. Only do this along the top 3cm of each side edge though, so the rest of the edge is still raw. This will make the ends of your cord openings nice and neat. Sew along the edge of each folded section to hold in place.
 5. Next, lay out your lining piece face up with the folded-in corners towards the top. Lay your outer piece on top face down, with the folded-in corners matching up. Pin and sew along the top edge 5mm in.
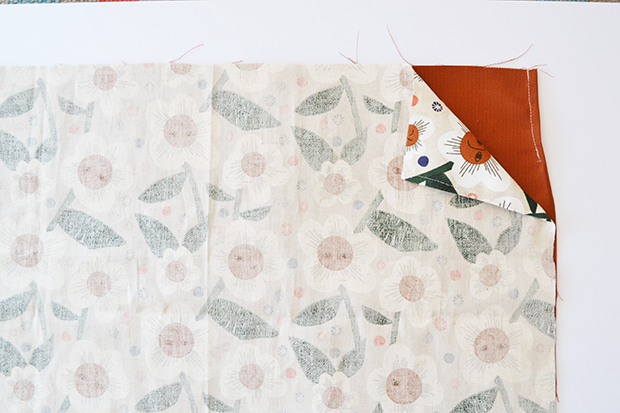 6. Open out your pieces and press the seam. Lay out face up with the lining at the top and the outer at the bottom. Fold in half so the side edges meet and pin along all the edges. Sew along the edges 1cm in, leaving an 8cm gap on the bottom edge of the outer piece (don’t worry, this will be hidden later) and also don’t sew over the folded-in section (i.e. leave about 2cm unsewn on either side where the folded-in section meets the seam between the two fabrics).
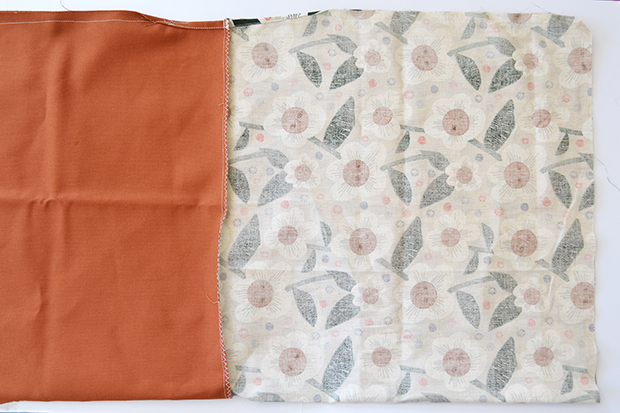 7. Turn right way out through the gap you left and then tuck the lining down into the outer and press.
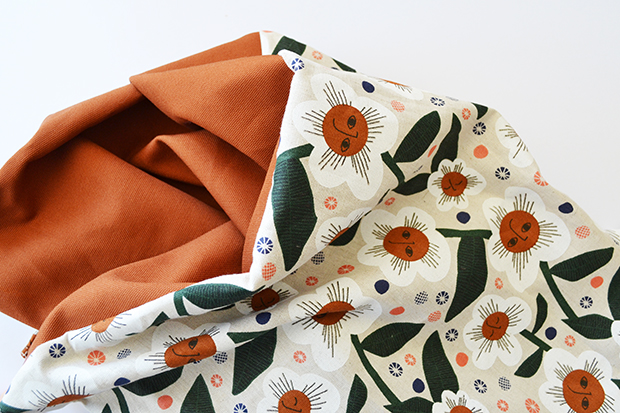 8. Sew around the top edge 2cm in to create a channel for your drawstrings.
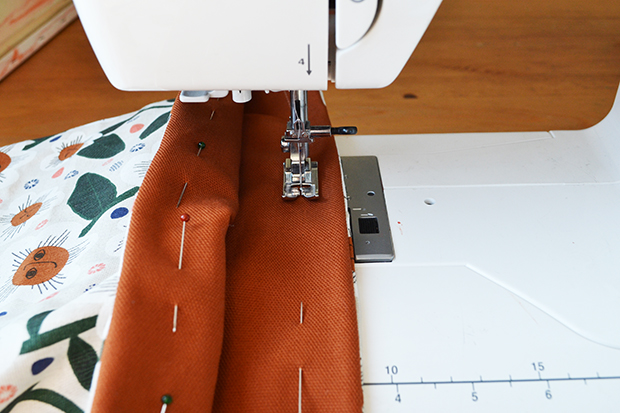 9. Next, we need to shape the bottom of the bag to fit inside the basket. Flatten one of the bottom corners out as in the picture and mark a point 0.5 x E up from the point of the corner. At that point, draw a line across at a right angle to the seam. Sew along that line then cut the corner away 1cm from your stitching.
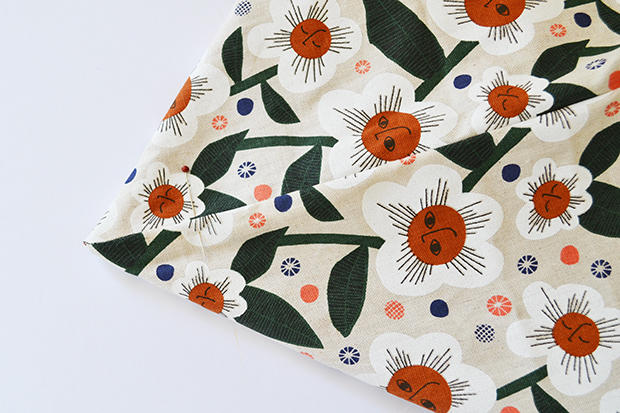 10. Repeat for the other bottom corner.
 11. Push your fabric ‘bag’ down into the basket so it sits neatly in the base of the bag (it doesn’t need to fit the shape of the basket exactly but should be close enough to sit nicely inside) with the side seam at the centre of the right hand side.
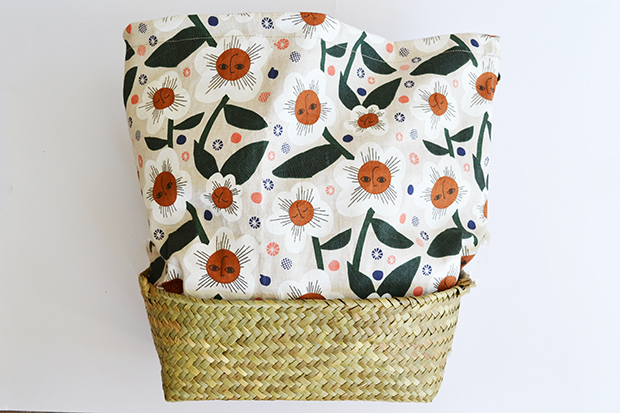 12. Keeping the base of your bag tucked into your basket, fold the sides of your bag down over the sides of your basket and clip in place.
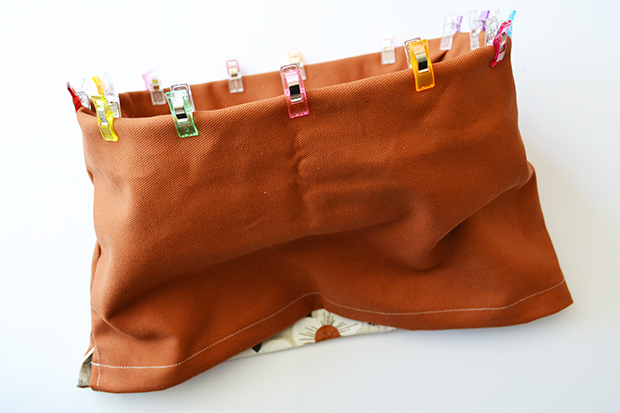 13. Using a blanket stitch, sew around the edge of your basket (sewing through the fabric on the outside, the basket and the fabric on the inside) so your fabric is sewn to the basket.
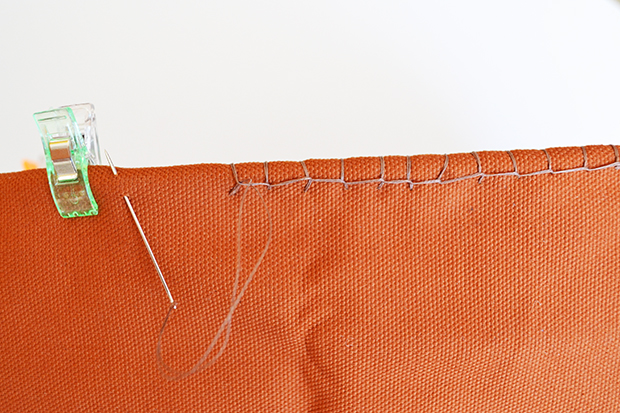 14. When finished sewing all the way around, pull the sides of the bag part back up, above the basket. To add your drawstring, cut a length of cord about 10cm longer than the rim measurement. Add a safety pin to one end of your cord and a safety pin across the other end (to stop it pulling through). Use the first safety pin to work the cord through the cord channel.
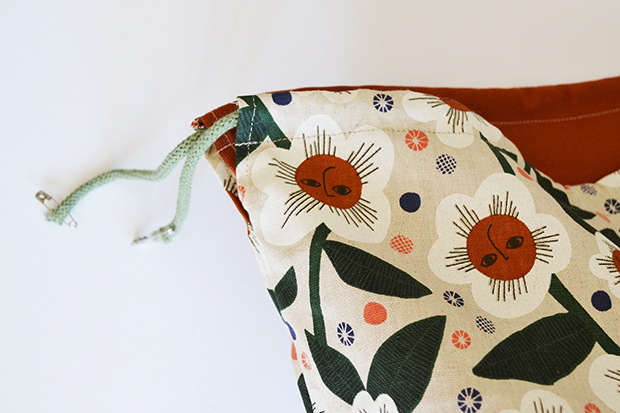 15. When all the way through, remove the safety pins, hold the cord ends together and tie in a knot. Trim any excess. Pull the cords to close your basket bag.
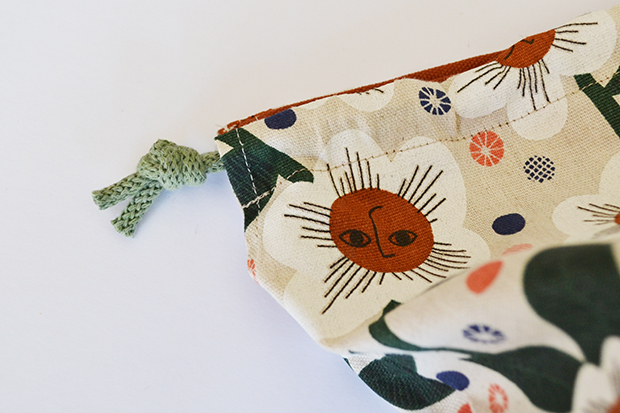
See more crafty projects from Anna over here.